

Think a sliding door draft is just something you have to live with?
It’s not, and you can stop most of the cold in 30 minutes or less.
You don’t need to test every seam or call a pro first.
Simple fixes like foam tape, brush seals, silicone stripping, or a temporary draft excluder work right away.
In this post you’ll learn quick ways to find the leaky spots and the fastest fixes that actually hold.
Focus on the bottom rail, the side jamb, and the lock edge, because those three spots give the biggest payoff fast.
Immediate Solutions for Draft Proofing a Sliding Door Effectively
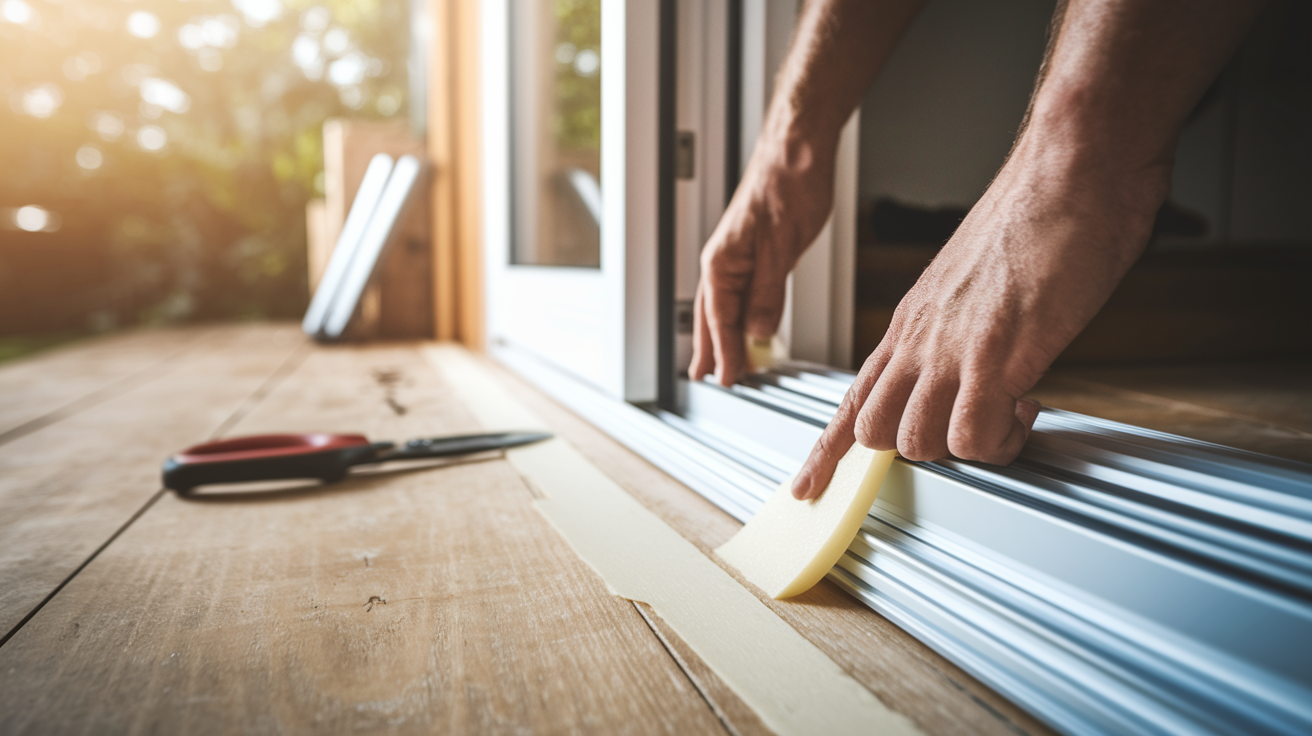
Drafts around sliding doors usually come from worn seals, frame gaps, or poor track alignment. You don’t need to diagnose every possible source before starting. Most fixes take under 30 minutes and work immediately. Focus on the bottom rail, side jambs, and the leading edge where the door locks, since those spots see the most wear and movement.
The fastest methods are foam tape, brush seals, silicone stripping, and temporary draft excluders. Foam tape seals small gaps along the top or bottom frame. Brush seals work best on the vertical jamb where the door slides against the frame, especially if the door rattles when closed. Silicone stripping sticks to metal or vinyl frames and creates a flexible barrier that compresses when the door closes. Temporary excluders, like fabric tubes or adhesive backed rubber strips, stop airflow within minutes and hold up through a full winter if you don’t open the door often.
Match the fix to the gap size. Gaps smaller than ¼ inch work with foam tape or thin brush seals. Gaps up to ½ inch need thicker compression seals or folded silicone strips. If the door slides smoothly but still leaks, the problem is usually worn brushes on the jamb. Replace those first before adding extra material.
- Clean the surface where you’ll apply the seal. Use a rag with warm soapy water, wipe dry, and let it sit for a few minutes so the adhesive sticks.
- Apply foam tape along the top or bottom rail. Peel a few inches of liner at a time, press the tape into place, and avoid stretching it as you go.
- Install brush seals on the leading jamb. Start at the top, press firmly, and run your thumb down the strip to seat the adhesive backing.
- Add silicone stripping for rattling doors. Fold the strip lengthwise before fitting if the jamb is worn, crease it at the bottom corner, cut to length, then press it flat with a table knife to get full contact.
- Fit a temporary draft excluder at the threshold. Push a fabric tube against the door base or stick a rubber strip across the bottom track if you won’t open the door until spring.
Diagnosing Air Leaks Around Sliding Doors

Hold a lit candle or long fireplace match near the door frame and move slowly along the bottom rail, side jambs, top track, and latch hardware. If the flame flickers, bends sideways, or blows out, air is moving through that spot. Work on a calm day so outdoor wind doesn’t throw off the test, and keep the match at least an inch from curtains or blinds.
Check the bottom of the frame first, then the junction where the frame meets the wall, the seam between glass and frame, and finally the latch, handle, and keyhole. Each of these spots can leak separately. Test every section before deciding which seal to use. If you see daylight between the door panel and the jamb when the door is locked, the gap is large enough to let cold air stream through even without a candle test.
Rattling when you shake the door handle means the jamb brushes are worn down and the door can move side to side inside the frame. That movement creates a changing gap that no amount of caulk will fix. You’ll need to replace the brush seal or add a compression strip that fills the space when the door locks. Doors that slide smoothly but still leak usually have bottom rail gaps or perished silicone around the glass, not mechanical problems.
- Bottom of the frame and threshold, where the moving panel sits on the track
- Vertical jamb on the locking side, especially if the door rattles or wobbles when latched
- Where the door frame attaches to the wall, inside and outside
- Around the glass pane, where old silicone may have cracked or pulled away
Weather Stripping Options for Sliding Door Draft Proofing

Foam tape compresses easily and works for light duty gaps along flat surfaces like the top rail or stationary panel. It comes with adhesive backing, sticks to metal and vinyl without primers, and costs less than $10 for a full door. Foam wears out faster than rubber or brush options. Expect 1–2 seasons if the door opens daily, longer if you seal a door that stays closed all winter. Rubber and silicone strips handle compression better and last 3–5 years, but they cost a bit more and need a cleaner surface to bond correctly.
Brush seals fit vertical jambs and sliding edges because the bristles flex as the door moves, so you get a seal without adding friction that makes the door hard to slide. Compression seals, like hollow rubber tubes or D shaped gaskets, work when you have a gap that stays consistent and the door presses firmly against the frame when locked. If your door has worn bushings or doesn’t latch tightly, compression seals won’t perform. The gap changes size as the door shifts, and the seal only works when it’s squeezed.
Adhesive backed strips stick permanently once pressed, so plan placement carefully and dry fit first. Peel the liner a few inches at a time, press the strip down, and use a table knife or putty knife to push the adhesive flat against the frame so it doesn’t peel up in humidity or temperature swings. For jamb seals that need extra grip, fold the strip lengthwise before you stick it down. This doubles the material thickness and fills larger gaps without needing a second layer.
| Material Type | Best Use | Durability Notes |
|---|---|---|
| Foam tape | Top rail, small gaps on flat surfaces, stationary panels | 1–2 seasons; tears easily; low cost |
| Brush seal | Vertical jambs, sliding edges, worn jamb brushes | 3–5 years; handles movement well; moderate cost |
| Rubber/silicone compression seal | Bottom rail, tight locking doors, consistent gaps | 3–5 years; resists moisture; higher cost |
| Temporary fabric excluder | Threshold, doors that stay closed all winter | Single season; removable; very low cost |
Installing Draft Excluders and Bottom Door Sweeps for Sliding Doors

Bottom of frame leaks happen when the door panel doesn’t sit flat on the track or the factory sweep has compressed and no longer touches the threshold. A door sweep is a strip of rubber, brush, or foam that attaches to the bottom edge of the moving panel and drags lightly across the floor or track as the door slides. Excluders sit on the floor in front of the door and block air without attaching to the panel. They work best for doors you won’t open until spring.
Tall gaps over ½ inch need a thicker material, like a double bulb rubber sweep or a brush style sweep with long bristles. Shorter gaps work fine with adhesive foam or a simple stick on rubber strip. Avoid stiff materials that create drag and make the door hard to slide. Rubber and brush sweeps flex as the door moves, so you get a seal without adding resistance.
- Clean the bottom edge of the door panel with soapy water and dry it completely so the adhesive sticks.
- Measure the width of the door panel and cut the sweep to length with scissors or a utility knife, trimming from the end without the mounting holes if your sweep has pre drilled screw points.
- Dry fit the sweep by holding it against the bottom edge and sliding the door to make sure it doesn’t catch on the track or bind when you open and close the panel.
- Peel the adhesive liner and press the sweep into place, starting at one end and working across so you don’t trap air bubbles or create wrinkles that let drafts through.
Using Silicone Caulking to Seal Frame and Glass Gaps in Sliding Doors
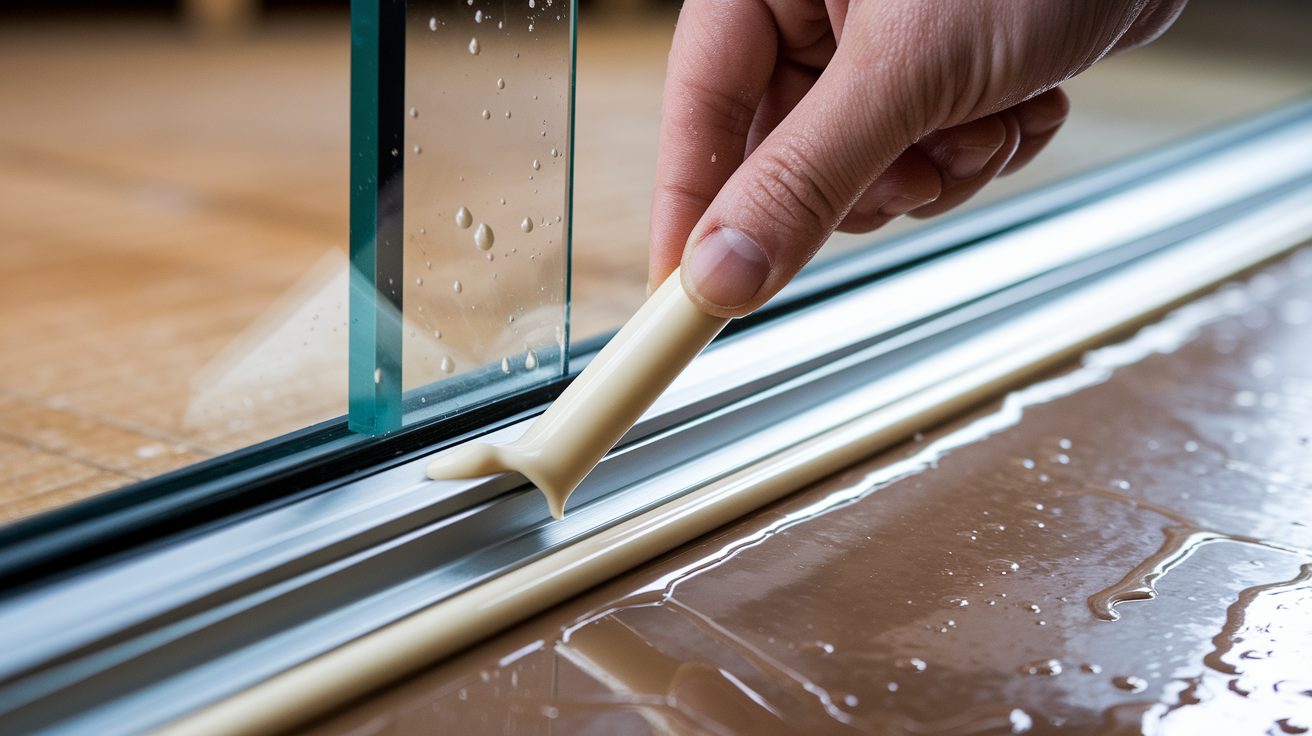
Silicone caulking works where frames meet walls and where glass sits inside the door panel, but it won’t help with moving parts like the sliding edge or the bottom rail that drags across the track. Use a caulk gun and a tube of 100% silicone rated for exterior use. It stays flexible through temperature changes and handles moisture better than acrylic or latex caulk. Apply it to both the interior and exterior sides of the frame for a full seal, and work on a dry day so the silicone cures without trapping water.
If you see cracked or missing silicone between the glass and the metal or vinyl frame, scrape out the old material with a utility knife or a plastic scraper before adding new caulk. Perished silicone lets cold air leak through and also allows condensation to form between the panes if your door has double glazing. Run a thin bead along the seam, smooth it with a wet finger or a damp sponge, and wipe off the excess before it skins over. Silicone sets in about 10 minutes and fully cures in 24 hours.
Sealing the frame to wall gap stops air from bypassing your weather stripping and leaking around the outside of the door structure. Even if your door panel seals perfectly, a gap where the frame bolts to the house will let cold air pour in through the wall cavity. Check for light or feel for airflow along the trim, then fill the gap with silicone and smooth it flush. This fix is permanent, improves energy efficiency year round, and prevents drafts that weather stripping alone can’t address.
Insulation Accessories to Improve Sliding Door Thermal Performance

Heavy thermal curtains hang on a rod in front of the door and create a dead air space that blocks cold from radiating through the glass. They work even if your seals are perfect, because single pane and some double pane doors still lose heat through conduction. Choose curtains with a thermal lining or a layer of foam backing, and make sure they’re wide enough to overlap the frame by a few inches on each side so air can’t slip around the edges.
Window quilts and honeycomb insulating blinds mount inside the door frame and press against the glass to reduce airflow and heat loss. Honeycomb blinds trap air in their cellular structure, adding an insulation layer without blocking light during the day if you choose a translucent fabric. Quilts are thicker and work better for doors you close off completely in winter. They’re essentially padded panels that Velcro or snap into place at night and roll up during the day if you need access.
Both options cut noise as a side benefit. If your sliding door faces a street or a neighbor’s yard, a heavy curtain or quilt will muffle sound as much as it blocks cold. You’ll also reduce condensation on the glass because the curtain keeps indoor humidity from hitting the cold surface and forming water droplets that drip onto the sill and rot the wood or stain the carpet.
Fixing Mechanical Causes of Drafts in Sliding Doors
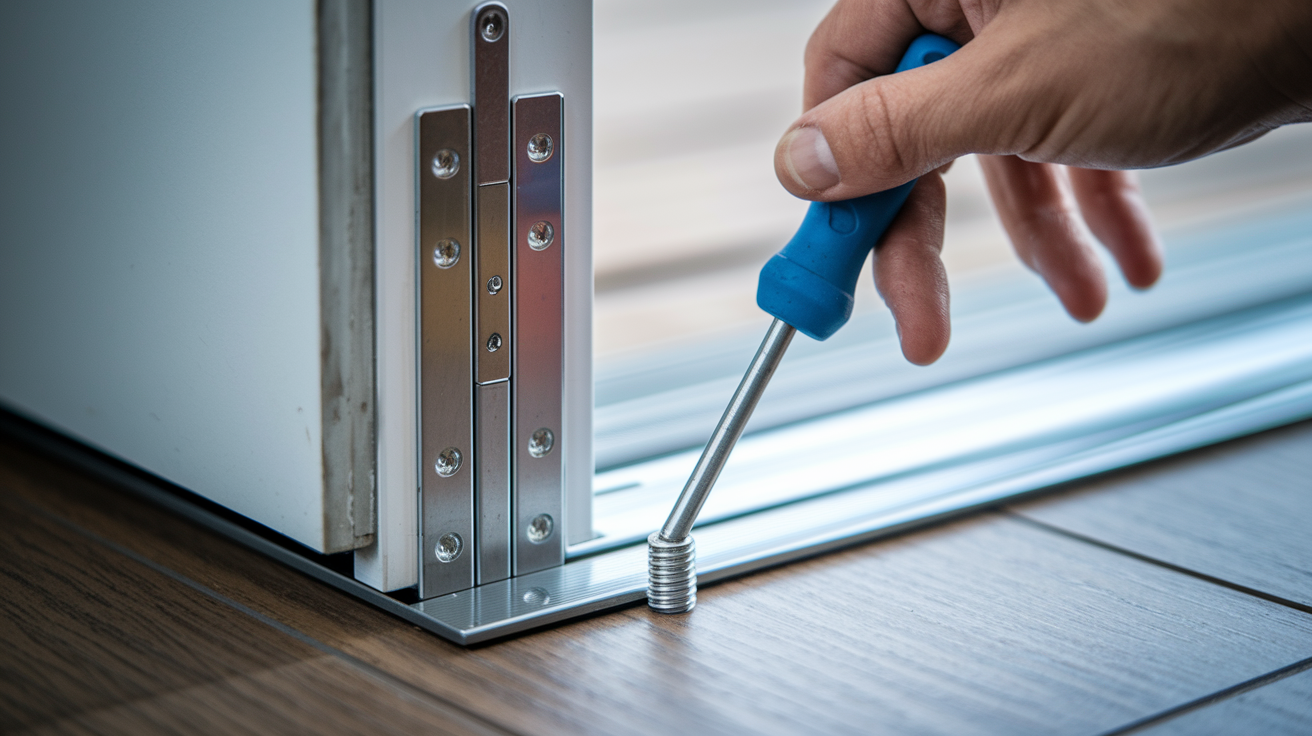
Misalignment between the door panel and the frame creates gaps that change size as the door shifts in the track. If the panel sits crooked, one side will press tightly against the jamb while the other side leaves a gap wide enough to see daylight. Most sliding doors have adjustment screws on the bottom corners that raise or lower the rollers. Turn them with a Phillips screwdriver and check the gap along the jamb after each quarter turn until the door sits level and seals evenly top to bottom.
Tightening the latch and handle hardware pulls the door tighter against the jamb and closes small gaps that let air leak through. If the screws spin without tightening, the holes are stripped. Add a small washer behind the screw head or use a slightly longer screw to grab fresh material. A door that rattles when you shake the handle has a worn jamb brush or too much play in the latch mechanism, and tightening alone won’t fix it. You’ll need to replace the brush seal or add a compression strip to fill the extra space.
- Remove leaves, dirt, and debris from the bottom track with a vacuum or a stiff brush so the door sits flat and seals correctly.
- Spray a silicone based lubricant on the track and rollers so the door glides smoothly without binding or lifting out of alignment when you open it.
- Turn the roller adjustment screws a quarter turn at a time and test the door after each adjustment to avoid over raising the panel and creating a new gap at the threshold.
- Tighten latch and handle screws, and add washers if the hardware feels loose or the door doesn’t lock firmly against the jamb.
- Inspect the jamb brushes for wear. If the bristles are flattened or missing, replace the entire brush strip so the door stops rattling and seals when latched.
Seasonal Maintenance for Long Term Draft Proofing

Temperature swings cause door frames to expand in summer and contract in winter, which stretches and compresses seals over time. Adhesive backed foam and rubber strips lose their stick in extreme heat, and brittle seals crack when temps drop below freezing. Check your seals twice a year, once before winter and again in early spring, and replace any strips that have pulled away, torn, or compressed flat.
Brush seals on the jamb wear out faster than bottom sweeps because they flex every time the door opens. Run your hand along the brushes and feel for bald spots or bristles that lie flat instead of standing upright. If the door rattles or you see light along the jamb when it’s locked, the brushes are done and need replacement. Replacement seals come in white or brown to match most door frames and stick right over the old worn strip without tools.
- Replace worn foam or rubber seals when they no longer spring back after you press them, or if the adhesive has failed and the strip peels up.
- Reapply silicone caulking where it has cracked or pulled away from the glass or frame, scraping out old material first so the new bead bonds cleanly.
- Clear built up dirt and grime from the track every few months so the door continues to sit level and the bottom sweep maintains contact with the threshold.
Final Words
Seal big gaps first, using foam tape, brush seals, silicone strips, or a bottom sweep. Clean surfaces, dry-fit parts, then press adhesives firmly so they stick.
Check for leaks with a candle or visual test, tighten rollers and latches, and replace worn jamb brushes. Add heavy curtains or honeycomb blinds for extra insulation.
Keep seasonal checks on seals and reapply silicone when it starts to fail. These straightforward tips for draft proofing sliding doors will stop cold air and make your space more comfortable. You’ve got this.
FAQ
Q: How to stop drafty sliding doors?
A: To stop drafty sliding doors, clean tracks and frames, apply foam tape or brush seals to gaps, fit a bottom sweep, adjust rollers for alignment, and caulk perimeter where gaps remain.
Q: How to winterize a sliding patio door?
A: To winterize a sliding patio door, install weatherstripping and a door sweep, add heavy thermal curtains or cellular blinds, caulk exterior frame gaps, and check rollers and drains for a tighter fit.
Q: Why does my sliding door track fill with water when it rains?
A: The sliding door track fills with water when it rains because drainage holes or weep channels are clogged, the sill lacks slope, seals or flashing are damaged; clear drains and reseal the sill.