

You can fix squeaky hardwood floors from below without damaging the finished surface.
Ripping up the floor is usually overkill.
Walk through a quick, two-person method to locate each creak, then learn how to pull the subfloor tight to joists using screws, wedge gaps with shims and adhesive, and stop the noise for good.
No sanding, no patched boards, just simple tools, a handful of screws, and a weekend.
By the end you’ll know what to buy, what to do first, and how to tell the job is done.
Locating and Confirming Floor Squeaks From Below
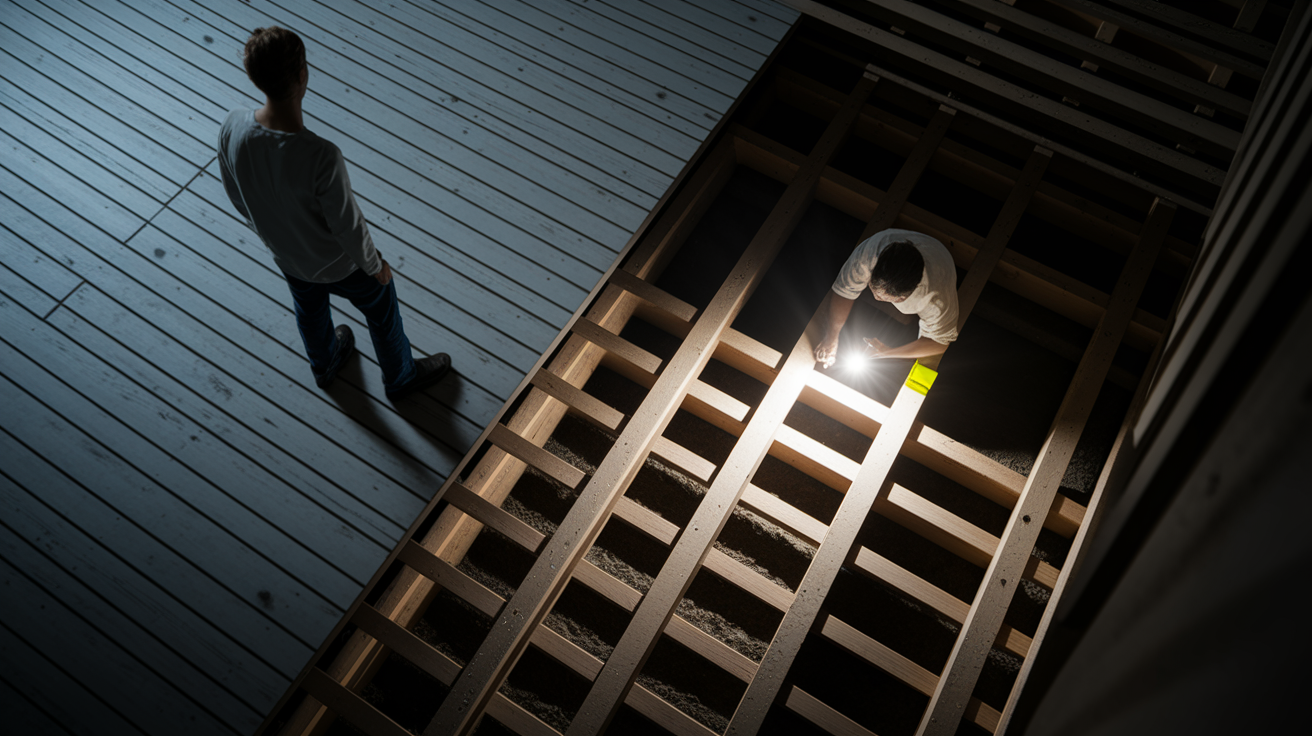
Start by walking slowly across the squeaky area while a helper listens from the basement or crawl space directly below. The person below should watch for movement where the subfloor meets the joists and call out when they hear or see motion. Mark each squeak location on the underside of the subfloor with a pencil or bright crayon as soon as you spot it. This two person approach is the fastest way to pinpoint squeaks without guessing.
Once you’ve marked the general area, use the tapping method to confirm which joist is involved. Tap gently along the bottom of the subfloor with your knuckle or a small stick. The sound changes where wood is loose or where a gap exists between the subfloor and the joist. Move insulation out of the way so you can see the seams, fastener lines, and joist tops clearly. Squeaks usually come from one of three places: the subfloor pulling away from the joist, loose tongue and groove joints between hardwood boards, or old fasteners that have backed out or rusted.
Before you move forward, clear all insulation and obstructions from the repair zone. You want to be able to reach every marked squeak and have enough light and elbow room to work. If your crawl space is tight or your basement ceiling is cluttered with ductwork, take the time now to create safe access. Rushing into tight quarters without prep leads to dropped screws, missed marks, and frustration.
Five symptoms to look for when locating squeaks:
- Visible movement of the subfloor when someone steps above
- Gaps between the top of the joist and the bottom of the subfloor
- Loose or missing fasteners (nails that have backed out or are missing entirely)
- Nail pops where the fastener head has lifted slightly from the wood
- Tongue and groove seams that shift or wiggle when you push them by hand
Tools and Materials Needed for Underfloor Squeak Repair
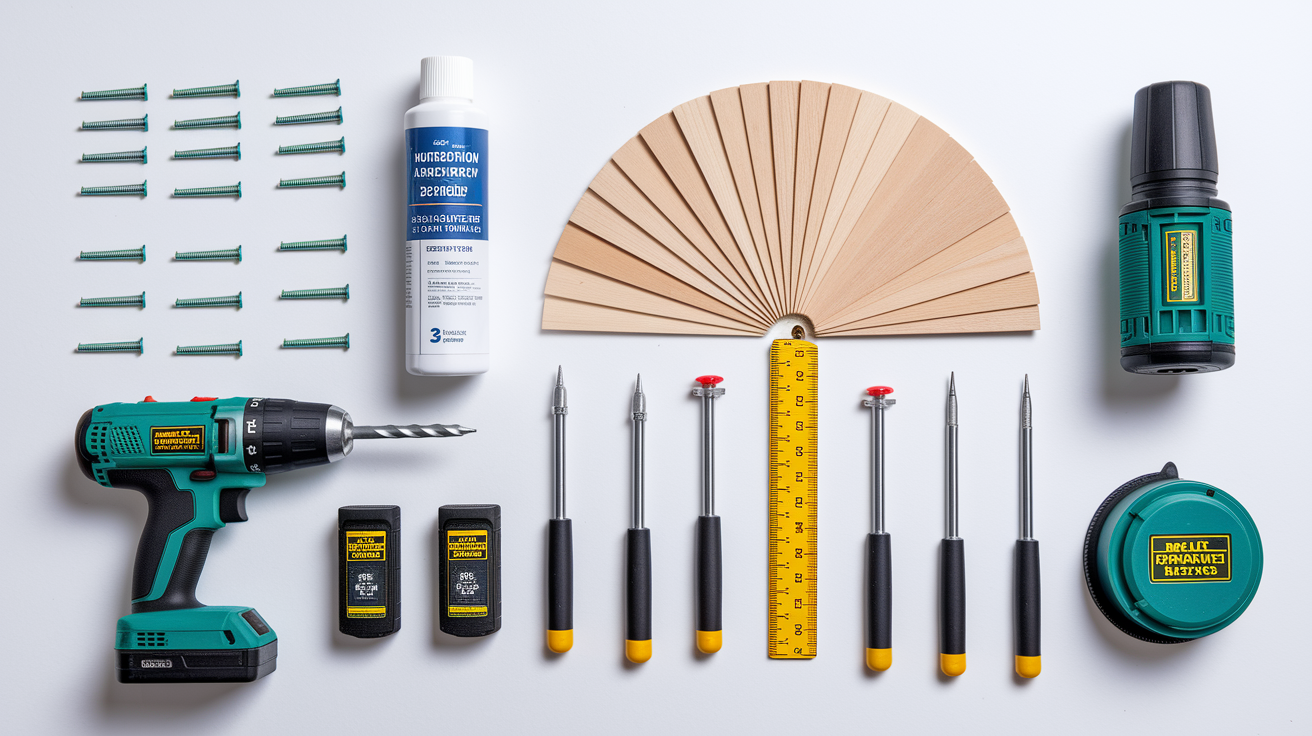
For most underfloor repairs, you’ll need a cordless drill or impact driver (a basic 12V model works fine for this job), a set of 1/8″ to 3/16″ pilot bits, and a good flashlight or headlamp so you can see what you’re doing overhead. Add a caulk gun for construction adhesive, a utility knife for trimming shims, a small pry bar to help test for movement, and a tape measure to confirm screw lengths and spacing. If you don’t already own a drill, expect to spend $50 to $150 for a reliable cordless model. The rest of the tools are inexpensive and often already in your garage.
On the materials side, pick up a box of 2″ to 2.5″ wood screws or trim head screws. These lengths give you enough bite into the joist (about 1″ to 1.5″ of thread engagement) without the risk of punching through your finished floor. A single box of 100 screws typically costs $5 to $15 and will cover several joists. You’ll also need one 10 ounce tube of construction adhesive like PL Premium (around $6 to $12 per tube), which covers 8 to 15 linear feet depending on how thick you lay the bead. For shimming gaps, grab a pack of wood or composite shims (usually 50 to 100 pieces for $3 to $8). Most small squeak repairs cost under $50 in materials, and you’ll have leftover supplies for the next project.
Six essential tool and material categories with recommended specs:
- Cordless drill or impact driver (12V minimum, 18V preferred for overhead work)
- Pilot bits (1/8″ or 3/16″ diameter, at least 3″ long for drilling up into joists)
- Wood screws (2″ to 2.5″ length, #8 or #10 gauge, coarse thread for softwood joists)
- Construction adhesive (10 ounce tube, polyurethane or hybrid polymer formula)
- Wood or composite shims (tapered wedge style, pack of 50+)
- Safety and lighting (headlamp or work light, safety glasses, dust mask, work gloves)
Securing Loose Subfloor and Hardwood to Joists From Below
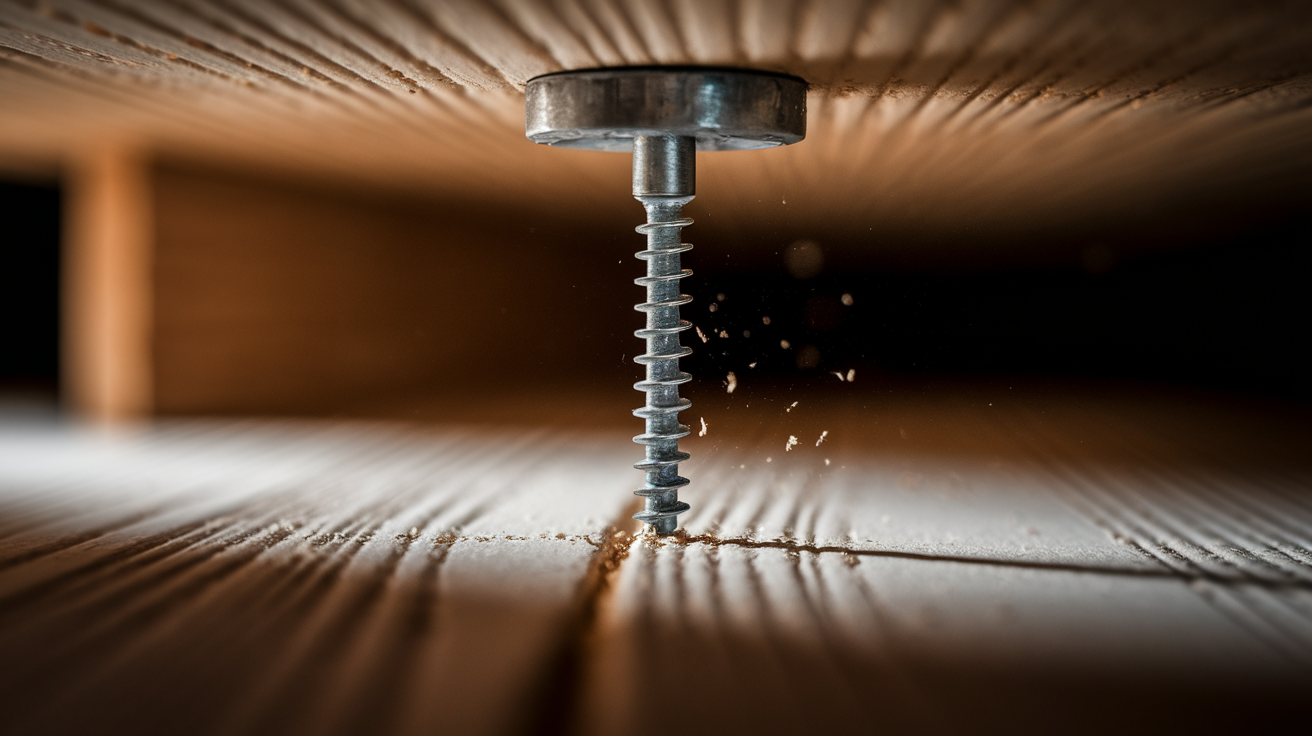
Drive screws upward from below so the screw head sits under the subfloor and pulls the wood down tight against the joist. Space your screws every 6 to 8 inches along the joist wherever you see or hear movement. For a typical 10 foot joist span that means you’ll use about 15 to 20 screws per joist line. More screws give a tighter hold and spread the load, reducing the chance that movement shifts to the next seam over. If the subfloor feels solid after your first pass, stop. You don’t need to screw every inch.
Partial thread screws work best because the smooth shank under the head acts like a clamp, pulling the subfloor down as the threads bite into the joist. Screws with a sharp “4CUT” style point let you skip pre drilling in most cases, which saves time when you’re working overhead. If your joists are old, dense hardwood or engineered lumber, drill a pilot hole first to avoid splitting the wood or snapping the screw. Choose a drill bit slightly smaller than the screw’s core diameter (usually 1/8″ for a #8 screw).
When you’re dealing with loose hardwood boards that flex between joists, you can “toe screw” from below by driving two screws at opposing 45 degree angles into the joist. One screw angles left, the other angles right, and together they lock the board down and stop lateral creaking. This technique works well at squeaky seams where the tongue and groove joint is loose. Keep screw lengths conservative. 2″ screws are usually safe for 3/4″ subfloor over a joist, but measure your actual floor thickness to be sure.
Correct Screw Placement Techniques
Always predrill a small pilot hole before driving screws into joists overhead. The pilot hole prevents the wood from splitting and keeps the screw running straight into the center of the joist, not off to one side where it might miss. Use a bit that’s about 75% the diameter of the screw’s core (not counting the threads). For a #8 screw, a 1/8″ bit is right. For a #10 screw, step up to 5/32″ or 3/16″.
Countersink the screw head just below the surface of the subfloor so it doesn’t hang down and interfere with insulation or ductwork. You don’t need a fancy countersink bit for this. Just drive the screw until it’s snug, then give it one more quarter turn. If you go too far and the head sinks deep into soft wood, back the screw out slightly and add a fender washer under the head for a wider bearing surface.
When toe screwing at an angle, aim for the center of the joist. Mark the joist edges with pencil lines so you know where to aim in the dim light. Start the screw perpendicular to get the threads started, then tilt to your target angle and keep steady pressure. If the screw wanders, stop, back it out, and redrill the pilot at the correct angle. One properly placed angled screw is worth three that miss the joist or split the wood.
Filling Joist Gaps Using Shims and Construction Adhesive

Gaps between the subfloor and the top of the joist are a common squeak source, especially in older homes where wood has dried and shrunk over decades. To fix a gap, cut a wood or composite shim to a length that fits neatly along the joist (usually 4 to 8 inches is enough for a single squeak spot). Apply a thin bead of construction adhesive along one face of the shim, then tap the shim up into the gap with a hammer or rubber mallet until it’s snug. The shim should wedge tightly without forcing the subfloor upward. If you feel resistance or hear cracking, back off and trim the shim thinner.
Once the shim is seated, let the adhesive cure for at least 15 minutes before you apply weight above. For an immediate mechanical hold, drive a short screw (1″ to 1.25″ long) through the shim and into the side of the joist. This locks the shim in place while the adhesive sets and prevents it from slipping out if someone walks overhead before the glue dries. After the adhesive has cured overnight, trim any protruding shim material flush with the joist using a utility knife. A flush shim won’t interfere with insulation or future work.
Four step shimming process:
- Apply adhesive. Squeeze a narrow bead of construction adhesive along the wide face of the shim, covering about two thirds of its length.
- Insert shim. Tap the shim gently into the gap between the subfloor and joist until it stops moving and feels snug.
- Trim excess. Once the adhesive has tacked up (usually 15 to 30 minutes), score and snap off any shim material that extends past the joist edge.
- Secure with screw (optional). Drive a 1″ to 1.25″ screw at an angle through the shim and into the joist for instant hold if needed.
When to Use Adhesive vs Mechanical Fasteners During Underfloor Repair

Construction adhesive works best when the subfloor has separated slightly from the joist over a broad area and you need to re bond the two surfaces without adding dozens of screws. The adhesive fills micro gaps, distributes stress, and reduces the chance of new squeaks forming nearby. Think of adhesive as the long term solution for bonding layers together, especially where wood movement is slow and seasonal. One 10 ounce tube covers 8 to 15 feet of joist, so a couple of tubes can handle a large room if the problem is delamination rather than structural movement.
Screws are the right choice when you see repeated or significant movement, like a subfloor that lifts visibly when someone walks above, or a seam that shifts side to side. Screws provide immediate mechanical restraint and stop motion right away. They also work better than adhesive alone in areas where the wood is already moving a lot, because adhesive needs a stable bond surface to cure properly. If the wood keeps flexing while the glue is setting, the bond may fail or stay weak.
The most durable repair combines both methods. Drive screws first to clamp the subfloor tight and stop the movement, then run a bead of adhesive along the joist top before you install the screws. The screws hold everything steady while the adhesive cures, and the adhesive prevents future micro movement that screws alone might not catch. For stubborn squeaks or areas with seasonal movement (like floors over unheated crawl spaces), this combo approach gives you the best odds of a permanent fix.
Troubleshooting Persistent Squeaks and Hard to Fix Areas

If squeaks remain after you’ve added screws and shims, the noise is probably coming from tongue and groove movement at the seams between hardwood boards, or from an adjacent joist you didn’t identify during your first pass. Walk the floor again with your helper and mark any new spots. Sometimes fixing one squeak shifts the load and creates movement at the next joist over. Check the joists on either side of your original repair zone and look for movement, gaps, or loose fasteners you missed.
Loose nails are another common culprit. Old cut nails or ring shank nails can back out over time, especially if the subfloor was installed during a humid season and has since dried. Pull out or hammer down any protruding nails you find, then replace them with screws. Nails hold by friction, screws hold by thread engagement and pull the layers tighter. If you see rows of nail heads lifted slightly above the subfloor, that entire joist line is probably loose. Add screws between the old nails rather than trying to remove every nail, and space your new screws 6 to 8 inches apart as before.
Five most common causes of persistent squeaks after initial repair:
- Tongue and groove seams moving independently of the subfloor to joist connection
- Adjacent joists that weren’t fastened and are now carrying shifted load
- Soft, damaged, or rotted subfloor that won’t hold fasteners securely
- Loose or missing blocking between joists, allowing the joists themselves to twist or rotate
- Movement at the perimeter where the subfloor meets the rim joist or wall plate and wasn’t addressed
When to Call a Professional for Underfloor Hardwood Squeak Repair

Call a licensed contractor when you see water damage, rot, or soft wood anywhere in the repair area. Squeaks often accompany structural problems, and if the subfloor feels spongy or the joists show dark staining or crumbling, you’re looking at a bigger job than screws and shims can solve. Rotted wood won’t hold fasteners, and bonding new material to damaged material just delays the inevitable failure. A pro can evaluate whether you need joist sistering, subfloor panel replacement, or moisture remediation before any squeak repair makes sense.
Unsafe access is another clear sign to bring in help. If your crawl space is less than 18 inches high, full of standing water, or crowded with electrical junction boxes and plumbing that you’re not qualified to work around, don’t risk injury trying to squeeze in with a drill and a headlamp. Professionals have the right safety gear, lighting, and often the experience to work in tight or hazardous conditions. Structural concerns like sagging floors, large cracks in joists, or movement that affects multiple rooms also require an engineer’s assessment and a contractor’s skills to fix correctly.
Four situations that require a professional:
- Extensive water damage, visible rot, or crumbly wood in joists or subfloor
- Structural sag, large cracks in joists, or joist failure that affects floor levelness
- Squeaks over a very large area (multiple rooms) indicating subfloor or framing system failure
- Unsafe or inaccessible crawl space with low clearance, standing water, or hazardous wiring/plumbing
Final Words
Get under the floor and pinpoint the squeak — listen, tap, and mark each spot.
Gather the drill, correct-length screws, shims, and construction adhesive. Fasten the subfloor to joists, shim gaps, and use adhesive for broad delamination. Use screws where movement repeats, and replace loose nails. Troubleshoot seams and hard-to-reach areas before calling it done.
These steps help you fix squeaky hardwood floors from below and keep repairs budget-friendly. If you find rot or structural issues, bring in a pro. You’ll have a quieter, more solid floor soon.
FAQ
Q: How to fix squeaky wood floors from below?
A: Fixing squeaky wood floors from below involves locating the squeak, then fastening the subfloor to joists with 2–2.5″ screws or shims plus construction adhesive. Clear insulation, mark spots, and drive screws without piercing the finish.
Q: Is there anything you can put down on your hardwood floor so it stops creaking like a rug or yoga mat?
A: Putting down a rug or yoga mat won’t stop hardwood floors from creaking; it only masks the noise. To stop creaks, repair the subfloor or joists from below or use targeted fasteners and adhesive.
Q: Should I hire a professional to fix creaks?
A: You should hire a professional if you find rot, joist damage, large-area movement, unsafe crawlspace access, or structural issues. For small, local squeaks, a DIY screw-and-adhesive repair is usually fine.
Q: Does WD-40 work on squeaky wood?
A: WD-40 may quiet a squeak briefly, but it won’t stop wood-on-wood movement and can harm finishes. Use mechanical fastening or construction adhesive for lasting floor repairs, and reserve lubricants for hinges only.