

Think you can just eyeball a stud?
Guessing usually ends with a cracked wall and a fallen shelf.
A stud finder removes the guesswork so you can drill once and hang heavy things that stay put.
Read on for a simple, step-by-step guide: what to buy, how to prep and calibrate, how to scan and confirm the stud center, common mistakes to avoid, and quick checks that show the job’s done.
What a Stud Finder Does and Why You Need One
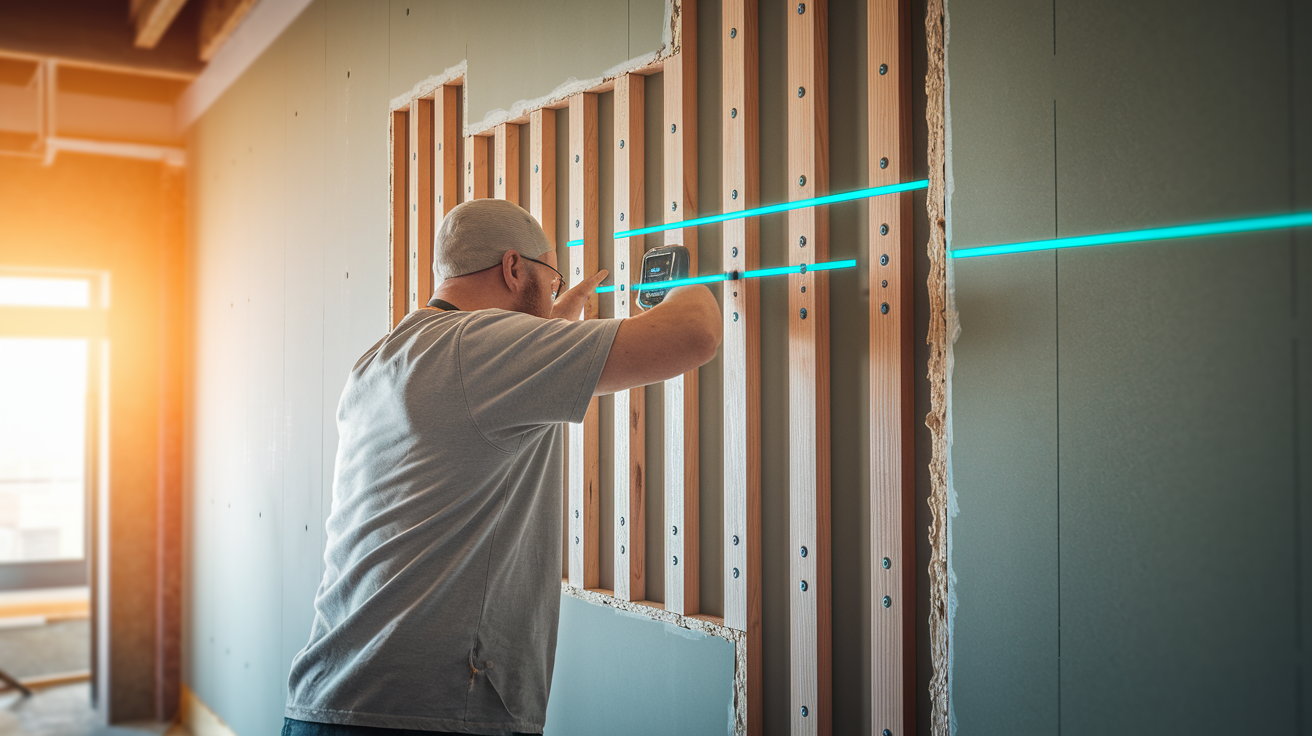
A stud finder helps you locate the vertical wood or metal framing members hidden behind drywall, plaster, or paneling so you can hang heavy items safely. Without one, you’re guessing where to drill or nail, and that usually means your shelf, TV mount, or cabinet ends up pulling out of the wall when you least expect it.
Studs are the solid parts of your wall frame. They’re usually made of dimensional lumber like 2x4s or 2x6s, and they run vertically from floor to ceiling. In most homes, studs are spaced either 16 inches or 24 inches apart, measured from the center of one stud to the center of the next. This spacing is called “on center.” When you screw or nail into the center of a stud, your fastener grabs solid wood instead of just drywall, which crumbles under weight.
Here’s what happens when you skip the stud finder and just wing it. You drill a hole, the screw goes in easy, you hang your 50 pound mirror, and everything seems fine. A week later the mirror is on the floor and there’s a ragged hole in your wall. That’s because drywall alone can’t support much weight. Standard 1/2 inch or 5/8 inch drywall will hold a few pounds with a plastic anchor, but anything heavier needs a stud.
A stud finder takes the guesswork out. It scans the wall and tells you exactly where the edges and center of each stud are, so you can mark the spot, drill with confidence, and know your heavy items will stay put. You’ll use it for mounting flat screen TVs, bathroom grab bars, floating shelves, curtain rods, kitchen cabinets, coat hooks, and any other hardware that needs real holding power.
There are two main types. Magnetic stud finders are simple and cheap, usually $5 to $20. They work by detecting the metal screws or nails that fasten drywall to studs. You slide the magnet across the wall until it sticks to a fastener, then mark that spot and follow the vertical line to map the stud. Electronic stud finders cost more, typically $10 to $100+, and they detect changes in wall density or locate metal and live AC wires. Basic electronic models sense the edge of a stud by measuring capacitance, which is how the wall material affects an electric field. Advanced models have multiple sensors, deep scan modes that reach through up to 1.5 or 2 inches of material, and can even show you a rough image of what’s behind the wall.
Both types work, but electronic finders are faster and more accurate once you learn how to calibrate and move them correctly. Magnetic finders are foolproof if you’re patient because they only react to metal, but they can miss studs if the fasteners are spaced far apart or covered by thick texture.
What You Need to Know About Wall Construction Before You Start

Most walls are built the same way. Vertical studs run from the bottom plate (a horizontal board lying on the floor) to the top plate (a horizontal board at the ceiling). Drywall panels are screwed or nailed to the face of those studs every 12 to 16 inches along each stud. The studs themselves are typically spaced 16 inches on center, which means if you measure from the center of one stud to the center of the next, you’ll get 16 inches. In some newer construction, especially non load bearing partition walls, studs are spaced 24 inches on center to save material.
A standard wall stud is a 2×4, but the actual dimensions are smaller than the name suggests. A 2×4 stud measures about 1.5 inches wide and 3.5 inches deep after milling and drying. That 1.5 inch width is what you’re trying to find and mark. The 3.5 inch depth is how far the stud sticks out from the wall’s back side, but you won’t usually worry about that unless you’re running pipes or wires.
Drywall thickness matters because it affects how your stud finder reads the wall. Most interior walls use 1/2 inch drywall. Ceilings and some walls in garages or moisture prone areas use 5/8 inch drywall for extra fire resistance and rigidity. Older homes may have plaster over wood lath or metal lath, which can be 3/4 inch to over an inch thick total. Thicker walls require a stud finder with a deep scan mode because basic electronic models usually detect through about 3/4 to 1 inch of material, while deep scan or multi sensor models can reach 1.5 to 2 inches.
Studs always appear in predictable places. Every inside and outside corner has a stud. Door and window openings are framed with a stud on each side, plus a horizontal header across the top and sometimes a sill plate at the bottom of a window. When you’re hunting for studs, start near a corner, door frame, or window frame because you know a stud is right there. Then measure 16 inches toward the center of the wall and scan to confirm the next stud.
It’s also good to know what else hides in walls. Electrical wiring typically runs horizontally between studs at outlet and switch height, then vertically up or down a stud to reach the next outlet or fixture. Plumbing supply lines and drain pipes are usually routed through holes drilled in the center of studs, and HVAC ducts may run in walls on the first floor or in chases between rooms. Metal corner beads (the L shaped metal strips that protect outside corners) and metal lath in old plaster walls will both trigger a stud finder, so you need to recognize those false signals and keep scanning to find the real wood or metal framing.
| Wall Element | Typical Dimension |
|---|---|
| Stud spacing (on center) | 16 inches or 24 inches |
| Actual 2×4 stud size | 1.5 inches wide × 3.5 inches deep |
| Standard interior drywall | 1/2 inch or 5/8 inch thick |
| Plaster over lath | 3/4 inch to 1+ inch thick |
When you understand these basics, using a stud finder makes a lot more sense. You’ll know why your finder beeps at the corner, why it sometimes signals 16 inches away, and why you should always double check before drilling into what might be a pipe instead of a stud.
Getting Ready to Scan the Wall

Clear everything off the wall surface where you plan to scan. Take down picture frames, remove any nails or screws sticking out, and peel off old painter’s tape or sticky notes. A stud finder needs to sit flat against the drywall. Even a small bump or piece of debris can cause a false reading or prevent calibration.
If there’s trim, baseboards, or chair rail in your scan area, avoid scanning directly over them. Trim is often nailed into studs, which means you’ll detect the nail heads and think you found a stud when you’re really just finding the trim fasteners. Instead, scan a few inches above or below the trim, then use a level or straightedge to extend your marks down to where you actually need to drill.
Gather your tools before you start. You’ll need the stud finder, a pencil, a small roll of painter’s tape or masking tape, a torpedo level or long straightedge, and a non contact voltage tester if you plan to drill anywhere near outlets or switches. Keep a small drill bit (1/16 inch or 1/8 inch) handy for verification probes. If you’re using a magnetic stud finder, grab a strong rare earth magnet as a backup to confirm fastener locations.
Pick a starting point. The easiest place to start is near an electrical outlet, light switch, corner, or door frame, because you know a stud is attached to or very close to those features. Outlets and switches are almost always mounted to the side of a stud, so if you measure 3/4 inch to the left or right of the box edge, you’ll be near the stud center. Corners always have studs. Door and window frames are trimmed out with studs on both sides. Use these known reference points to get your first mark, then measure 16 inches toward the middle of the wall to predict where the next stud should be.
If your stud finder has a built in level or you’re using a separate one, note which way is plumb (perfectly vertical). Studs run plumb from floor to ceiling, so any marks you make should form a vertical line. If your marks wander left and right, you’re either scanning over something that isn’t a stud or you’re not holding the finder flat and steady.
Check for nearby electrical circuits. If you’re drilling anywhere within two feet of an outlet, switch, or ceiling fixture, use a non contact voltage tester to sweep the wall before you drill. These testers beep or light up when they detect live AC voltage, even through drywall. Many mid range and higher end electronic stud finders have built in AC wire detection, but a dedicated voltage tester is more sensitive and safer. Turn off the circuit breaker for that area if you’re not sure, then test the outlet to confirm power is off before you drill.
Be aware of plumbing and HVAC. If you’re working on a wall that backs up to a bathroom, kitchen, or laundry room, there’s a good chance water supply lines, drain pipes, or vent stacks run through the studs. HVAC ducts sometimes hide in interior walls, especially in single story homes or first floor walls of two story houses. If you hit metal when probing with a small bit, stop and figure out what it is before you drill a larger hole.
Wipe the wall with a dry cloth if it’s dusty or textured with loose particles. Some heavy textures, like skip trowel or popcorn, can confuse an electronic stud finder because the surface isn’t uniform. You don’t need to sand it smooth, but brushing off loose crumbs helps the finder sit flat and read consistently.
Set up good lighting. A stud finder’s LCD screen or LED indicators are easier to see in bright light, and you’ll have an easier time making accurate pencil marks if you can see the wall clearly. If you’re working in a dim hallway or basement, bring a work light or use your phone’s flashlight.
How to Calibrate an Electronic Stud Finder

Calibration is the step most people skip, and it’s the reason their stud finder gives them random beeps and false readings. Every time you turn on an electronic stud finder or move it to a different wall, it needs to “learn” what an empty section of wall feels like so it can recognize when it crosses something denser, like a stud.
Here’s how to do it. Pick a spot on the wall where you’re confident there’s no stud, no pipe, no wire, and no fasteners. About 12 inches away from any corner or outlet is usually safe. Press the stud finder flat against the wall with the sensor plate (the smooth plastic or rubber pad on the bottom) making full contact. Don’t tilt it or hold it at an angle. Keep it flat.
Press and hold the power button. Most finders will beep once and show a light or display a message that says “calibrating” or “ready.” This takes about two to five seconds. Some models, like the Zircon MultiScanner series, will display the word “stud” or show a green light when calibration is complete. If your finder has a OneStep or auto calibrate feature, it will calibrate automatically as soon as you press the button while flat on the wall.
Don’t lift the finder off the wall during calibration. If you do, you’ll have to start over. Once calibration finishes, the finder is ready to scan. Keep it pressed flat and start moving.
Recalibrate any time you switch to a different wall, especially if that wall has a different thickness or surface texture. Calibrate again if you move from drywall to plaster, or from a painted wall to one with heavy texture. If your finder starts giving erratic readings in the middle of a scan, stop, lift it off the wall, move to a clear area, and recalibrate.
Low batteries are the number one cause of calibration failure. If your finder won’t calibrate, or if it beeps continuously, or if the display flickers, replace the battery. Most electronic stud finders use a 9 volt battery or two AA batteries. Keep a spare battery in your toolbox. Cheap batteries die fast in stud finders because the sensor circuits draw steady current. Use name brand alkaline batteries or rechargeable lithium cells for longer life.
If the finder calibrates but immediately signals a stud as soon as you start moving, you probably placed it directly over a stud during calibration. Lift it off, move six inches to the left or right, and recalibrate on a clear section of drywall. Some finders will show an arrow on the screen telling you to go back and find the edge you missed. Follow the arrow, then recalibrate and try again.
Calibration is especially important on older walls or walls with unknown construction. Plaster over metal lath, dense blown in insulation, or foam board insulation behind drywall can all affect the finder’s baseline reading. When you calibrate on that specific wall, the finder adjusts its sensitivity to match, and your readings become much more accurate.
Step by Step Instructions for Finding a Stud

Place the stud finder flat against the wall at about shoulder height, roughly 12 inches away from any corner or obstacle. Press the power button and wait for the calibration beep or ready light. Once calibrated, start moving the finder slowly to the left or right in a horizontal line. Move at about one to two inches per second. That’s slower than you think. If you rush, the finder’s sensor can’t keep up and you’ll get false positives.
Watch the screen or listen for the alert. Most electronic finders will beep, light up, or show an arrow or bar graph when they detect the edge of a stud. Mark that spot with a small pencil line or a piece of painter’s tape. Keep moving in the same direction until the signal stops. That’s the far edge of the stud. Mark it.
Now reverse direction and scan back across the same area. You should detect the same two edges. If the marks don’t line up within a quarter inch, you moved too fast or the finder lost calibration. Recalibrate and try again. The stud is about 1.5 inches wide, so your two edge marks should be roughly that far apart.
To find the center, measure the distance between your left and right edge marks and mark the midpoint. That’s where you drill or screw. If you’re using an electronic center finding stud finder, it will beep or show a spotlight icon when the sensor is over the stud center. Mark that spot, then verify by scanning from the opposite direction. The center mark should repeat in the same place.
Make multiple passes at different heights. Scan again at waist height and knee height. Studs run vertically, so if you found a stud at shoulder height, it should be in the same horizontal position lower down. Mark each detection and connect the marks with a vertical line using a level or straightedge. This gives you a clear map of the stud from floor to ceiling.
If you’re using a magnetic stud finder, the process is a little different. Place the magnet flat on the wall and slide it slowly in a horizontal line. When it suddenly sticks or pulls toward the wall, you’ve found a screw or nail head. Mark that spot. Keep scanning up and down along that vertical line to find more fasteners. Drywall screws are typically spaced every 12 to 16 inches vertically along a stud, so if you find three or four fasteners in a vertical row, you’ve confirmed the stud location. Mark the center of that row.
Magnetic finders won’t detect the edges of the stud, only the metal fasteners, so you’re mapping the stud by connecting the dots. If you find a fastener, measure 3/4 inch to the left and right (half of the 1.5 inch stud width) to estimate the stud center. Then verify with a small probe hole or a second pass with an electronic finder.
Draw a plumb line. Once you have marks at two or three heights, use a torpedo level, long straightedge, or laser level to draw a single vertical line connecting them. This is your stud center line. Measure 16 inches to the left or right and scan again to find the next stud. Mark it the same way. Repeat until you’ve mapped out all the studs in your work area.
How to Mark and Verify the Stud Center

Once you’ve located both edges of a stud, mark the center before you drill. The center is the safest place to drive a screw or nail because it keeps your fastener away from the stud edges where plumbing, electrical wiring, or HVAC ducting might be routed through holes in the framing.
Use a pencil and make small marks. Avoid using a permanent marker or heavy crayon because you’ll see those marks through paint later. Light pencil marks erase easily or get covered when you touch up with paint. If you’re worried about marking the wall, use painter’s tape instead. Stick a strip of tape on the wall and mark the stud edges and center on the tape. When you’re done drilling, peel off the tape and the wall stays clean.
Measure between your left and right edge marks. If the distance is close to 1.5 inches, you’re on a wood stud. If it’s closer to 2.5 or 3.5 inches, you might be on a doubled stud (two studs nailed together, common at corners) or a metal stud. Metal studs are common in commercial buildings and some residential construction. They’re usually 2.5 to 6 inches wide, and they have flanges on the edges that make them wider than wood studs. You can still screw into metal studs, but you’ll need self tapping metal screws instead of standard wood screws.
Mark the center point, then verify before you commit. Even the best stud finder can be fooled by a pipe, conduit, or corner bead. The safest way to verify is to drill a small pilot hole with a 1/16 inch or 1/8 inch bit. Drill slowly. If you hit solid resistance, you’re in wood. If the bit spins free after about 1/2 inch, you hit drywall only and missed the stud. If you hit metal that the bit won’t penetrate, stop immediately and figure out what it is.
Another verification method is to use a thin finish nail or brad. Tap a 1 inch or 1.5 inch finish nail through the drywall at your center mark. If it sinks in easily and feels solid when you wiggle it, you’re in a stud. If it pushes through with no resistance and wiggles freely, there’s no stud there. Pull the nail out and scan again. The tiny hole from a finish nail is nearly invisible and easy to fill later with a dab of spackling paste.
You can also use a strong rare earth magnet to double check. After you mark the stud center, place the magnet on your mark and slide it up and down. If you feel it pull toward the wall every 12 to 16 inches, you’re on a line of drywall screws and that confirms the stud location. If the magnet doesn’t react, you might be between fasteners or your mark is off.
If your first probe hole misses, move 1/4 inch left or right and probe again. It’s common to be slightly off, especially on your first try. Once you hit solid wood, make a new center mark and use that as your drilling point. Don’t drill a bunch of exploratory holes all over the place. Two or three small probes in a tight cluster is fine. Any more and you’re damaging the drywall for no reason.
When you’ve confirmed the stud center, mark it clearly with a small X or a short vertical line. If you’re mounting something large like a TV bracket or shelf, mark the stud center every 8 to 12 inches vertically so you know exactly where to place each screw. Use a level to draw a plumb line connecting your marks. This makes installation faster and keeps your hardware straight.
What to Do When You Get False Readings or Inconsistent Results

If your stud finder beeps all over the place, signals a stud that isn’t there, or gives different readings on each pass, don’t throw it across the room yet. There are fixable reasons for bad readings, and most of them are easy to troubleshoot.
First, replace the battery. A weak battery is the most common cause of erratic behavior. Even if the finder turns on, a low battery can cause the sensor to drift or the calibration to fail partway through a scan. Swap in a fresh 9 volt or new AA batteries and try again. If the problem disappears, you’re done. If not, keep troubleshooting.
Recalibrate on a clear section of wall. Lift the finder, move it 12 inches away from your previous area, press it flat, and recalibrate. If you accidentally calibrated over a stud, pipe, or wire, the finder’s baseline will be wrong and every reading after that will be garbage. Recalibrating on an open span fixes that.
Slow down. Moving the finder too fast is the second most common mistake. Your hand should move in tiny, overlapping sweeps, advancing one to two inches per second. If you’re sweeping across the wall like you’re painting, you’re going too fast. Slow, steady movement gives the sensor time to detect changes and reduces false positives.
Check for metal in the wall. If the finder keeps signaling a stud but your probe hole or magnet test says there’s nothing there, you’re probably detecting metal that isn’t a stud. Common culprits include metal corner beads on outside corners (the L shaped metal strip that protects the drywall corner), metal electrical boxes behind outlets or switches, metal plumbing pipes (supply lines, drain pipes, or vent stacks), metal HVAC ducts in interior walls, metal conduit protecting electrical wires, and rebar or wire mesh in old plaster walls.
If your stud finder has a metal only mode or deep scan mode, switch to it and scan again. Metal only mode will confirm whether you’re seeing metal or wood. If it signals metal but not a stud, move left or right to get away from the pipe or conduit and find the actual stud.
Scan perpendicular to the texture or joint lines. Some heavily textured walls or walls with visible drywall seams can confuse a stud finder if you scan parallel to the texture ridges. Try scanning at a slight angle or rotating the finder 90 degrees and scanning vertically instead of horizontally. This changes how the sensor reads the surface and can clear up inconsistent signals.
Switch to deep scan mode if your finder has one. Standard mode on most electronic finders penetrates about 3/4 inch to 1 inch. Deep scan mode reaches 1.5 to 2 inches, which helps on thick plaster walls, textured walls, or walls with foam insulation board behind the drywall. Deep scan reduces sensitivity to surface irregularities and focuses on deeper density changes.
Combine methods. When one tool isn’t working, use two. Start with your electronic stud finder to get a rough location, then verify with a magnetic stud finder or strong magnet to locate fasteners. If both tools agree, you’re on a stud. If they don’t, scan again or make a small probe hole to confirm.
Test your finder on a wall you know. Before you give up on a tool, test it on a bathroom or closet wall where you can see or feel the studs through thinner drywall or where you know a stud is located because of a visible outlet or door frame. If the finder works there but not on your problem wall, the issue is the wall construction, not the tool.
If the finder repeatedly signals studs at random intervals (10 inches, then 14 inches, then 20 inches) instead of the expected 16 inch or 24 inch spacing, you’re probably in an older home with irregular framing or you’re detecting blocking (short horizontal pieces of wood between studs used for fire stops or backing for cabinets). Use a magnet to trace vertical lines of fasteners and ignore the random horizontal signals.
Common Mistakes to Avoid

Not calibrating before each scan is the top mistake. People turn on the finder, press it on the wall, and start sweeping immediately. If you skip calibration, the sensor has no reference point and will either beep constantly or miss studs entirely. Always calibrate on a clear section of wall before every scan.
Moving too fast. Your stud finder is not a metal detector at the beach. It’s a precision tool that measures tiny changes in capacitance or density. If you sweep it across the wall in one quick motion, the sensor can’t track the edges of the stud, and you’ll mark random spots or miss the stud completely. Move one to two inches per second, and make multiple passes.
Trusting a single pass. Even experienced users make mistakes. Scan across the wall, mark your detection, then turn around and scan back from the opposite direction. If your marks don’t repeat within a quarter inch, recalibrate and try again. Two passes in opposite directions catch 95 percent of errors.
Scanning over trim, baseboards, or electrical cover plates. Trim is nailed or screwed into studs, so your finder will detect those fasteners and make you think the stud is wider than it is or in a different location. Always scan on open drywall, a few inches above or below any trim, then extend your marks down with a level.
Drilling without verification. Just because your finder beeped doesn’t mean you found a stud. Always verify with a small pilot hole, a finish nail probe, or a magnet test before you drive a large screw or mount heavy hardware. A 1/16 inch pilot hole is invisible and takes five seconds. Pulling a fallen TV bracket out of the wall takes an hour and costs money.
Assuming every detection is a stud. Pipes, wires, metal lath, corner beads, and duct work all trigger stud finders. If you detect something that doesn’t form a vertical line, or if your magnet test doesn’t find fasteners, or if your pilot hole goes through with no resistance, you’re not on a stud. Move left or right and scan again.
Ignoring the battery warning. If your finder’s screen flickers, the beep sounds weak, or calibration fails, replace the battery immediately. Trying to work with a dying battery wastes your time and gives you bad data. Keep a spare battery on hand and swap it the moment you see any sign of trouble.
Not marking multiple points. If you mark one spot and drill, you’re guessing. Mark the stud at shoulder height, waist height, and knee height, then connect the marks with a plumb line. That confirms the stud runs vertically where you think it does, and it makes mounting brackets and shelves much easier because you can see the whole stud.
Drilling too deep without checking. Once you confirm a stud, drill your pilot hole only as deep as your screw needs to go, plus a quarter inch. If you drill three inches deep into a wall cavity, you risk hitting a wire or pipe on the far side of the stud. Use a drill stop or a piece of tape on your bit to control depth.
Safety Precautions and What to Watch For

Always assume live electrical wiring is present. Even if you turned off the light switch, wires may still run through the wall to outlets, other switches, or the next room. Before you drill, sweep the area with a non contact voltage tester. Hold the tester against the wall and move it slowly over your drill location. If it beeps or lights up, there’s live AC voltage behind that spot. Turn off the circuit breaker, confirm the power is off by testing the nearest outlet, then drill.
Many mid range and higher end electronic stud finders have built in AC wire detection, usually marked with a lightning bolt icon or “AC” on the display. When you scan across a live wire, the finder will beep or flash a warning. That’s helpful, but it’s not foolproof. A dedicated voltage tester is more sensitive and specifically designed for electrical safety. Use both when drilling near outlets, switches, or light fixtures.
Typical AC wiring locations are predictable. Wires run horizontally between outlets at a height of about 12 to 18 inches above the floor, and they run vertically up or down a stud to reach switches and ceiling fixtures. If you’re drilling within two feet of an outlet or switch, or directly above or below one, there’s a good chance you’ll cross a wire. Plan your drill locations accordingly, and probe with a tester first.
Wear eye protection whenever you drill or probe the wall. Drywall dust, paint chips, and tiny splinters can fly when you drill, and a probe hole can release decades of accumulated wall dust. Safety glasses or a face shield take two seconds to put on and prevent a trip to urgent care.
Control your drill depth. If you’re drilling into a stud to install a screw, you only need to go about 1.5 to 2 inches deep. Drilling deeper risks punching through the back side of the stud and hitting whatever is in the wall cavity (pipes, wires, insulation, or even another room’s drywall if it’s a thin partition wall). Use a drill stop, depth collar, or a piece of tape wrapped around your drill bit to mark the correct depth. Stop drilling as soon as you hit the mark.
If you’re working in a bathroom, kitchen, laundry room, or any wall that backs up to plumbing, assume there are water lines in the wall. Copper, PEX, and CPVC supply lines are small and easy to puncture. If your drill bit hits metal and you’re near plumbing, stop immediately. Pull out the bit and check for water. If you see any moisture or hear hissing, turn off the water main and call a plumber. A punctured supply line can spray water inside your wall cavity and cause thousands of dollars in damage in minutes.
Know the signs of hitting something you shouldn’t. If your drill suddenly binds up, makes a high pitched squeal, or the bit gets hot, you’ve hit metal. Stop and investigate. If the bit punches through and spins free with no resistance, you missed the stud entirely and drilled into the wall cavity. Back out and probe again.
Use the right fasteners for the load. Once you find the stud and verify it’s safe to drill, choose screws that are long enough to bite at least 1 inch into the stud. A 2.5 inch or 3 inch construction screw is standard for mounting heavy brackets. Shorter screws (1.5 to 2 inches) work for lighter items like coat hooks or small shelves. Never rely on drywall anchors alone for anything heavier than a picture frame. Even the best anchor will pull out under shear load (sideways force) or if the drywall gets bumped.
What to Do When a Stud Finder Doesn’t Work or You Don’t Have One
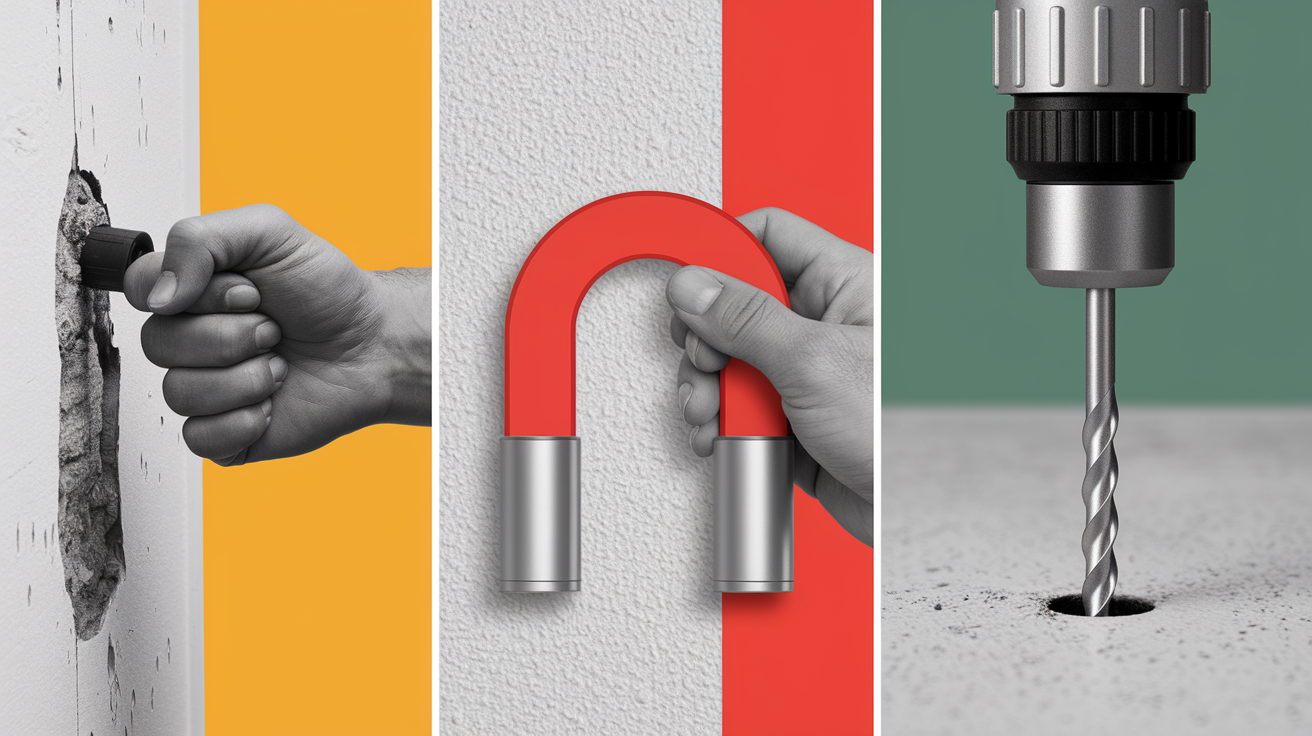
If your stud finder gives up, the batteries are dead, or you just don’t own one, you can still find studs using manual methods. These techniques are slower, but they’re reliable and require only basic tools.
The knock test is the oldest method. Tap the wall with your knuckle and listen. Drywall over an open cavity sounds hollow, like a drum. Drywall over a stud sounds solid and dull, with almost no echo. Start at a known reference point (corner, outlet, or door frame) and tap every few inches as you move horizontally. When the sound changes from hollow to solid, mark that spot and tap up and down to confirm the solid sound continues vertically. That’s your stud.
The knock test works best on thin drywall (1/2 inch) and takes practice to hear the difference. On thick plaster walls or walls with heavy insulation, the sound difference is subtle and easy to miss. Use it as a rough guide, then verify with another method.
The 16 inch rule is a reliable shortcut. Start at a corner or door frame where you know a stud is located. Measure 16 inches toward the center of the wall and tap or probe at that spot. If you find a stud, mark it and measure another 16 inches. Repeat until you’ve mapped the wall. If you don’t find a stud at 16 inches, try 24 inches, which is the next most common spacing. If you still don’t find one, the framing is irregular and you’ll need to use another method.
Use an electrical outlet or switch as a reference point. Outlets and switches are almost always screwed to the side of a stud. Turn off the power to the outlet, remove the cover plate, and look inside the box with a flashlight. The electrical box is screwed or nailed to a stud on one side. Measure 3/4 inch from the edge of the box in the direction of the stud and mark that spot. That’s close to the stud center. Verify with a probe hole or magnet.
A strong rare earth (neodymium) magnet can find studs by locating the drywall screws or nails that fasten the drywall to the framing. Tie a string to the magnet or tape it to a stick so you can slide it across the wall without losing it. Move the magnet slowly in a horizontal line at shoulder height. When it suddenly sticks to the wall, you’ve found a fastener. Mark that spot, then search up and down along the same vertical line to find more fasteners. If you find three or four in a row, you’ve confirmed the stud location.
Make a small exploratory hole with a 1/16 inch or 1/8 inch drill bit. Drill slowly at a suspected stud location. If you hit solid resistance, you’re in wood. If the bit goes through with no resistance, there’s no stud. Angle the bit left and right once you’re through the drywall to feel for the stud edges. Mark where you felt solid wood, measure the width, and drill a new hole at the center. The small pilot holes are easy to patch later with a dab of spackling compound.
If you need to find studs behind thick plaster or dense lath, a thermal imaging camera or smartphone thermal attachment (like a FLIR or Seek Thermal) can sometimes reveal studs because they create a slight temperature difference compared to the open wall cavity. This method is expensive and not always reliable, but it’s useful in historic homes where conventional stud finders fail because of metal lath and thick plaster.
A borescope (inspection camera) is another professional level option. Drill a 1/4 inch inspection hole in an inconspicuous spot (inside a closet or behind furniture), insert
Final Words
You ran the stud finder across the wall, marked the strong spots, and checked for wires and pipes before you drilled. That’s the core workflow: prep, scan slowly, confirm with a small pilot hole or measurement, and mark each stud.
Keep safety in mind—wear eye protection, avoid electrical runs, and don’t trust one read alone. If something feels off, re-scan or call a pro.
Now you’re ready to hang shelves, cabinets, or hooks confidently. Remember how to use a stud finder and trust the steps—you’ve got this.
FAQ
Q: What are common stud finder mistakes?
A: Common stud finder mistakes are not calibrating, moving too fast, missing edges, trusting single readings, scanning over trim or textured walls, and ignoring pipes or wiring that can cause false signals.
Q: How far apart are studs in a house?
A: Studs in a house are typically spaced 16 inches on center (measure from center to center). Some exterior or newer walls use 24 inches; older homes may vary, so always measure before cutting.
Q: Can I use my smartphone as a stud finder?
A: You can use your smartphone as a stud finder for metal nails using magnetometer apps, but it’s less reliable for wood. Remove cases, expect false readings, and confirm with a real finder or small pilot hole.
Q: How do I know when my stud finder finds a stud?
A: You know your stud finder found a stud when it gives a steady light or beep and repeated sweeps show a consistent edge or center. Mark both edges and measure the midpoint before drilling.