

Ever wish your floor would stop squeaking without you tearing up the whole room?
Working from underneath is the fastest way to fix most squeaks because you can see which subfloor and joist are moving and lock them back together.
This post walks you step by step through safe, budget-friendly underside fixes, finding the noise, choosing shims or screws, and adding blocking when needed, so you can stop the noise for good and get back to living in peace.
You’ll learn what to buy, how long it takes, and the common mistakes to avoid.
Pinpointing Squeaky Floor Locations from Below for Fast Repair
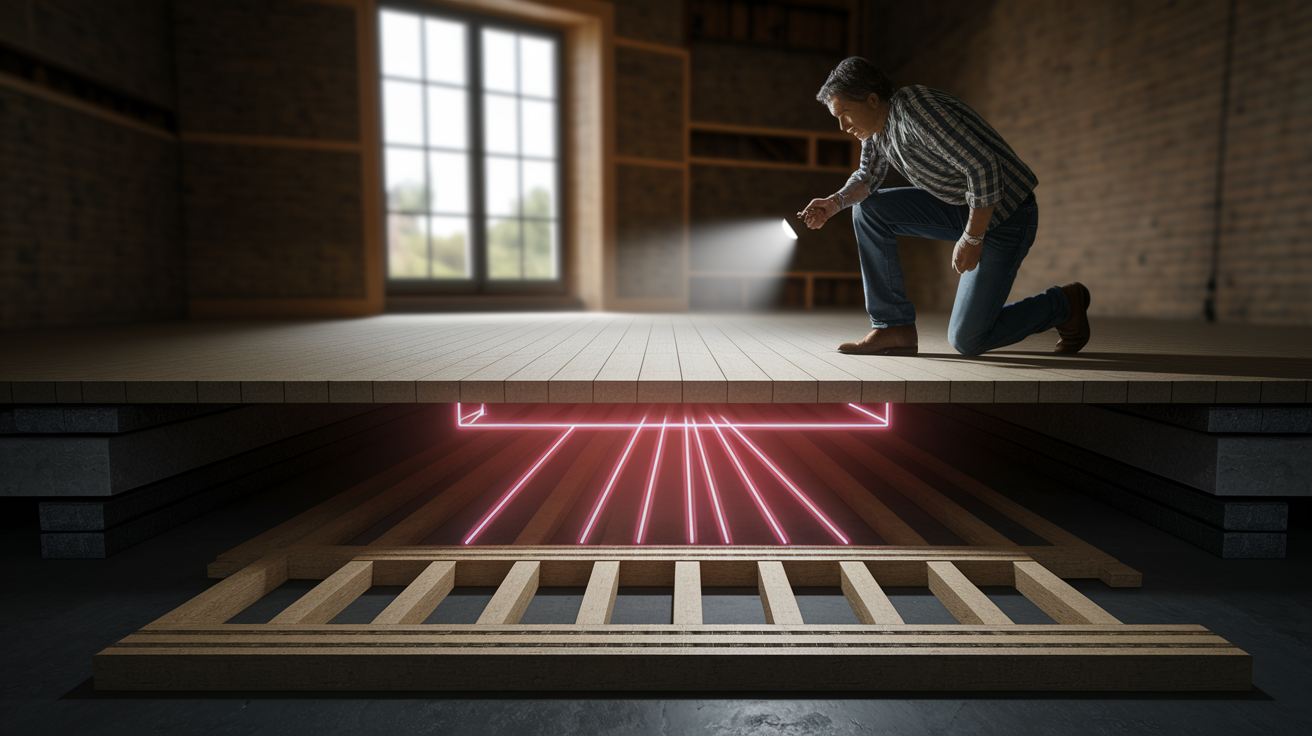
The fastest way to find a squeak is to have someone walk slowly across the noisy floor while you’re positioned directly underneath in the basement or crawl space. Tell your helper to step firmly and pause when they hear the squeak. From below, watch the subfloor and joists for any visible movement or shifting. The squeak is happening right where you see motion.
If you’re working alone, you’ll need to mark the squeak location from above first. Measure the distance from a wall, doorway, or floor register to the noisy spot, then transfer that measurement to the basement or crawl space ceiling. Another quick method is to drive an 8d finish nail up through carpet at the squeak location. The nail tip will poke through into the crawl space and give you an exact target. Once you’ve found the general area from below, use a flashlight and tap along the subfloor to locate the nearest joist. Joists make a solid, dull thud when you knock on them. The space between joists sounds hollow.
Steps to identify squeaks from beneath:
Have a helper walk or jump on the squeaky area while you watch from below with a flashlight. Mark any spots where the subfloor visibly moves, separates from a joist, or flexes. Locate joists by tapping with your knuckles or using a stud finder. Most joists run parallel and are spaced 16 inches on center. If working solo, measure from a wall or register and transfer that measurement to the underside, or drive a finish nail through carpet as a marker. Check for gaps between the subfloor and the top of the joist. Even a thin gap can cause squeaking. Use chalk or a pencil to circle problem areas on the subfloor so you don’t lose your place while gathering tools. Inspect nearby joists too. Sometimes the squeak travels a few inches from the actual problem spot.
Tools, Safety Gear, and Materials Needed for Fixing Squeaky Floors from Underneath

You’ll need a basic carpentry toolkit plus a few specialized items for overhead and confined space work. Most of these tools are common shop items. The materials list is short and inexpensive: shims, screws, adhesive, and blocking lumber.
Always wear safety glasses when working overhead to protect your eyes from falling dust and debris. Use a dust mask or respirator, especially when cutting blocking or applying construction adhesive in a crawl space. A half mask respirator with an organic vapor cartridge is required when you’re using construction adhesive in tight, poorly ventilated areas. The solvents are strong and can cause dizziness or headaches. Work gloves protect your hands from splinters and sharp fastener edges.
| Item | Purpose |
|---|---|
| Cordless drill with drill bit set | Drilling pilot holes and driving screws from below |
| Caulk gun | Applying construction adhesive into gaps and onto blocking |
| Wood shims (cedar or pine) | Filling gaps between subfloor and joists to stop movement |
| Construction adhesive | Securing shims and blocking; filling narrow gaps permanently |
| 1¼ inch wood screws and No. 8 wood screws | Pulling subfloor tight to joists; fastening blocking |
| 2×4 or 2×8 blocking lumber | Adding structural support under loose or sagging subfloor |
| Flashlight or headlamp | Lighting dark crawl spaces and overhead work areas |
| Measuring tape and utility knife | Measuring gaps and blocking lengths; trimming shims flush |
| Safety glasses, dust mask, work gloves | Protecting eyes, lungs, and hands from debris and solvents |
| Diagonal cutters | Clipping protruding nails or fastener tips if needed |
Practical Underside Fixes That Stop Squeaky Floors Immediately

Most squeaks happen because the subfloor has separated from the joist or because loose floorboards are rubbing against each other. The fixes below pull everything back together and lock it in place so the squeak can’t return. Choose your method based on what you see when you inspect the problem area from below.
Shimming Gaps at Joists
If you see a visible gap between the top of a joist and the underside of the subfloor, insert a pair of wood shims to fill the space. Tap the shims gently with a hammer until they’re snug. Don’t force them or you’ll lift the finished floor and create a hump. Mark the depth of the shim where it enters the gap, then pull it back out.
Apply a thick bead of construction adhesive to both flat sides of each shim, then slide the pair back into the gap until the adhesive starts to squeeze out. Let the adhesive cure for about 4 hours before anyone walks on the floor above. Once the glue has hardened, use a utility knife to trim any protruding shim tips flush with the joist. If you’re uncertain which joist is causing the squeak, glue shims into nearby joists too. Shimming adjacent joists won’t hurt and may stop related squeaks.
Refastening the Subfloor with Screws
When the subfloor has pulled away from the joist but there’s no visible gap to shim, drive screws from below to pull the two layers back together. Use 1¼ inch wood screws or No. 8 wood screws, depending on your subfloor thickness. Drill a 1/8 inch pilot hole first to prevent splitting and to control penetration depth. Mark the drill bit with a piece of tape so the pilot hole stops about ½ inch short of breaking through the finished floor.
Drive screws at a slight upward angle (about 45 degrees) through the subfloor and into the joist. Space screws every 6 inches along the squeaky area. Stop driving when the screw head is flush with the underside of the subfloor. Don’t countersink too deep or you’ll weaken the connection. If you’re working under hardwood floors, measure the total floor thickness by removing a floor register and checking with a tape measure, or drill a small test hole in an out of the way spot. Use screws that are ¼ inch shorter than the total thickness so you won’t poke through the finished surface.
For especially tough squeaks at subfloor seams, drive two screws at 45 degree angles so they form a V shape. This locks the joint and prevents future movement.
Adding Blocking or Bracing for Structural Stability
When joists have warped, sagged, or shifted over time, shims and screws alone won’t solve the problem. You need to add solid blocking between the joists or underneath unsupported subfloor edges. Measure the gap or unsupported span, then cut a piece of 2×4 or 2×8 blocking to fit. Make the block about 2 feet longer than the problem area so it extends roughly 1 foot beyond each end.
Apply a generous bead of construction adhesive to the top and one side of the blocking. Position the block under the subfloor and tight against the joist, then predrill 3/16 inch clearance holes through the blocking every 12 inches at a slight upward angle. Drive 2½ inch wood screws through the blocking and into the joist to pull everything tight. You should see adhesive squish out as the screw tightens.
For blocking installed between joists to support a subfloor seam, cut 2×8 blocks to fit snugly between the joists. Predrill 1/8 inch pilot holes, apply adhesive, and drive 3 inch wood screws up through the blocking into the subfloor to pull the seam tight. Then drive two additional screws or 16d nails through each joist into the ends of the block to lock it in place and prevent it from working loose. Don’t walk on the repaired area for about 24 hours to let the adhesive fully cure.
Quick Decision Guide for Choosing Screws vs. Shims

When you’re staring at a noisy floor from below, it’s not always obvious whether to reach for shims or screws. The decision depends on what’s causing the movement. If you see a visible gap between the joist and the subfloor and the joist itself looks uneven or warped, shims are the right choice. They level the support and stop the subfloor from bouncing. If the subfloor and joist have simply separated but are otherwise parallel and flat, screws will pull them back together and hold them tight.
Use Screws When…
The subfloor has pulled away from the joist but there’s no visible gap to fill. You need to fasten hardwood flooring to the subfloor without leaving surface marks. The squeak is at a subfloor seam and you want to lock the joint permanently. You see slight movement but the joist is straight and the subfloor is flat.
Use Shims When…
You see a clear gap between the underside of the subfloor and the top of the joist. The joist has warped, twisted, or settled unevenly over time. The gap is too wide to pull closed with screws alone without risking over compression. You need to level support before adding blocking or bracing. The squeak happens only when weight shifts onto an unsupported area.
Fixing Squeaky Floors When You Can’t Access the Underside
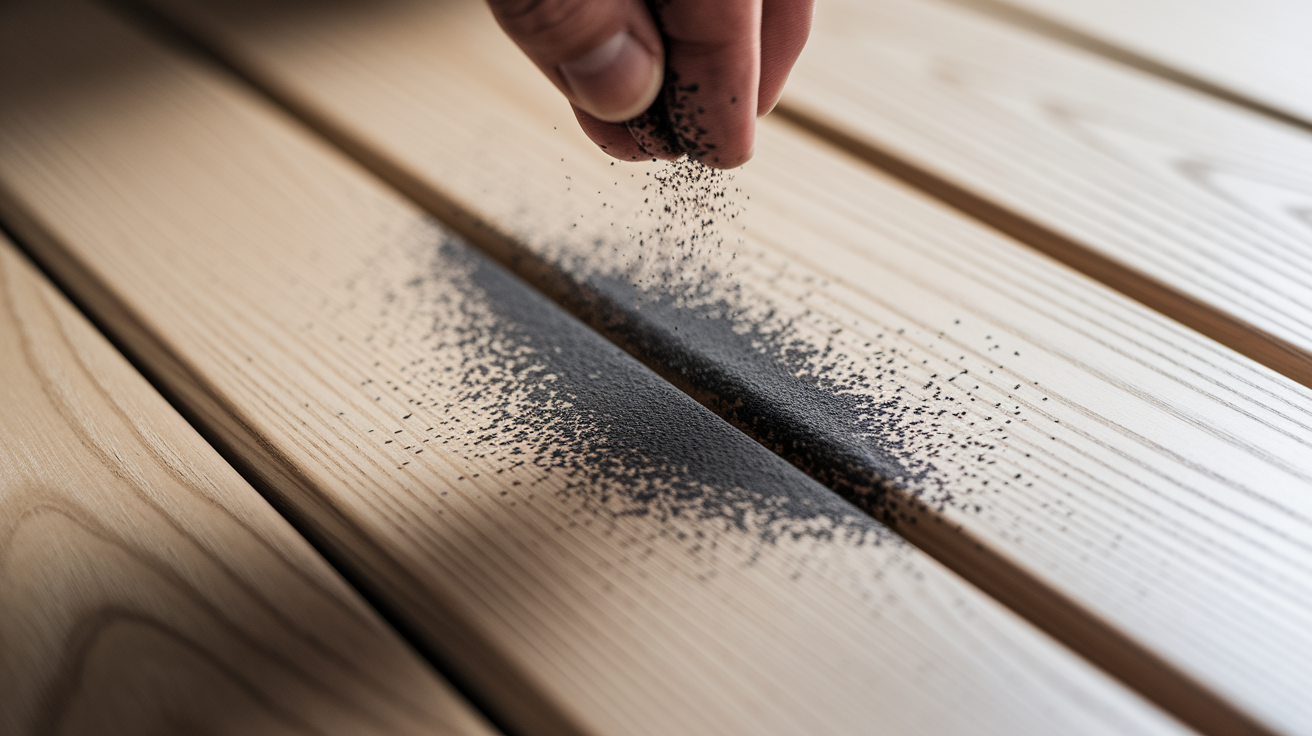
If your house sits on a slab foundation or the basement ceiling is finished with drywall, you’ll need to work from above. The easiest temporary fix is to dust powdered graphite or talcum powder into the cracks between floorboards where friction is causing the noise. Wipe off any excess powder on the surface. It can be slippery underfoot. This method only works for surface friction squeaks and may need reapplication every few months.
For a more permanent repair from above, use breakaway screws designed to be driven through carpet and pad into the subfloor below. The screw head snaps off flush once it’s fully seated, leaving almost no visible mark. For hardwood floors, drill a small pilot hole and drive trim head screws at an angle through the tongue of the floorboard into the subfloor, then fill the hole with matching wood putty. If squeaks are widespread and these quick fixes don’t work, you may need to pull up a section of flooring to access the subfloor directly, or refinish the entire floor after securing loose boards with finish nails and filler. For serious structural movement or large areas of squeaking, expect to involve a contractor who can assess whether the issue is related to failing joists or foundation settling.
Costs, Repair Time, and Material Estimates for Squeaky Floor Fixes from Below

Most DIY squeaky floor fixes cost between $20 and $50 in materials. That covers a tube or two of construction adhesive, a small box of wood screws, a bundle of shims, and a short length of 2×4 or 2×8 blocking if needed. If you already own a cordless drill and basic hand tools, you won’t need to buy anything else. A typical repair targeting three or four squeak locations takes about half a day once you’ve located the problem areas. If you’re securing multiple subfloor seams or adding blocking across several joist bays, plan on a full day for the project.
Professional repairs typically run $150 to $500 depending on how many squeaks need fixing and how difficult the access is. A pro will charge more if they need to cut access panels in finished ceilings or if the work requires sistering damaged joists or reinforcing sagging floor systems. That kind of structural work can push costs into the thousands. Construction adhesive cures in about 4 hours for shimmed repairs and up to 24 hours for adhesive only gap filling, so factor in that wait time before walking on repaired floors.
Typical cost ranges:
DIY materials (shims, adhesive, screws, blocking): $20 to $50. Professional squeak repair (access available, 3 to 6 locations): $150 to $300. Professional structural repairs (joist reinforcement, subfloor replacement): $500 to $2,000 or more. Time to complete DIY repairs: 4 to 8 hours depending on number of squeaks and accessibility.
Preventing Future Squeaky Floors with Better Subfloor and Joist Support

The best way to avoid squeaks in the first place is to control indoor humidity year round. Wood expands when humidity rises in summer and contracts when dry winter air pulls moisture out. Use a dehumidifier during humid months and a humidifier in winter to keep relative humidity between 30 and 50 percent. Stable humidity means less wood movement and fewer new squeaks.
If you’re renovating or building new, install solid blocking between joists during construction to prevent subfloor edges from flexing. Use construction adhesive on the top edge of every joist before laying the subfloor, and fasten the subfloor with screws instead of nails. Screws hold tighter and won’t pop loose over time. Add a quality underlayment between the subfloor and finished flooring to cushion movement and reduce sound transmission. Once the floor is in use, inspect it periodically and tighten any loose boards as soon as you notice them. Small problems are easy to fix before they turn into widespread squeaks.
Prevention tips:
Maintain indoor humidity between 30 to 50% with a humidifier in winter and dehumidifier in summer. Install solid blocking between joists during construction or renovation to support subfloor edges. Use construction adhesive on joist tops and fasten subfloor with screws instead of nails. Add a foam or felt underlayment layer to cushion movement and dampen sound. Tighten loose floorboards as soon as you hear squeaks. Early fixes prevent bigger problems. Use furniture pads under heavy furniture legs to reduce point loads that can shift floor planks.
Safety Requirements for Working Under Floors and Performing Overhead Repairs

Crawl spaces and basements present real hazards that you need to respect before you start swinging a drill overhead. Always wear safety glasses when working below a floor. Dust, insulation fibers, and bits of old nails fall constantly when you disturb the subfloor. A dust mask or respirator protects your lungs from decades of accumulated dust and from solvent fumes if you’re using construction adhesive. Use a half mask respirator with an organic vapor cartridge any time you’re applying adhesive in a confined space. Construction adhesive contains strong solvents that can make you dizzy or nauseous if you breathe them in a tight crawl space.
Watch for plumbing pipes, HVAC ducts, and electrical wiring as you move around under the floor. If you’ll be working near electrical boxes or wiring, turn off the power to that circuit at the breaker panel before you start drilling or driving screws. It’s easy to nick a wire in dim light. Use a stable stepladder or solid footing, especially when you’re reaching overhead to drill or install blocking. If the crawl space is less than 3 feet high, move slowly and rest frequently. Working in cramped positions for long stretches leads to mistakes. Have a partner nearby if possible, both for safety and to help locate squeaks by walking on the floor above.
When to Call a Professional for Squeaky Floor Repairs from Below

Some floor problems go beyond simple squeaks and point to structural damage that’s outside the scope of a weekend DIY repair. If you see sagging or visibly bowed joists, that’s a sign the floor system is failing and needs engineered reinforcement, often by sistering new joists alongside the damaged ones or adding steel supports. Widespread squeaking across large areas of the floor, especially combined with soft or bouncy spots, suggests the subfloor or joists are deteriorating and may need partial replacement.
Check for wood rot, water damage, or pest damage while you’re underneath. If you see dark stains, soft wood, or tunnels and sawdust from termites or carpenter ants, stop work and call a structural inspector or pest control professional. Floors that have settled or dropped noticeably at one end of a room may indicate foundation movement. That requires a foundation specialist, not a floor repair. Any time you’re not confident in the structural integrity of what you’re looking at, it’s smarter to get a licensed contractor’s assessment than to patch a symptom and ignore the underlying cause.
Warning signs that require a professional:
Joists that are visibly sagging, cracked, or twisted along their length. Soft, spongy spots in the subfloor that indicate rot or water damage. Dark stains, mold growth, or a musty smell under the floor. Sawdust, mud tubes, or tunnels in wood that suggest termite or carpenter ant activity. Floors that have settled unevenly or dropped several inches at one end of a room, which points to possible foundation movement.
Final Words
Drop into the crawlspace: have a helper walk the noisy areas while you listen below, mark each squeak, and find the joists.
You’ve got the tool list, safety gear, and clear fixes, shimming gaps, screwing the subfloor, or adding blocking, plus quick options when you can’t get underneath. There’s a decision guide, time and cost ranges, and prevention tips so squeaks don’t come back.
For a plan on how to fix squeaky floors from underneath, follow the walk test, map the problem, then pick screws or shims. Do one spot at a time. You’ll enjoy quieter floors soon.
FAQ
Q: Can you fix a squeaky floor from below and how do you fix a squeaky floor between joists?
A: You can fix a squeaky floor from below by pinpointing the squeak, then shimming glued gaps, driving angled wood screws to pull subfloor tight, or adding glued-and-screwed blocking between joists.
Q: Is there anything you can put down on your hardwood floor so it stops creaking like a rug or yoga mat?
A: Putting down a rug or yoga mat will muffle creaks but won’t stop structural squeaks. Try talc/graphite for friction noise or use breakaway screws through carpet; permanent fixes come from below.
Q: Why do my floors squeak when I walk on them?
A: Floors squeak when you walk on them because the subfloor or boards are rubbing or shifting against joists, nails have worked loose, or seasonal wood movement created gaps. Check from below to confirm.