
Think a chilly room means you need new windows? Think again.
Most cold air sneaks through gaps you can seal yourself in under an hour.
In this post I’ll show the fastest fixes that actually work, weatherstripping, window insulation film, caulk, draft stoppers, thermal curtains, and when storm windows make sense.
You’ll learn what to buy, how long it takes, and the simple steps that give warmer rooms and lower bills, plus the common mistakes to avoid so you don’t make the draft worse.
Ready to stop feeling that freeze?
Fastest Ways to Block Window Drafts Immediately
When cold air’s pouring through your windows on a winter night, you want relief now. Not next week. Good news: you can stop most drafts in under an hour with simple tools and materials from one hardware store trip.
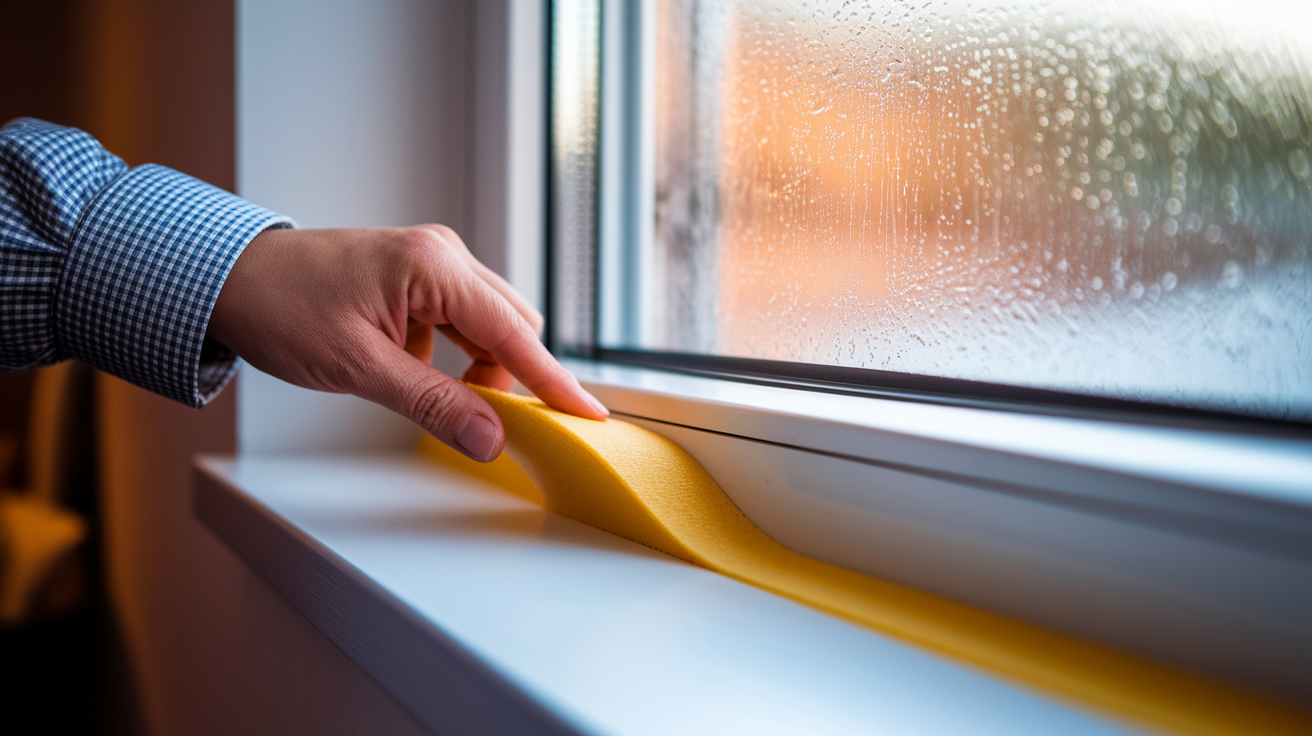
Weatherstripping seals gaps around window frames where moving parts meet stationary trim. It comes in three main types. Compression strips that squeeze when the window closes, foam tape that sticks to clean surfaces, and V-strip that slides into channels. Most people notice a difference the first night. Window insulation film adds a thin plastic barrier over the entire glass and frame, creating a dead air pocket that blocks cold transfer. You stick it on with double-sided tape and shrink it tight with a hair dryer. Both fixes cost under $20 per window and work immediately.
Draft stoppers and thermal curtains give you the fastest comfort boost with zero skill required. A fabric draft snake blocks the cold breeze along the bottom sill in seconds. Thermal curtains cut radiant heat loss by about 10 to 20 percent when you close them at night. If you need the window sealed tighter, start with weatherstripping or film first.
How to apply foam weatherstripping tape in five steps:
- Measure the length of each window edge where the sash meets the frame, then add two inches to your total.
- Clean the surface with rubbing alcohol or a damp cloth and let it dry completely so the adhesive sticks.
- Cut the foam tape to length with scissors and peel back about six inches of the backing paper to start.
- Press the sticky side onto the jamb or stop bead, keeping it aligned so the sash compresses the foam when closed but doesn’t force it open.
- Test the window by closing it slowly and checking for an even seal along the entire edge. Reposition any loose spots before the adhesive sets.
How to Identify Where the Cold Air Is Coming From

You can’t fix a draft until you know exactly where it lives. Most leaks hide around the edges of the sash, at the bottom sill, along the side jambs, or in corners where old caulk’s cracked. Finding them takes a few minutes and costs nothing.
The simplest test is the hand sweep. On a cold, windy day, move your hand slowly around the entire window perimeter about an inch away from the frame. You’ll feel a breeze or cold spot wherever air sneaks in. For a more visible check, light a stick of incense or a thin candle and watch the smoke. Hold it near suspect joints and watch for the smoke to flutter or blow sideways instead of rising straight up.
Four quick detection techniques that work:
- Candle or incense smoke test – Move the flame or smoke stick along every seam and watch for movement. Even a gentle breeze will push the smoke.
- Thermal leak detector – Use an inexpensive infrared thermometer or a smartphone thermal camera accessory to scan for cold spots on the frame and glass.
- Visual inspection – Look for daylight shining through gaps when the window’s closed, peeling caulk, or condensation stains that signal moisture getting in.
- Wet hand test – Dampen your palm and move it near seams. Evaporating moisture feels colder in a draft, making leaks easier to sense.
Sealing Gaps With Caulk for a Longer Term Fix
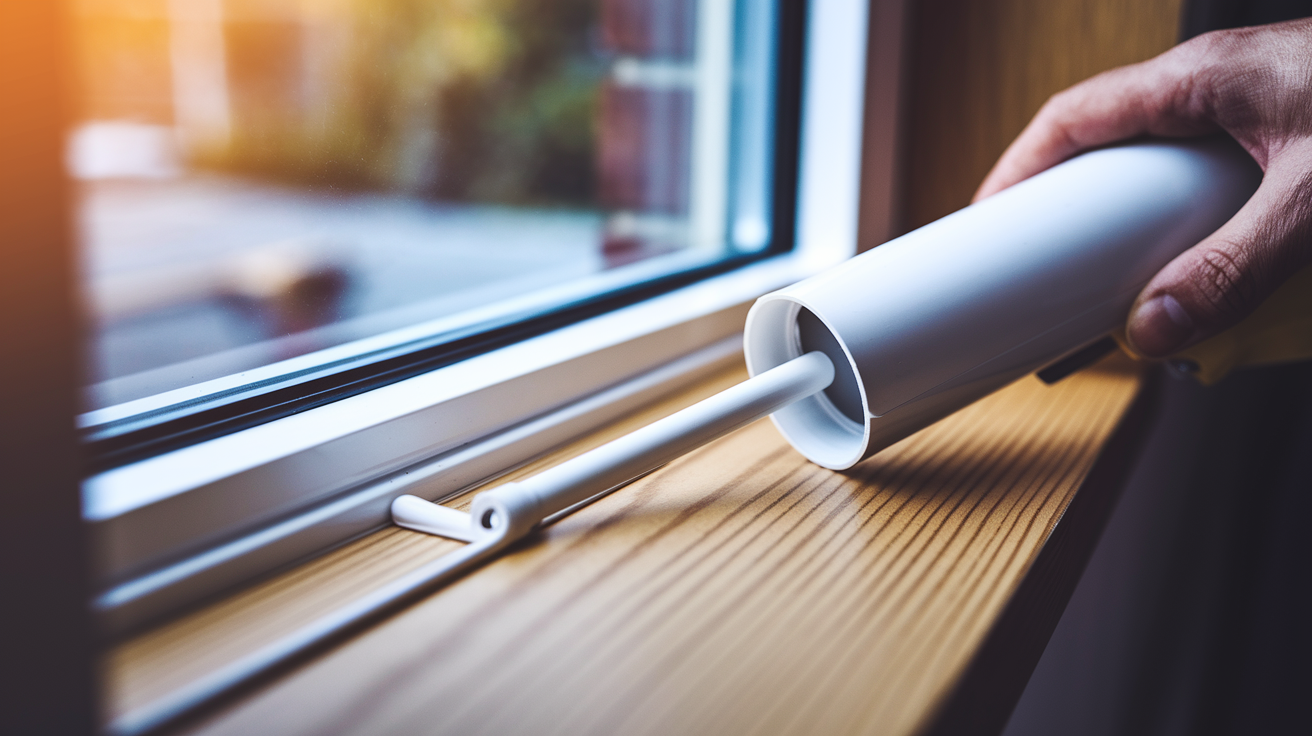
Caulk fills cracks and stationary joints that weatherstripping can’t reach. It works best around the exterior trim where the window frame meets the siding, along interior stops that never move, and in small gaps at corners or nail holes. One tube typically covers about 20 to 50 linear feet depending on bead size, and a proper seal lasts five to ten years before you need to touch it up.
Choose latex caulk for interior paintable surfaces and silicone or polyurethane for exterior exposure or anywhere that flexes with temperature swings. Never caulk the bottom edge of exterior trim because that blocks the weep holes that let trapped water escape. Also skip any moving parts like the sash edges or tracks. Caulk will glue them shut and you’ll be chipping it out the next time you want to open the window.
Six steps to caulk window gaps correctly:
- Scrape away old, cracked caulk with a putty knife and vacuum or wipe the joint clean so the new bead sticks to bare wood or metal.
- For gaps wider than one quarter inch, press in a foam backer rod first to give the caulk something to grip and prevent it from sinking too deep.
- Load the caulk tube into the gun, cut the nozzle at a 45 degree angle to match your gap width, and puncture the inner seal with a long nail or the built-in rod.
- Hold the gun at 45 degrees and push it along the joint in one smooth motion, laying a continuous bead without stopping or going back.
- Wet your finger or a plastic spoon and smooth the bead within five to ten minutes before a skin forms, pressing it into the gap so it bonds on both sides.
- Let the caulk cure for 24 to 48 hours before painting or exposing it to moisture. Check the tube label for exact times and temperature limits.
Using Draft Stoppers and Window Snakes
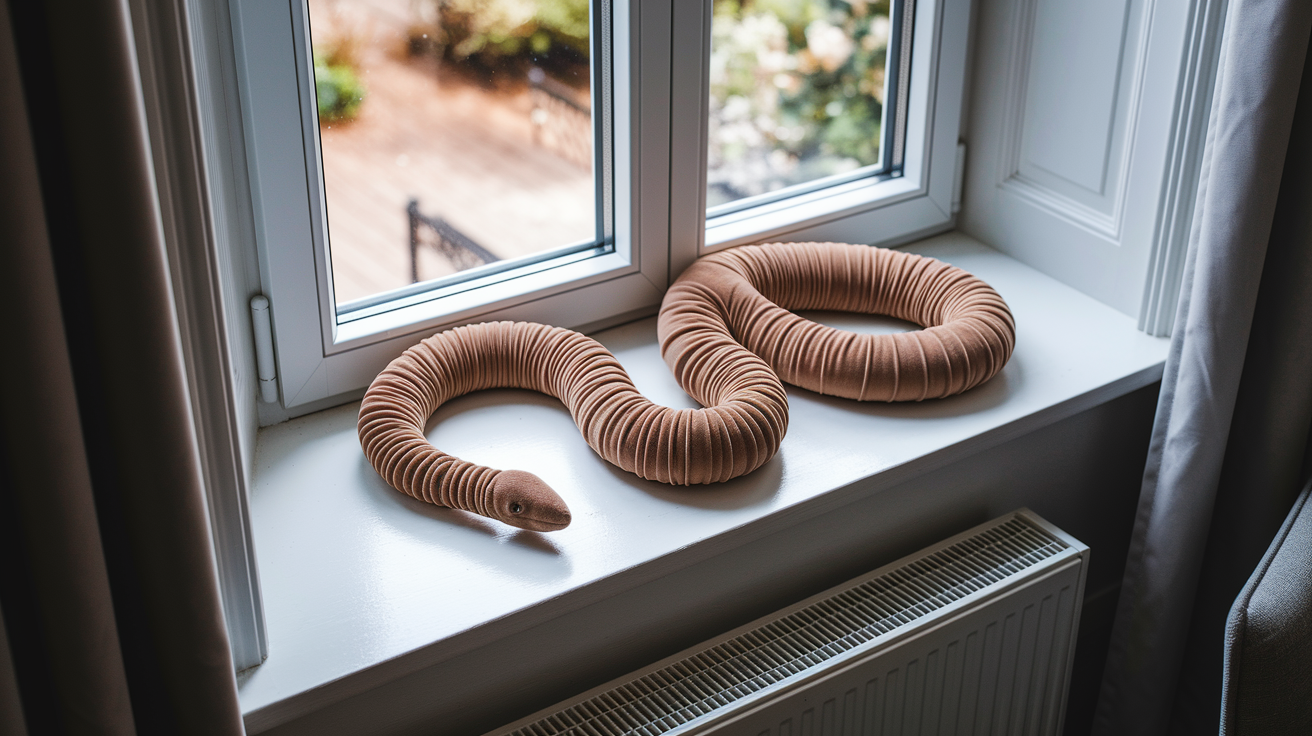
A draft stopper’s just a fabric tube filled with sand, rice, or polyester stuffing that you lay along the bottom sill to block cold air rushing under the sash. They cost about five to thirty dollars or you can sew one from an old towel in ten minutes. They work best on windows you don’t open in winter and double hung units where the bottom sash sits directly on the sill.
Position the snake so it covers the entire width of the sill and touches both side jambs. If the draft still sneaks around the ends, tuck a small rolled towel into each corner. Draft stoppers won’t fix big gaps or leaks higher up the frame, but they kill that icy breeze at floor level where you feel it most.
Benefits of Thermal Curtains and Insulated Window Treatments
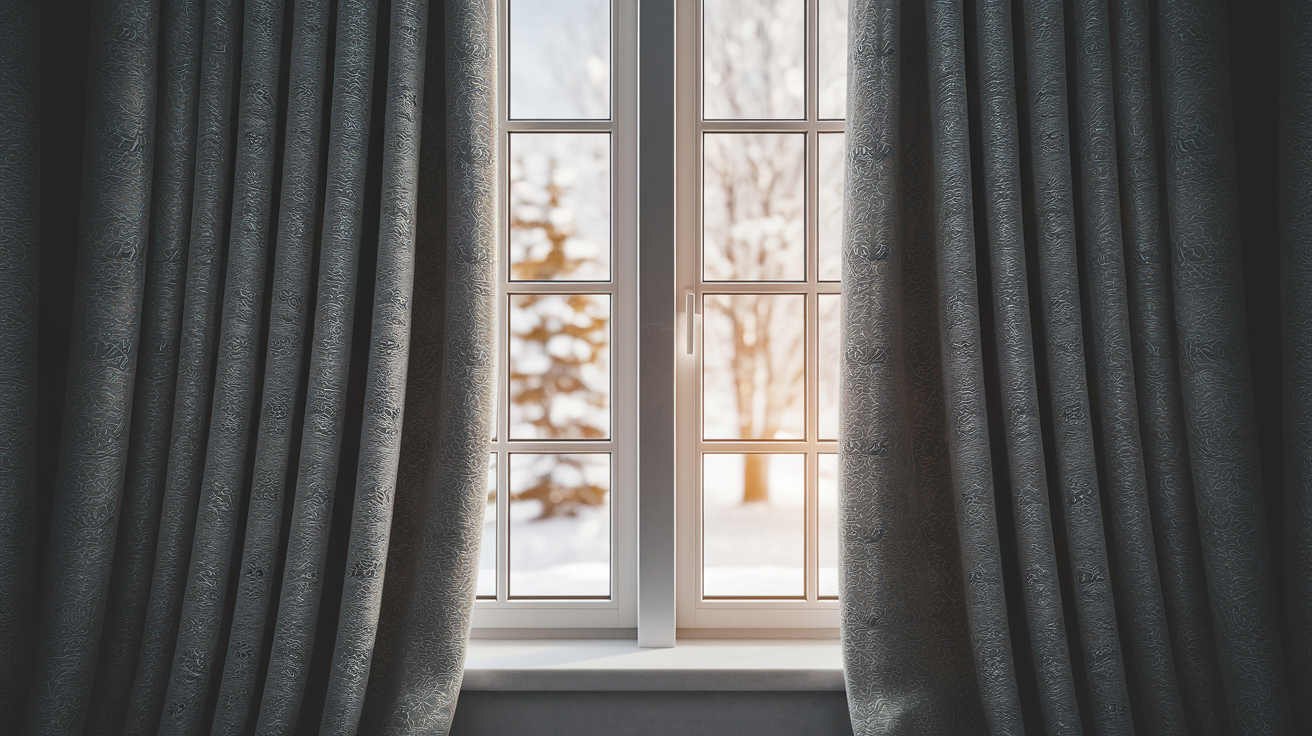
Thermal curtains use multiple layers of tightly woven fabric, often with a foam or mylar backing, to slow heat transfer through the glass. When you close them at night, they create a buffer zone that keeps warm room air from touching the cold window surface. That cuts radiant heat loss and reduces the convective loop where cold air sinks along the glass and pulls warm air toward the ceiling.
The best thermal curtains extend above the window frame and hang below the sill so they seal the edges. You’ll see the biggest benefit on single pane windows or large picture windows with a lot of glass area. Some manufacturers claim up to 25 percent reduction in heat loss through the window when the curtains are closed, though real world performance depends on how well they fit and how cold it gets outside.
Even a simple heavy curtain helps if you can’t afford the insulated versions. The extra fabric thickness slows air movement and adds a psychological comfort boost because you can’t see the frost forming on the glass. Close them before sunset to trap daytime warmth, and open them on sunny winter mornings to let passive solar heat in.
Installing Interior or Exterior Storm Windows
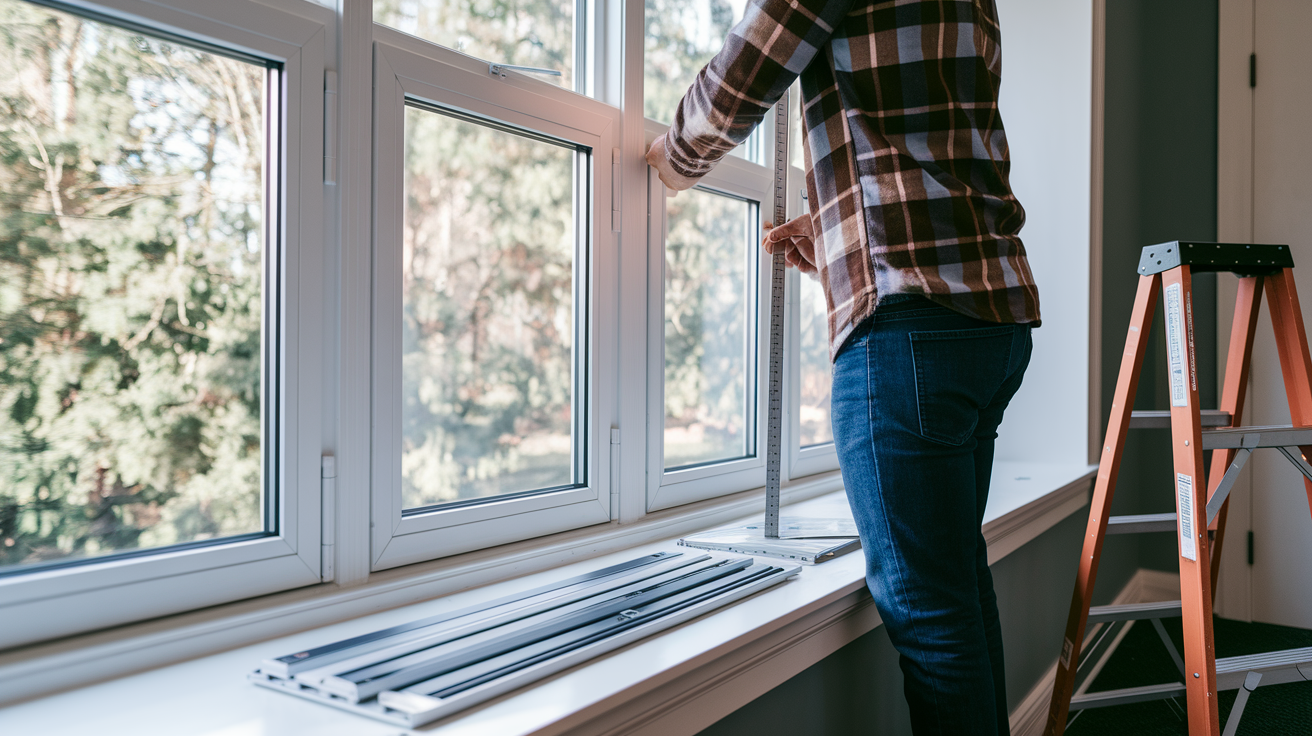
Storm windows add a second pane of glass or acrylic in front of your existing window, creating an insulating air gap that cuts drafts and improves energy efficiency. Interior storm windows are easier to install because you attach them to the inside trim with clips or magnetic strips. Exterior storms mount to the outside casing and handle weather exposure better, but they cost more and require ladder work.
An interior storm window kit typically includes a lightweight aluminum or plastic frame, clear glazing, and mounting hardware. You measure your window opening, cut the frame pieces to fit, snap them together, and press the unit into place against weatherstripping or magnetic tape already stuck to your trim. Most people finish one window in 30 to 60 minutes. Exterior storms usually come preassembled. You screw the flanges to the brick mold or siding and caulk the edges to keep rain out.
Interior vs exterior storm window comparison:
- Interior storms – Lower cost ($75 to $200 per window), easier DIY install, removable for cleaning, but can trap condensation between panes if indoor humidity’s high.
- Exterior storms – Higher durability ($150 to $400 per window), better weather seal, protects the primary window from UV and hail, requires ladder access and exterior fastening.
- Effectiveness – Both types reduce air infiltration and add roughly R-1 to R-2 insulation value when the air gap is one to four inches. The best performance comes from tight seals and low-e coatings on one surface.
Cost Comparison of All Major Draft Blocking Methods

Before you spend money, it helps to see what each fix costs and how much effort it takes. Quick temporary solutions run under twenty dollars per window but last only a season or two. Medium term weatherstripping and caulking projects cost a bit more and hold up for years. Long term upgrades like storm windows or full replacements are the most expensive but deliver the biggest energy savings and comfort gains.
| Method | Approx Cost | Difficulty |
|---|---|---|
| Draft stopper (fabric snake) | $5–$30 per window | None (just place it) |
| Window insulation film kit | $8–$25 per window | Easy (scissors, tape, hair dryer) |
| Foam weatherstripping tape | $3–$15 per 25 ft roll | Easy (measure, peel, stick) |
| Caulking (one tube + gun) | $8–$30 total | Moderate (clean joints, apply smoothly) |
| Thermal curtains | $30–$150 per panel | Easy (hang on existing rod) |
| Interior storm window kit | $75–$200 per window | Moderate (measure, cut, mount) |
The cheapest fixes give you immediate relief but you’ll replace them every year or two. Caulk and good weatherstripping last five to fifteen years if you pick quality materials and apply them right. Storm windows and full replacements are big jumps in price, but they pay back through lower heating bills and better comfort in every room.
Tools and Materials Needed for Each Fix

You don’t need a full workshop to stop window drafts. Most fixes require only a handful of basic tools you probably already own, plus the specific sealing materials for the method you choose. One shopping trip covers everything for several windows.
Common tools and materials for DIY window draft fixes:
- Measuring tape – to measure gap lengths, window dimensions, and material cuts accurately.
- Utility knife or scissors – for cutting foam tape, weatherstripping, plastic film, and backer rod to length.
- Caulk gun – holds standard 10.1 oz caulk tubes and lets you control the bead size and flow rate.
- Putty knife or scraper – removes old caulk, paint, and dirt so new materials stick properly.
- Hair dryer or heat gun – shrinks window insulation film smooth and tight after you tape it in place.
- Screwdrivers and drill – needed for storm window mounting hardware or replacing sash locks and weatherstripping screws.
- Ladder or step stool – gives safe access to upper sashes and exterior trim on tall windows.
For materials, buy one roll of foam tape or one package of V-strip per window, one tube of caulk for every three to six windows depending on gap size, and one window film kit per pane. If you’re tackling multiple rooms, pick up extra supplies so you don’t have to make a second trip halfway through the project.
DIY vs Professional Solutions: When to Call for Help

Most draft blocking fixes are simple enough for any homeowner to handle in an afternoon. Applying weatherstripping, caulking small gaps, hanging thermal curtains, and installing interior storm windows all fall within easy DIY territory. You’ll save money on labor and learn skills that help with future maintenance around the house.
Some window problems go deeper than a leaky seal. If the frame’s rotted, the sash won’t close because the wood’s warped, or you see condensation trapped between the panes of a sealed double pane unit, a surface fix won’t last. Structural damage, repeated leak failures after multiple repair attempts, and safety issues like windows that won’t lock or stay open all call for professional assessment. A contractor can tell you whether a repair makes sense or if replacement’s the smarter long term move.
Four scenarios that usually require a professional:
- Rotten or damaged window frames – wood decay spreads fast and compromises the structure. A pro can rebuild or replace the frame correctly.
- Condensation between double pane glass – means the sealed unit’s failed and needs a new insulated glass unit or full sash replacement.
- Gaps wider than half an inch around the rough opening – signal improper installation or settling that needs reframing and air sealing from the outside.
- Persistent drafts after multiple DIY fixes – suggest hidden leaks in the wall cavity, missing insulation, or problems a blower door test and infrared scan can pinpoint.
Final Words
Seal the biggest gaps first and feel the difference right away. This guide walked you through fast fixes—weatherstripping, insulation film, and draft stoppers—how to find leaks, caulking for longer-term repair, thermal curtains, and storm window options.
You also got a clear tool list, cost pointers, and signs that mean it’s time to call a pro. Start small, follow the step lists, and layer solutions for best results.
Want one clear goal? Begin with weatherstripping and film to learn how to stop cold air coming through windows. You’ll warm up the room fast.
FAQ
Q: How do I stop cold air from coming through my windows or seeping in?
A: Stopping cold air from coming through windows or seeping in starts by sealing gaps with weatherstripping or caulk, using draft stoppers, adding window insulation film, and closing heavy curtains to hold heat.
Q: How can I seal drafty windows for under $50 and what’s the cheapest way to seal windows for winter?
A: Sealing drafty windows for under $50 usually means adhesive weatherstripping ($5 to $15), shrink-film insulation kits ($10 to $20), a small tube of caulk, and DIY draft snakes for quick, cheap results.