

Think a few drops under the sink are no big deal?
They’re not.
A slow leak can rot cabinet bottoms, ruin stored items, and quietly drive up your water bill.
Before panic sets in, you can do three things that stop the damage fast: grab towels and a bucket, shut off the under-sink valves, and inspect the supply lines, drain, and P trap.
This post gives step-by-step quick fixes, the common causes you’ll actually see, and the simple tools and parts to keep on hand so you can fix it right and fast.
Immediate Steps to Stop a Leaking Faucet Under the Sink

When you spot water under the sink, stopping the flow comes first. Open those cabinet doors wide, throw down towels or newspapers to soak up standing water, and stick a bucket right under the drip. A flashlight helps you actually see what’s happening instead of just guessing in the dark.
Next, shut off the water. Most sinks have two oval shutoff valves underneath, one for hot and one for cold. Turn each one clockwise until it’s snug. If a valve won’t move or keeps dripping after you’ve closed it, find your home’s main water shutoff and close that instead. Once the water’s off, wipe everything dry with a towel and wait a couple minutes. This lets you see if the leak slows down, which tells you the shutoff actually worked.
Now test where the leak’s coming from. Turn the valves back on for a moment, one at a time if you can, and watch closely with your flashlight. If water sprays or drips right away, you’re dealing with a supply side leak. If the leak only shows up when you run the faucet or drain the sink, the problem’s on the drain side. For slow leaks, wrap a piece of paper towel around each suspect fitting and check which one gets damp.
Emergency response sequence:
- Clear the cabinet and lay towels or a bucket to catch water.
- Find the two shutoff valves under the sink and turn each one clockwise.
- If valves won’t close or still leak, shut off the main water supply to the house.
- Dry the area completely with towels so you can see fresh drips.
- Turn one valve back on and watch for leaks, then repeat with the second valve.
- Use a flashlight to inspect connections at the supply lines, faucet base, drain flange, and P trap.
- Wrap paper towel around suspect joints to catch slow drips and pinpoint the exact source.
How to Diagnose the Source of a Leak Under the Sink

Once the area’s dry and you’ve got your flashlight ready, start at the top and work down. Run your fingertips along the supply lines that connect the shutoff valves to the faucet. Feel for dampness at the threaded couplings and where the braided hoses attach. Any wetness when the valve’s open means the supply side is leaking. If those lines are dry, move to the faucet itself.
Check where the faucet sits on top of the sink. Water pooling at the base of the spout or around the handle mounts usually means a worn O ring or dried out putty under the faucet deck. Shine your light upward from below while someone runs the tap above. If you see drips forming at the faucet body or threaded tailpieces, the problem’s in the faucet hardware, not the drain.
Next, inspect the drain assembly. Fill the sink with a few inches of water, then pull the plug and watch the drain flange (the ring at the bottom of the sink) while the water empties. If water seeps around the flange or you see rust stains, the putty or gasket underneath has failed. Also watch the tailpiece, the straight pipe that drops from the sink to the P trap. Leaks here often show as dark mineral stains or wet threads.
Finally, trace the curved P trap and the horizontal drain pipe running into the wall. Run water and watch the slip nuts, the large plastic or metal rings that hold sections together. If a joint drips only when the sink drains, tighten that slip nut about a quarter turn. If water still appears, the trap may be cracked or its rubber gasket worn out. A clogged P trap can also force water out through loose joints when pressure builds.
Six common leak points under a sink:
- Supply line compression nuts at the shutoff valves or faucet tailpieces
- Faucet base and mounting hardware where O rings or putty dry out
- Sink drain flange held by plumber’s putty or a rubber gasket
- Tailpiece threads connecting the drain to the P trap
- P trap slip nuts at both the sink side and the wall side
- Wall drain stub out where the horizontal pipe enters the wall
Common Causes of a Leaking Faucet Under the Sink and What They Look Like
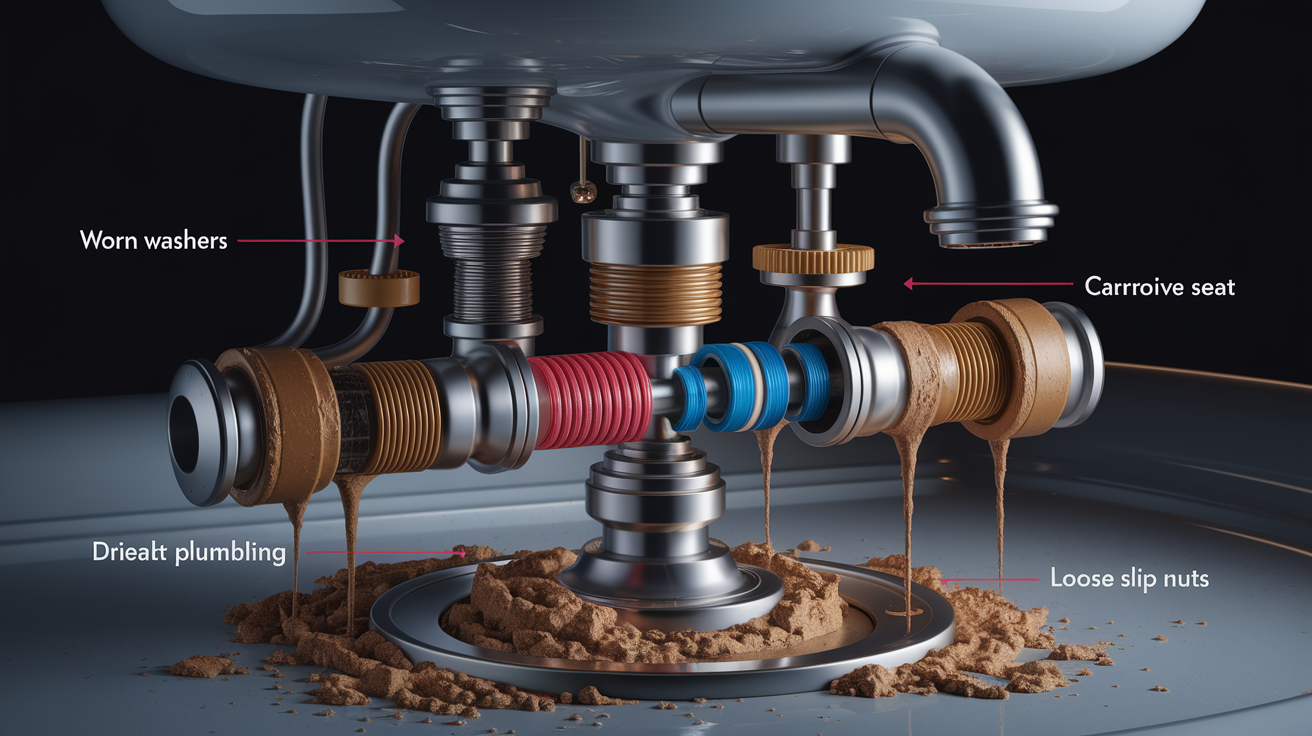
Worn washers and gaskets top the list. Inside the faucet and at every threaded connection, rubber or fiber washers create a watertight seal. Over time those parts harden, crack, or compress flat. When a washer fails inside the faucet cartridge or valve stem, you’ll see drips only when the faucet’s turned on. When a gasket fails at a supply line nut, you may get a slow weep that leaves white mineral rings on the threads.
Corroded valve seats cause persistent leaks that don’t stop even when the faucet handle’s fully closed. The valve seat’s a small brass ring inside the faucet body where the washer or cartridge presses to stop flow. Hard water etches the metal, and eventually the seal can’t form. You’ll notice a steady drip from the spout above and sometimes moisture tracking down the faucet body underneath. On the drain side, dried or missing plumber’s putty lets water sneak between the sink and the drain flange every time the sink fills. You’ll see wetness around the flange or brown stains on the cabinet floor right below the drain opening.
Loose fittings behave differently. A loose compression nut on a supply line will spray a fine mist when the valve’s first opened, because water’s under pressure. Loose slip nuts on the P trap usually drip steadily while water drains, and the drip stops as soon as the sink empties. Clogs in the P trap create back pressure that forces water out through any weak joint, so you may see sudden gushing when the sink’s full or slow drainage paired with drips at the trap connections.
DIY Repair Methods for Fixing a Leaking Faucet Under the Sink
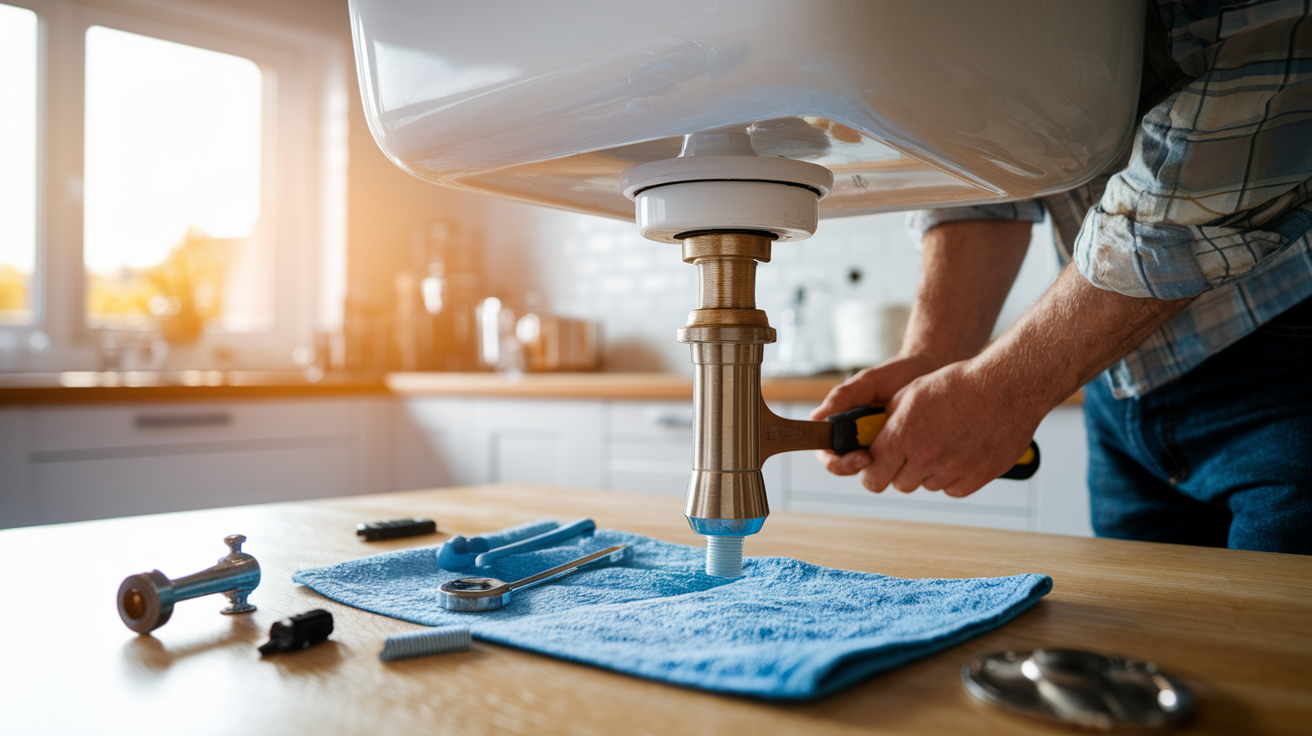
Most under sink leaks respond to simple tightening or part replacement. Before you start, confirm the water’s off at the shutoff valves and keep a bucket and towels ready to catch leftover water in the lines. If a leak’s at a threaded connection (supply line, P trap slip nut, or tailpiece), try tightening the nut one quarter to one half turn with an adjustable wrench or channel lock pliers. Turn the water back on and check. If the drip stops, you’re done. If it continues, the gasket or washer inside that fitting’s worn and needs replacement.
For faucet body leaks, you’ll usually replace an O ring, a cartridge, or a compression washer. Turn off the water, remove the faucet handle by loosening the set screw (often hidden under a decorative cap), and pull the handle off. Single handle faucets typically have a cartridge held by a retaining clip or nut. Pull the old cartridge straight out and press the new one in, lining up any tabs or flats. Two handle compression faucets have a stem with a washer on the end. Unscrew the packing nut, lift out the stem, and swap the washer at the bottom. Coat new O rings with a thin layer of silicone grease before sliding them onto the cartridge or stem to prevent tearing during installation.
If the leak’s at the sink drain flange, you’ll need to remove the drain assembly. From below, unscrew the large lock nut that holds the tailpiece to the sink. Pull the tailpiece down and lift the flange out from above. Scrape away old putty with a plastic putty knife, wipe the area clean, and roll a rope of fresh plumber’s putty about as thick as a pencil. Press the putty around the underside of the new flange, drop the flange into the sink hole, and reconnect the tailpiece from below. Tighten the lock nut until putty squeezes out evenly around the flange, then wipe away the excess.
Step by Step Component Repairs
- Replace supply line washers: Shut off water, disconnect the supply line at the faucet tailpiece, remove the old cone washer from inside the coupling nut, press in a new washer (beveled side toward the nut), and reconnect.
- Replace faucet cartridge: Remove handle and retaining hardware, pull cartridge straight up using pliers if needed, match the old cartridge at the store, insert the new cartridge in the same orientation, and reassemble.
- Replace faucet O rings: Disassemble the handle and spout, slide off worn O rings, roll new rings into place with a dab of silicone grease, and reassemble.
- Tighten packing nut: If the leak’s at the handle base, use an adjustable wrench to snug the packing nut (located just below the handle) about one eighth turn, then test by turning the water on.
- Clean the P trap: Place a bucket below, unscrew both slip nuts by hand or with pliers, pull the trap down, dump debris, rinse the trap, check gaskets, and reinstall with hand tight plus one quarter turn.
- Replace a cracked P trap: Remove the old trap, take it to the store to match size and material (usually 1¼″ or 1½″ PVC or chrome), slide new slip nuts and gaskets onto each pipe end, connect the new trap, and tighten nuts until snug.
- Replace a braided supply hose: Shut off water, use an adjustable wrench to disconnect both ends of the old hose, wrap Teflon tape clockwise on male threads if present, attach the new hose hand tight, then wrench tighten each nut about one half turn.
- Reseat a wobbly faucet: Tighten the mounting nuts on the underside of the sink using a basin wrench (a long handled tool that fits in tight spaces) until the faucet no longer shifts.
Tools and Parts Needed to Repair a Leak Under the Sink
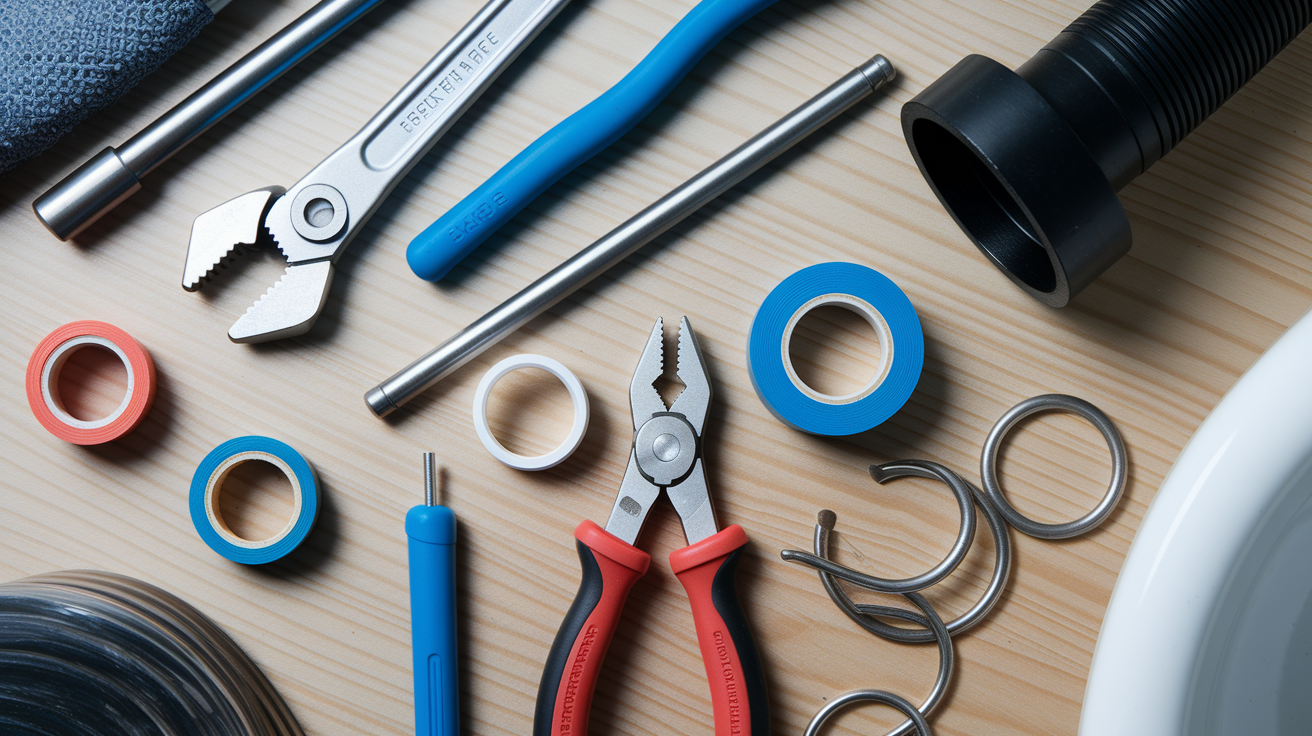
You don’t need a full toolbox, but a few basics will cover most repairs. An adjustable wrench handles hex nuts on supply lines and faucet tailpieces. Channel lock pliers grip slip nuts on the P trap and larger lock nuts on drain flanges. A basin wrench, which has a long shaft and pivoting jaws, reaches mounting nuts in the cramped space behind the faucet. Keep a small flat head screwdriver or Allen key set handy to remove handle caps and set screws. A flashlight and a pocket knife or putty knife round out the tool list.
On the parts side, stock an assortment pack of washers and O rings in common sizes so you’re not waiting on a hardware store trip. A roll of white Teflon tape seals threaded pipe connections. Wrap it clockwise so it tightens as you screw the fitting. A small tub of plumber’s putty or a tube of silicone sealant works for drain flanges. Have a bucket for catching water and several old towels for cleanup. If you know your faucet brand and model, order a replacement cartridge ahead of time, because cartridges are brand specific and not sold in universal packs.
| Tool or Part | Purpose |
|---|---|
| Adjustable wrench (8″ or 10″) | Tighten or loosen hex nuts on supply lines, compression fittings, and packing nuts |
| Channel lock pliers | Grip large slip nuts on P trap and drain lock nuts |
| Basin wrench | Reach faucet mounting nuts and tailpiece couplings in tight under sink spaces |
| Flashlight | Illuminate dark cabinet interiors to spot leaks and inspect threads |
| Plumber’s putty or silicone sealant | Seal drain flanges and prevent leaks at the sink to drain junction |
| Teflon tape and washer assortment | Seal pipe threads and replace worn compression washers in fittings |
Cost to Fix a Leaking Faucet Under the Sink and Time Estimates

A pack of assorted faucet washers costs two to ten dollars and covers most compression faucet repairs. Replacing a worn washer or tightening a loose nut usually takes fifteen to thirty minutes once you’ve cleared the cabinet and gathered tools. Faucet cartridges range from fifteen dollars for basic models to seventy dollars for name brand or specialty designs. Swapping a cartridge takes thirty to sixty minutes if you’ve never done it, less on repeat jobs. Budget another five to fifteen dollars for Teflon tape, plumber’s putty, and a small tube of silicone grease.
P trap assemblies run ten to fifty dollars depending on material. White PVC is cheapest, chrome plated brass costs more but looks cleaner. Removal, cleaning, and reinstallation of an existing trap takes fifteen to thirty minutes. Full replacement adds another fifteen minutes for a trip to the store and fitting the new part. Braided stainless steel supply lines cost eight to thirty dollars each. You’ll need two if you’re replacing both hot and cold lines. Expect twenty to forty minutes to disconnect old hoses, apply Teflon tape, and install new ones. If you’re replacing the entire faucet, parts range from fifty dollars for a builder grade model to three hundred or more for a pull down or touch activated unit, and installation can take one to three hours for a first timer.
Professional service calls typically start at seventy five to one hundred fifty dollars for the visit, with labor billed at fifty to one hundred fifty dollars per hour after that. A plumber can diagnose and repair a simple washer leak in under an hour, so total cost often lands between one hundred and two hundred dollars. Faucet replacement by a pro usually runs one hundred fifty to five hundred dollars in labor, depending on complexity and regional rates, plus the cost of the fixture.
Cost and time by repair type:
- Replace faucet washers or O rings: $2 to $10 in parts, 15 to 30 minutes
- Replace faucet cartridge: $15 to $70 in parts, 30 to 60 minutes
- Replace supply lines (pair): $16 to $60 in parts, 20 to 40 minutes
- Clean or replace P trap: $10 to $50 in parts if replacing, 15 to 45 minutes
- Full faucet replacement (DIY): $50 to $300+ in parts, 1 to 3 hours
When to Call a Professional for a Leaking Faucet Under the Sink

If you’ve tightened every fitting and replaced washers but water still drips, the problem may be hidden corrosion inside the faucet body or a cracked pipe you can’t see. Corroded valve seats sometimes require special reseating tools or complete faucet replacement, and trying the repair without the right equipment can strip threads or crack the faucet casting. Leaks at compression fittings inside the wall or at shutoff valves that won’t close fully are also best left to a licensed plumber, because those repairs often involve soldering or replacing in wall sections of pipe.
Call a professional right away if you see soft, spongy wood inside the cabinet, dark stains spreading across the cabinet floor, or a musty smell that suggests mold growth. Water that’s been leaking slowly for weeks or months can rot the particleboard cabinet and weaken the sink mounting. A plumber can assess structural damage, recommend cabinet repairs or replacement, and make sure the new plumbing won’t leak again. Large or continuous leaks, especially when the shutoff valves won’t stop the flow, require fast professional attention to prevent flooding and expensive water damage to flooring and walls below.
Preventing Future Under Sink Faucet Leaks

Set a reminder to check under every sink in your home twice a year. Open the cabinet, shine a flashlight on all connections, and feel for dampness. Tighten any slip nuts or compression nuts that have backed off even slightly. This simple habit catches small leaks before they cause cabinet damage or mold.
Replace faucet washers and O rings every three to five years, even if they haven’t failed yet. Rubber degrades over time, and a two dollar washer’s cheaper than cabinet repair. When you replace washers, also inspect valve seats for pitting or mineral buildup. A light scrub with fine steel wool or a valve seat dresser tool can extend the faucet’s life by years. Keep your P trap clear by running hot water down the drain weekly and avoiding heavy grease or food scraps that clog the curve.
Install a plastic drip tray or shallow basin under the sink to catch minor leaks before they reach the cabinet floor. Trays with raised edges hold about a quart of water and give you time to fix a problem before it spreads. For extra protection, add a battery powered water leak sensor near the back of the cabinet. These small alarms chirp loudly when moisture touches the sensor pads, alerting you to leaks you might not notice during a visual check.
Five preventive habits to avoid repeat leaks:
- Inspect all under sink fittings every six months using a flashlight and dry paper towel to catch early drips.
- Replace rubber washers and O rings every three to five years before they crack or compress beyond recovery.
- Run hot water through the drain weekly to flush grease and prevent P trap clogs that create back pressure.
- Place a drip tray or shallow pan under the cabinet to contain minor leaks and protect wood surfaces.
- Install a water leak sensor near the back of the cabinet for early warning when you’re not home.
Final Words
Shut off the under-sink valves, set a bucket and towels, and get your flashlight—stop the water first, then dry and inspect.
We walked through how to trace supply versus drain leaks, what worn washers, O-rings, and P-traps look like, and step-by-step repairs. You also have a tools list, time and cost ranges, and clear signs for when to call a pro.
Follow the quick steps and preventive checks, and you’ll handle most problems yourself. If you see corrosion or hidden rot, call a pro. With a little care, your leaking faucet under sink will be fixed and stay that way.
FAQ
Q: Why is my faucet dripping when I turn it off?
A: A faucet drips when you turn it off because worn washers, O-rings, corroded valve seats, or loose fittings let water bypass the shutoff; cartridges and supply lines can also fail.
Q: Do I need a plumber to fix a leaky faucet?
A: You don’t always need a plumber to fix a leaky faucet. Tightening fittings, replacing washers or O-rings, or swapping a cartridge are DIY-friendly. Call a pro for corrosion, inaccessible fittings, or persistent leaks.
Q: How much does a plumber charge to fix a leak under the sink?
A: Plumbers typically charge $75–$200+ for a service call and minor repairs; parts are extra. Simple fixes run on the low end, while cartridge replacements or complex access jobs cost more.
Q: Why is there moisture under my sink but no leak?
A: Moisture under the sink with no obvious leak is usually condensation on cold pipes, rising humidity, a slow seep at the drain flange, or a hidden slow drip; use paper towels and run the water to find it.