

Tired of watching warm air leak out and money fly down the hall because of one drafty door?
You can fix it yourself in an afternoon with basic tools and a few inexpensive parts.
This guide shows simple tests to find leaks, how to choose the right weatherstripping, and step-by-step installs for foam tape, V-strips, door sweeps, and caulk.
Follow these steps and you’ll stop drafts, cut heating bills, and make your door feel snug without hiring someone.
Identifying Door Drafts and Choosing the Right DIY Fix

Start by walking around the inside of your door with your hand near the edges. You’re looking for cold air, but you’ll feel drafts faster if you move a flame close to the gap. Use a gas lighter, candle, or incense stick and watch for flicker or smoke drift. If the flame bends toward the door, you’ve found your leak.
Check the full perimeter: bottom sill, all four edges of the frame, hinge side, top jamb, and any fixtures like keyholes or mail slots. Most air leaks show up at the bottom and along the hinge side where the door presses against the stop. Gaps fall into three practical sizes. Tiny gaps under 1/8 inch respond well to adhesive foam tape. Small gaps between 1/8 and 1/2 inch need tubular seals or V-strips. Large gaps over 1/2 inch call for a door sweep, threshold replacement, or combination fixes.
Quick smoke test steps:
- Close all windows and turn off HVAC fans to reduce cross-drafts.
- Light a candle, lighter, or incense stick and hold it 1 to 2 inches from the door edge.
- Move slowly along the bottom, sides, top, and around hardware.
- Watch the flame or smoke. Any sideways movement marks a leak.
- Mark problem spots with painter’s tape so you remember where to seal.
Once you’ve mapped the gaps, match each one to the right fix by size. Foam tape handles hairline cracks, sweeps stop under-door wind, and sealant fills irregular voids around the frame. If your door won’t latch after adding weatherstripping, you’ve chosen material that’s too thick.
Essential Materials and Tools for DIY Door Draft Proofing

Most door sealing projects need only a few rolls of weatherstripping, a sweep, and basic hand tools. Foam tape works for small perimeter gaps and costs $3 to $8 per 17-foot roll. V-strips (vinyl or metal-backed) run $5 to $15 for a 6 to 17-foot length and fold into a wedge shape that compresses when the door closes. Door sweeps, either rubber blade or brush style, fit 30 to 36-inch widths and range from $10 to $30. For irregular frame gaps, grab a tube of acrylic caulk for indoor use or silicone sealant for exterior weatherproofing, both priced around $4 to $12.
Core materials and typical costs:
Adhesive foam tape: 17 ft roll, $3 to $8. Best for gaps under 1/8 inch.
V-strip (vinyl or aluminum-backed): 6 to 17 ft, $5 to $15. Folds into jambs and top.
Door sweep (rubber or brush): 30 to 36 inch cut-to-fit, $10 to $30.
Tubular silicone or EPDM bulb seal: 6 to 10 ft, $8 to $25. For larger gaps.
Acrylic caulk or silicone sealant: One tube, $4 to $12.
Fabric draft stopper materials: 1 to 2 ft fabric plus 1 to 3 lbs rice or poly pellets, $5 to $20 total.
Adjustable threshold (aluminum with rubber insert): $40 to $120 depending on length.
Weatherstripping adhesive or screws: Included in most kits or $2 to $5 separately.
On the tool side, keep a tape measure, utility knife or scissors, screwdriver or cordless drill, pencil, and masking tape handy. Add rubbing alcohol or mild cleaner to prep surfaces, sandpaper to smooth cut metal edges, and a putty knife if you’re removing old caulk. Optional upgrades include a hacksaw for trimming aluminum thresholds and an infrared thermometer to measure temperature improvements before and after sealing.
Preparing the Door for DIY Draft Proofing
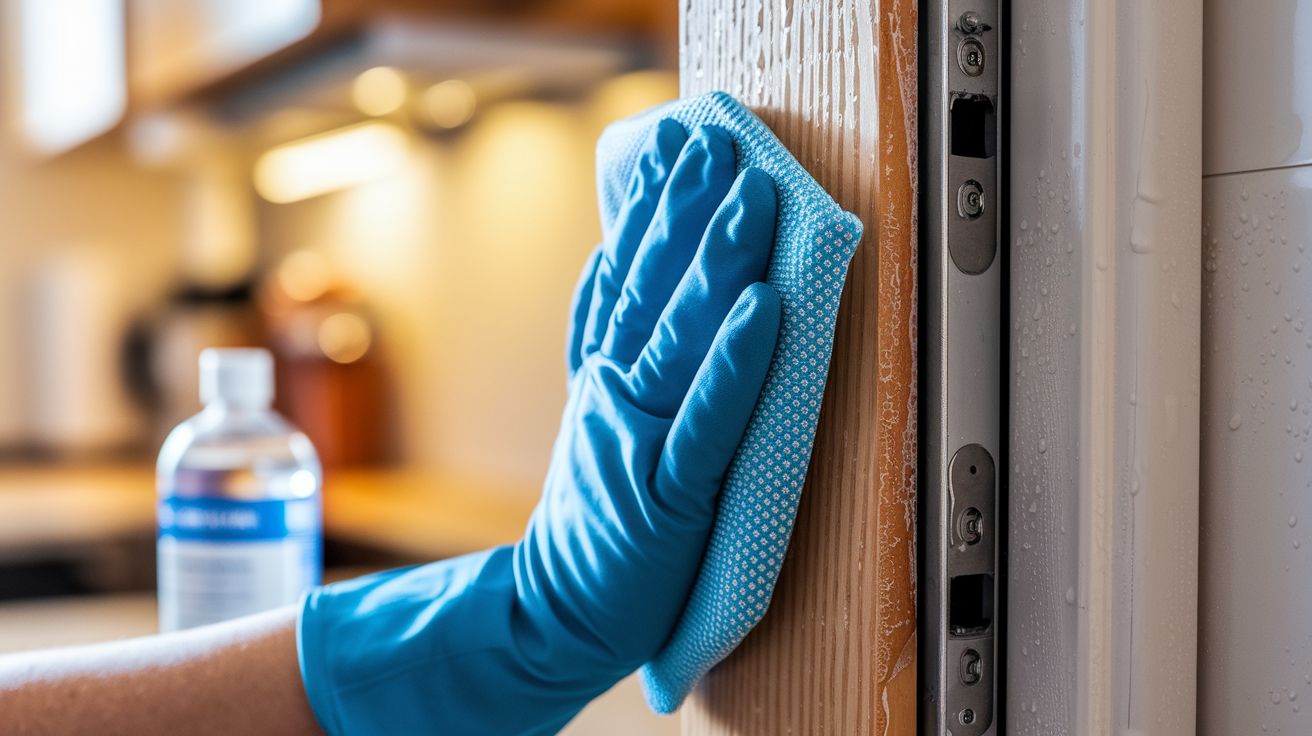
Adhesive weatherstripping sticks only as well as the surface underneath it. Wipe down the door jamb, stop molding, and threshold with a clean cloth dampened with rubbing alcohol, soapy water, or white spirits. Let everything dry completely. Damp wood or painted trim will cause foam tape to peel within days. If you’re applying sealant around the exterior frame, scrape away loose paint, old caulk, and dirt with a putty knife first.
Smooth any rough or sharp edges on metal door sweeps or aluminum thresholds using fine-grit sandpaper. A jagged cut will snag clothing and won’t seal evenly against the floor. Check that the door closes without binding. If it rubs the frame now, adding thick weatherstripping will make it worse.
Five-step prep checklist:
- Clean. Wipe all surfaces with rubbing alcohol or mild cleaner. Remove dust, grease, and loose paint.
- Dry. Wait 10 to 15 minutes for surfaces to air-dry or speed up with a clean towel.
- Inspect. Look for damaged paint, rot, or warping that needs repair before sealing.
- Smooth. Use sandpaper on cut metal edges and splinters on wood to prevent snagging.
- Position. Close the door and mark where the weatherstripping will sit so it compresses lightly when latched.
Test-close the door after each prep step. If the latch doesn’t click or you have to push hard, the frame may be out of square or the hinge screws may be loose. Tighten those first before adding seals that will make the fit even tighter.
Applying DIY Foam Tape and V‑Strips for Perimeter Door Gaps
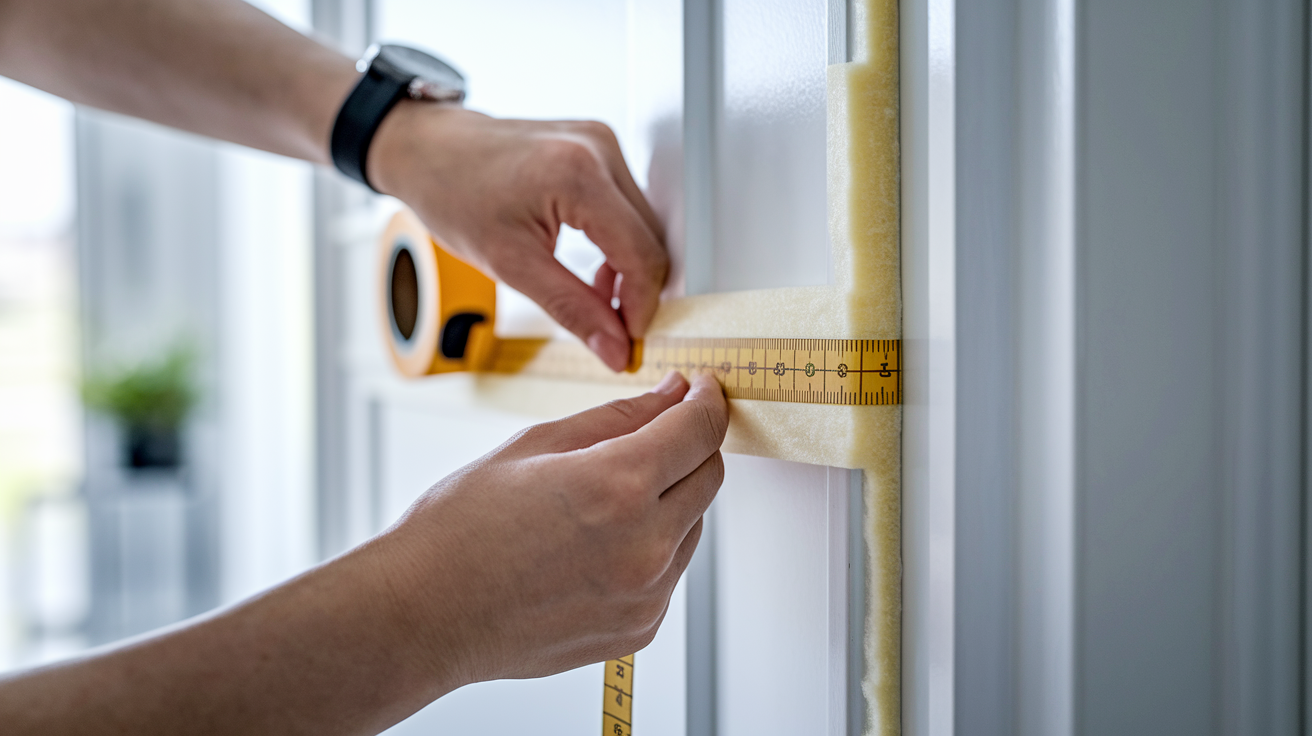
Foam tape seals the stationary parts of the frame where the door presses when closed. Measure the top jamb, both side jambs, and the threshold separately rather than cutting one long strip. Doors rarely have perfectly square corners. Cut each piece slightly longer than your measurement, around 1/4 inch extra, so you can trim or overlap at the corners without leaving a gap. Peel back only an inch or two of the backing at a time and press the tape firmly into place as you go. Avoid stretching the foam, which thins it out and reduces its sealing power.
V-strips work on the same principle but fold into a wedge that tucks into the gap between the door edge and the jamb. Adhesive-backed vinyl V-strips install just like foam tape: clean, measure, cut, peel, and press. Metal-backed versions may include pre-drilled screw holes. Position the strip so the fold faces into the gap, mark your screw locations with a pencil, and drive short screws every 8 to 12 inches. Either type should compress slightly when the door closes but not so much that the door won’t latch.
Installing foam tape in six steps:
- Measure the top, hinge side, latch side, and threshold separately with a tape measure.
- Cut foam strips 1/4 inch longer than each measurement with scissors or a utility knife.
- Peel back 2 inches of backing and align the tape along the door stop or jamb edge.
- Press firmly and roll forward, peeling more backing as you go. Avoid pulling or stretching.
- At corners, either butt the ends together or overlap slightly and trim with a knife.
- Close the door gently to check compression. You should feel light resistance but the latch should click easily.
Installing V-strips in six steps:
- Measure jamb lengths from top to bottom and cut V-strip to match.
- For adhesive versions, clean the jamb and peel backing. For screw versions, position and mark holes.
- Align the fold of the V so it points into the gap when the door is closed.
- Press adhesive strips firmly or pre-drill pilot holes and drive screws every 8 to 12 inches.
- Close the door halfway and check that the V compresses without buckling.
- Test the latch. If the door won’t close, remove the strip and choose thinner material or reposition slightly outward.
Foam tape typically lasts 6 to 24 months depending on sun exposure, temperature swings, and how often the door opens. V-strips, especially metal-backed ones, can last several years. Inspect both each fall and replace any sections that look compressed flat or have peeled loose.
Installing Door Sweeps to Block Under‑Door Drafts
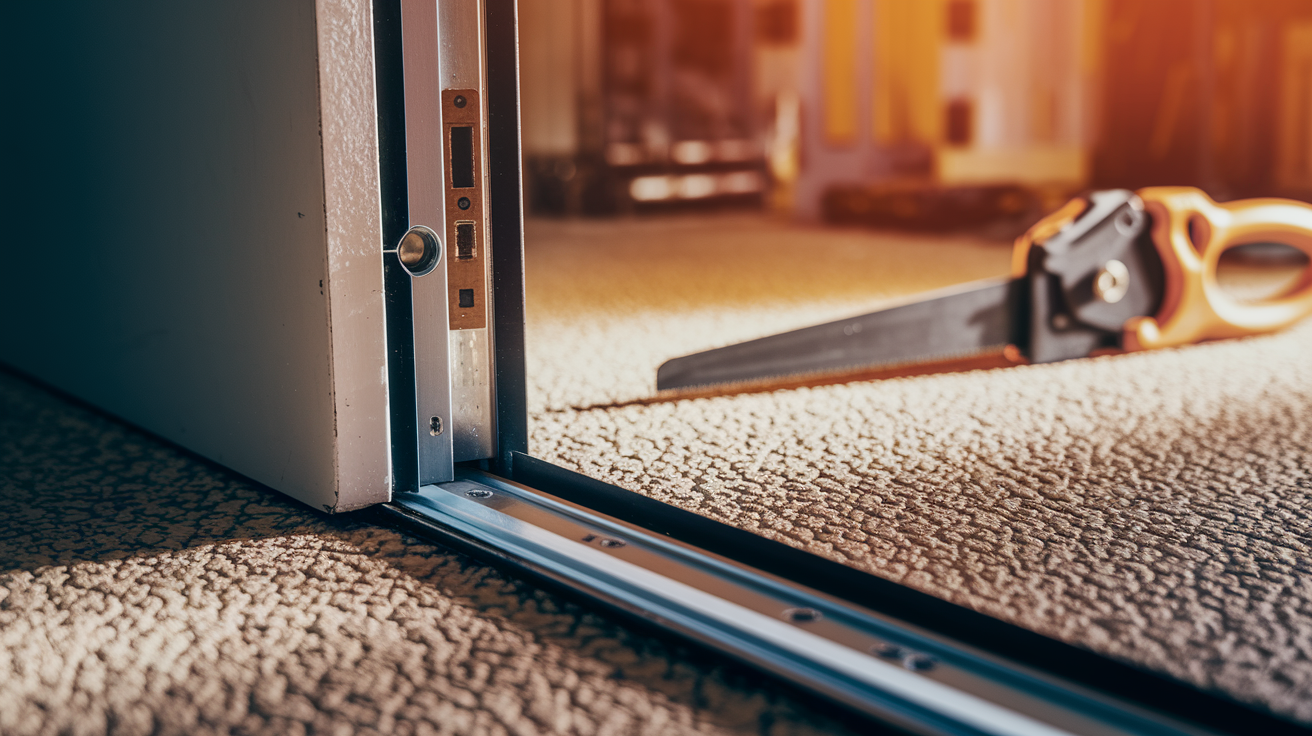
A door sweep mounts along the bottom edge of the door and drags a rubber blade or bristle strip across the threshold when closed. Measure your door width from edge to edge, then cut the sweep 1/4 inch shorter so it clears the door frame on both sides. Metal sweeps trim easily with a hacksaw, vinyl ones with heavy scissors or a utility knife. Most sweeps come with a pre-drilled metal or plastic mounting strip and a handful of screws.
Position the sweep so the flexible part just touches the threshold when the door is closed. Hold it in place, open the door slightly, and mark the screw holes with a pencil. Pre-drill pilot holes if you’re working with a metal door or hardwood to prevent splitting, then drive the screws snug but not tight enough to bend the mounting strip. Close the door and check that the sweep compresses slightly against the threshold without dragging or preventing the door from opening smoothly.
Six steps to install a door sweep:
- Measure door width and cut the sweep 1/4 inch shorter than that measurement.
- Smooth any rough edges on the cut with sandpaper or a file.
- Close the door and hold the sweep in position so the rubber or bristles just kiss the threshold.
- Mark screw-hole locations with a pencil, then open the door.
- Pre-drill pilot holes if needed and drive screws through the mounting strip into the door bottom.
- Close the door and test. The sweep should brush the floor without binding. Adjust height if your sweep has slotted screw holes.
Common sweep types:
Rubber-blade sweep: Single flexible lip. Best for even thresholds. Compresses well but can wear flat over time.
Brush sweep: Row of stiff bristles. Handles uneven floors better. Less airtight but longer-lasting.
Adjustable sweep: Slotted screw holes let you raise or lower the sweep after installation. Ideal for wavy thresholds.
Under-door slip-on sweep: Slides onto the bottom edge without screws. Quick install but may shift or fall off.
Overtightening the screws will warp the mounting strip and create gaps at the ends. If your threshold is badly uneven, a single sweep won’t seal everywhere. Consider an adjustable model or pair the sweep with a threshold cover to level the surface first.
Sealing Door Frame and Threshold Gaps with Caulk or Silicone
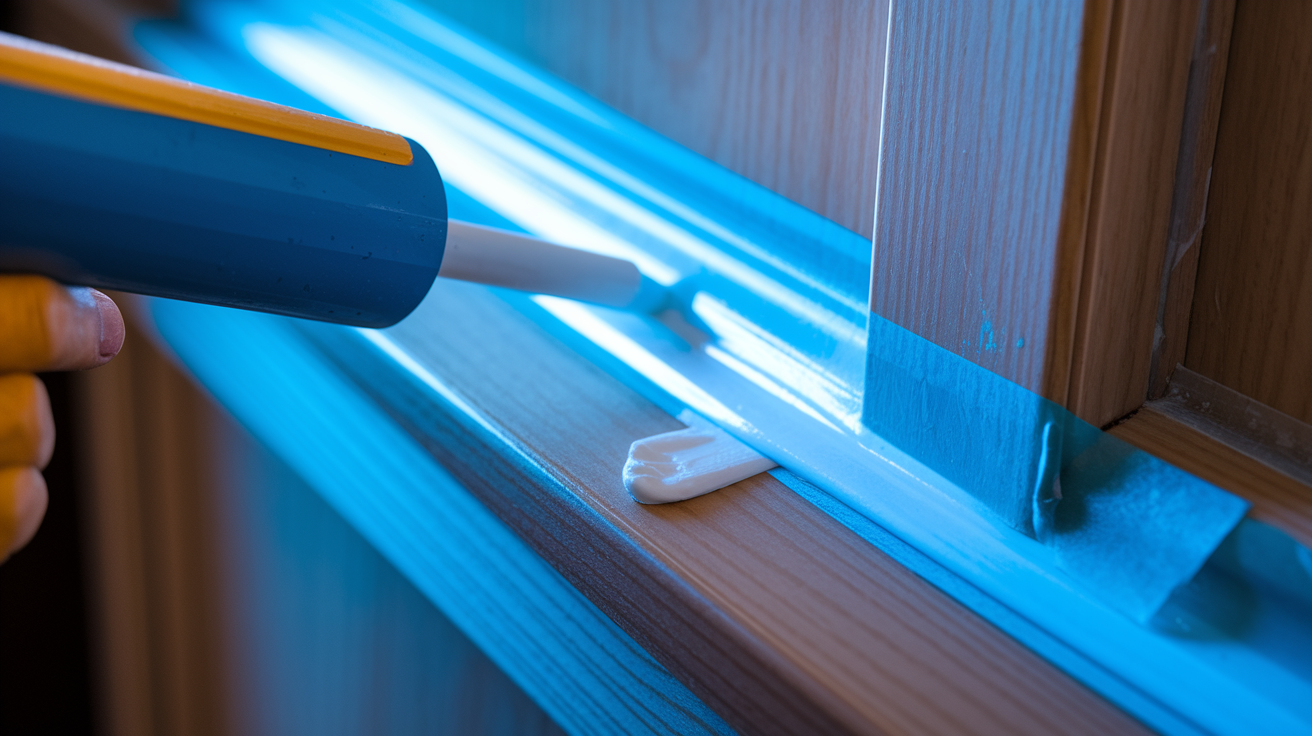
Caulk and silicone fill irregular voids where weatherstripping can’t reach. Around the exterior trim, between the threshold and the subfloor, or along the door jamb where it meets the wall. Acrylic latex caulk works indoors and paints over easily. Silicone sealant resists rain and temperature swings, making it the right choice for outdoor trim and thresholds. Both come in tubes that fit a standard caulking gun.
Start by scraping out old, cracked sealant with a putty knife and wiping the gap clean. Run strips of masking tape along both sides of the gap, about 1/8 inch back from the edge, to create crisp boundaries. Cut the tube nozzle at a 45-degree angle. Start with a small opening and enlarge it if needed. Hold the gun at a 45-degree angle and squeeze a continuous bead into the gap, moving steadily without stopping. Smooth the bead immediately with a wet finger or a small putty knife, then peel off the masking tape before the sealant skins over.
Seven steps to seal gaps with caulk or silicone:
- Clean the gap. Scrape out old sealant, dirt, and loose paint with a putty knife. Wipe with a damp cloth.
- Apply masking tape. Stick tape 1/8 inch back from both edges of the gap for neat lines.
- Cut the nozzle. Snip the tip at a 45-degree angle. Start small and test on scrap.
- Load the gun. Insert the tube, puncture the inner seal, and pump the trigger until sealant appears.
- Apply the bead. Hold the gun at 45 degrees and squeeze a continuous line into the gap without stopping.
- Smooth immediately. Wet your finger or a small tool and run it along the bead to press it in and shape it.
- Remove tape before drying. Peel the masking tape within 5 to 10 minutes. Let the sealant cure 24 hours before testing.
Choosing silicone vs caulk:
Use acrylic latex caulk for interior gaps around the door jamb, trim joints, and anywhere you plan to paint. It cleans up with water, dries in a few hours, and stays flexible enough to handle minor door movement. Use silicone sealant for exterior thresholds, bottom edges exposed to rain, and any joint that sees temperature swings or moisture. Silicone won’t accept paint but forms a tougher, longer-lasting seal. If you’re sealing both inside and outside, buy one tube of each rather than forcing the wrong product into the wrong location.
Allow a full 24 hours (or the time listed on the tube) before closing the door hard or testing the seal with water. Rushing this step leaves a weak bond that will peel or crack within weeks.
DIY Fabric Draft Stoppers and Temporary Under‑Door Fixes

A fabric draft stopper is a weighted tube you place against the bottom of the door from the inside. It won’t seal airtight, but it blocks enough wind to make a room noticeably warmer during a cold snap. Store-bought versions range from $12.99 for a basic foam-filled model to $41.90 for a wool-blend design with ceramic bead filling, but you can sew your own in 20 to 45 minutes using a yard of heavy fabric and a few pounds of dried rice, beans, lentils, or poly pellets.
Cut or fold fabric into a tube roughly 4 inches wide and as long as your door is wide, leaving an extra inch on each end. Sew three sides closed (or use fabric glue if you don’t own a sewing machine), then fill the tube about two-thirds full so it stays flexible and molds to uneven floors. Sew or tie the open end shut and position the stopper tight against the door bottom. For a no-sew version, fill a thick sock or pillowcase, twist the open end, and secure it with a rubber band or zip tie.
Five filler options for DIY draft stoppers:
Dried rice or beans: Cheap, heavy, and molds well. Can attract pests if left damp.
Poly pellets or plastic beads: Washable, won’t rot, slightly more expensive. Sold at craft stores.
Sand: Very dense and stays put. Makes the stopper stiff and harder to reposition.
Unused cat litter: Absorbs moisture, adds weight. Choose unscented clay litter.
Hollow-fiber stuffing: Lightweight and soft. Less effective at blocking wind but safe for homes with small kids or pets.
Temporary fixes work well if you rent or only need draft relief for a few weeks. A rolled-up towel wedged under the door costs nothing and takes five seconds to position. Heavy fabric or a folded blanket draped along the bottom edge adds insulation without tools or damage. These solutions must be moved every time you open the door, but they’re ideal for guest rooms, seasonal cabins, or apartments where you can’t screw hardware into the trim.
Draft Proofing for Sliding, French, Patio, and Internal Doors

Sliding and patio doors leak along the vertical jambs where the moving panel overlaps the frame and at the bottom track. Replace worn vertical jamb seals first. Peel off the old adhesive strip, clean the channel with rubbing alcohol, and press in a new felt or bristle strip cut to the full height of the door. Then check the bottom sweep. Most sliding doors have a removable plastic or rubber insert that slots into a groove along the lower edge of the panel. Pop out the old sweep, measure its length, cut a replacement to match, and snap it back into the groove. Costs for these parts run $15 to $60 depending on door size.
French doors present a central gap where the two panels meet. Weatherstrip each door’s perimeter with foam tape or V-strip as you would a single door, then add a vertical astragal seal (a strip of compressible rubber or foam) down the edge of the inactive panel. When you close the active door against it, the astragal compresses and blocks wind. Some astragals are adhesive, others screw into the door edge.
Internal doors between rooms don’t face weather but still leak conditioned air if you’re trying to heat or cool one zone at a time. A simple cushion draft stopper or adhesive foam strip along the bottom improves thermal efficiency and cuts noise. Keep internal doors closed when running heat or AC to make the most of any seal you add.
| Door Type | Best DIY Fix | Typical Cost Range | Difficulty |
|---|---|---|---|
| Sliding / Patio | Vertical jamb seals + bottom sweep replacement | $15–$60 | Easy |
| French Doors | Perimeter foam tape + vertical astragal seal on inactive panel | $10–$35 | Easy–Medium |
| Internal Doors | Cushion draft stopper or adhesive foam strip at bottom | $5–$20 | Easy |
| Garage Doors | Bottom rubber seal or threshold foam strip | $20–$100 | Medium |
For garage doors, focus on the bottom seal, a thick rubber strip that runs the full width of the door. Remove the old seal by pulling it out of the metal retainer channel, slide in a new one cut to length, and trim any excess. If the concrete floor is uneven, add a foam threshold strip along the inside edge to fill the void. These fixes take 30 to 90 minutes and dramatically reduce dust and cold air infiltration.
Common Mistakes When DIY Draft Proofing Doors

Skipping the cleaning step is the fastest way to waste money on weatherstripping that peels off in a week. Adhesive foam and V-strips need clean, dry surfaces to bond. Wipe down trim with rubbing alcohol and let it dry fully before pressing anything into place. Dirty or damp wood rejects adhesive, and you’ll be back at the hardware store buying replacements.
Choosing foam that’s too thick makes the door bind or fail to latch. Foam that’s too thin leaves gaps and does nothing. Measure the actual gap with a ruler or by closing the door on a strip of paper. If the paper slides out easily, you have room for thicker foam. If the door already touches the stop firmly, use the thinnest tape available or switch to a compression seal like a V-strip. Overtightening screws on door sweeps warps the mounting strip and creates end gaps that leak as much air as no sweep at all. Snug the screws until the sweep sits flat, then stop.
Six common mistakes to avoid:
Not cleaning before applying adhesive. Dirt, dust, or moisture prevents foam tape and V-strips from sticking. They peel within days.
Using foam that’s too thick or too thin. Thick foam prevents the door from latching. Thin foam compresses flat and stops sealing.
Overtightening sweep screws. Warps the mounting strip and leaves gaps at the ends. Screws should be snug, not cranked down.
Leaving masking tape on until sealant dries. Removes cleanly only while the sealant is wet. Waiting makes tape stick and ruins the edge.
Ignoring required ventilation. Sealing combustion-appliance vents or fresh-air intakes creates dangerous backdrafts. Never block required airflow.
Failing to test after installation. Always close the door and recheck with a smoke test or hand feel. Small gaps you miss will leak just as much as big ones.
Weatherstripping wears out. Foam tape lasts 6 to 24 months depending on UV exposure, temperature cycling, and how often the door opens. Inspect seals every fall and replace any that look compressed flat, torn, or peeling. V-strips and metal sweeps last longer (several years) but check screws annually and tighten any that have worked loose. If you sealed too tightly and the door won’t close, peel up the weatherstripping, reposition it slightly away from the stop, or switch to thinner material rather than forcing the latch.
Final Words
Start by testing the door, use a candle or incense to spot air movement, measure gaps, then choose foam, V-strip, sweep, or caulk by gap size.
This guide covered tools, prep, step-by-step installs, temporary door socks, and fixes for sliding and French doors. Avoid dirty surfaces and wrong-thickness foam. If you follow the steps, draft proofing doors diy becomes quick and low-cost. You’ll feel less chill, see smaller bills, and have a door that closes tight. You’ve got this.
FAQ
Q: How to make door draft proof?
A: To make a door draft proof, find gaps with a smoke test, then pick fixes by gap size: foam tape for tiny/small gaps, V‑strip for edges, a door sweep for the bottom, and caulk or silicone for frame gaps.
Q: What is the best filling for draft stoppers?
A: The best filling for draft stoppers is weighted, dry material like rice, dried beans, sand, cat litter, or plastic pellets, and choose washable or removable liners to keep the tube clean and avoid moisture.