

Tired of feeling a cold breeze from your windows even when the heat is on?
You don’t need to replace the whole window to stop it.
In this post we’ll show simple tests to find leaks, the right materials for each gap, and step-by-step fixes you can do in an afternoon with basic tools.
Do the work once, and you’ll get a warmer house, less noise, and lower energy bills.
Identifying Window Drafts and Locating Air Leaks Effectively

Finding the exact spots where cold air sneaks in is the first step. If you don’t know where the leak is, you can’t fix it. Start on a chilly, windy day when the temperature difference between inside and outside makes airflow easier to spot. Turn off any fans or HVAC systems that could mess with the test, and walk slowly around each window with your hand raised near the frame, sash, and sill. You’ll feel a cool breeze or temperature drop at the leak points.
The fastest way to confirm a draft is the candle or incense test. Light an incense stick (or a long candle if you don’t have incense) and hold it about an inch away from the window frame, moving slowly along every edge. Top, bottom, sides, and where the sash meets the frame. Watch the smoke closely. If it wavers, gets pulled toward the window, or moves sideways, you’ve found an air leak. The wet hand test works too. Wet your hand under the faucet, shake off the drips, and hold it still near suspect areas. Cold air moving across damp skin feels noticeably cooler and helps you zero in on smaller leaks you might miss by sight alone.
Visual clues tell you a lot before you even light the incense. Look for cracked or missing caulk along the outside edge where the window meets the siding. Check for condensation or fog trapped between double pane glass. That’s a sign the seal has failed. Rattling frames when you open or close the window, visible gaps in the sash or frame, peeling paint near the sill, or daylight showing through closed window edges all point to air leaks that need sealing.
Most common window leak locations:
- Gap between window frame and exterior siding where the house structure meets the window unit.
- Bottom sash rail on double hung windows which is the horizontal piece at the base of the lower movable pane.
- Lock side of casement windows especially if the handle doesn’t latch tightly or the gasket is compressed unevenly.
- Meeting rail on double hung windows where upper and lower sashes overlap in the middle.
- Corners of the window frame where vertical and horizontal frame pieces meet, often the first place caulk cracks.
- Sliding window track edges where the movable panel sits against the side channel or bottom track.
Materials and Tools Needed to Seal Window Drafts Properly

Before you start, gather everything in one trip so you’re not running back to the hardware store mid project. You’ll need a caulking gun. Spend a few extra dollars on a thumb release model instead of the cheap twist release type, because the thumb version lets you stop the bead cleanly without drips. Grab a utility knife or scissors for cutting weatherstripping and caulk tube tips, a measuring tape, a scraper or razor blade for removing old caulk, and basic cleaning supplies. Rubbing alcohol or soapy water and a rag work fine. For larger gaps, pick up a foam backer rod and a can of low expansion spray foam. If you’re working on exterior frames, a flathead screwdriver helps seat weatherstripping into tight channels.
Caulk choice matters more than most people think. Silicone caulk is your best bet for exterior gaps and anywhere that sees weather. It stays flexible through hot summers and freezing winters, bonds to most surfaces, and resists water for years. The downside is you can’t paint over pure silicone, so it stays visible. If you need a paintable exterior seal, use polyurethane caulk, which is almost as durable and accepts paint after it cures. For interior window edges or spots you plan to paint, silicone latex (also called “acrylic latex with silicone”) gives you moisture tolerance, flexibility, and paintability in one tube. Avoid plain acrylic caulk for windows. It doesn’t expand and contract well with temperature swings and will crack within a year or two.
Complete materials list:
Caulking gun (thumb release style preferred), silicone caulk (exterior), polyurethane caulk (exterior, paintable), or silicone latex caulk (interior). Weatherstripping such as foam tape, V seal strips, or adhesive backed rubber, depending on gap size and window type. Low expansion spray foam for gaps wider than 1/4 inch. Foam backer rod (cylindrical foam rope for filling deep gaps before caulking). Utility knife or scissors. Scraper or razor blade. Measuring tape. Cleaning supplies like rubbing alcohol or soapy water and rags.
Step by Step Window Sealing Instructions Using Caulk

Caulking works for gaps up to about 1/4 inch wide. Anything wider needs a backer rod first or low expansion foam instead. If the gap is deeper than it is wide, push a foam backer rod into the space with your fingers until it sits just below the surface, then caulk over it. The rod keeps the caulk from sinking too deep and gives you a proper seal at the surface where air actually moves.
Start by scraping out all the old caulk with a utility knife or a scraper. Don’t skip this. New caulk won’t stick to old, cracked material, and you’ll just have to redo it next year. Once the joint is clear, wipe it down with rubbing alcohol or soapy water and let it dry completely. Wet surfaces won’t hold caulk. Cut the tip of the caulk tube at a 45 degree angle, starting small. You can always cut more off if the bead is too narrow, but you can’t make the opening smaller once it’s cut. Load the tube into your caulking gun with the plunger rod pulled all the way back, then push the rod forward until you feel light resistance.
Hold the gun at a 45 degree angle to the joint and squeeze the trigger steadily while pulling the gun along the gap. Keep your speed consistent so the bead stays even. If the line gets messy, don’t panic. Most first beads look a little rough. The trick is to smooth it right away with a damp finger or a caulk smoothing tool (a plastic spoon works too). Wet your finger under the faucet, shake off the drips, and run it along the fresh bead in one smooth motion from end to end. Wipe your finger on a rag between passes to keep it clean.
Caulking steps in order:
- Remove old caulk and debris. Scrape with a utility knife or razor until the joint is clean and bare.
- Wipe the surface. Use rubbing alcohol or soapy water, then let it dry fully (wait 10 to 15 minutes).
- Insert backer rod if needed. For gaps wider than 1/4 inch, press foam backer rod into the joint until it sits slightly below the surface.
- Cut the caulk tube tip. Start with a small cut at 45 degrees. You can always enlarge the opening if the bead is too thin.
- Load the caulking gun. Push the tube in with the plunger pulled back, then advance the plunger until it touches the tube base.
- Apply a steady bead. Hold the gun at 45 degrees, squeeze evenly, and pull along the joint at a consistent speed.
- Smooth the bead immediately. Wet your finger or a tool, and run it along the fresh caulk to press it into the gap and create a clean line.
Weatherstripping Application for Sliding, Casement, and Double Hung Windows

Weatherstripping seals the movable parts of a window where caulk can’t go. Places like the bottom of a sliding sash, the edges of a casement window, or the meeting rail where two sashes touch. The key is choosing the right profile and material for your window type and gap size. Foam tape works well for small, consistent gaps up to about 1/4 inch. It’s cheap, self adhesive, and easy to cut with scissors. V seal (also called V strip or tension seal) is a folded plastic or metal strip that compresses when the window closes, making it perfect for sliding windows and the sides of double hung sashes. For larger gaps at entry doors or wide opening casement windows, adhesive backed rubber provides a thicker, more durable seal that can handle repeated use and bigger drafts.
Measure the full perimeter of the area you’re sealing. Top, bottom, and both sides if needed. Then add an extra inch or two so you don’t come up short. Peel off any old weatherstripping first and scrape away leftover adhesive with a razor blade or scraper. Clean the channel or frame edge with rubbing alcohol and let it dry. Cut your new weatherstripping to length, peel the backing off a few inches at a time (not all at once), and press it firmly into place as you go. For compression gaskets or valley mounted strips, seat the material fully into the channel with your fingers, then use a flathead screwdriver to push any stubborn sections down so they sit flat and even.
Check that the window still opens and closes smoothly after you install the strip. If it binds or feels too tight, the weatherstripping might be too thick for that gap, or it’s folded over on itself. Pull it out and try a thinner profile or reposition it so it’s straight. The seal should compress slightly when the window is closed but not so much that you have to force the latch.
Best Weatherstripping Types by Window Style
Different window designs leak in different places, and the best weatherstripping profile matches how the window moves and where the gap is. Casement and awning windows swing open on hinges, so compression gaskets work best. They squash down when you latch the window and spring back when you open it. Sliding windows and double hung sashes move along tracks or channels, so you need a strip that stays flexible and doesn’t bind the movement. Sweep pile (a fuzzy strip) or V seal strips slide easily and still block air. Aluminum sliding glass doors use the same principle but need a tougher material like a Mylar fin seal that can handle heavier, more frequent use.
| Window Type | Recommended Weatherstripping | Typical Gap Size | Durability Notes |
|---|---|---|---|
| Casement & Awning | Compression gasket (bulb or D profile) | 1/8″ to 3/8″ | High durability, replace every 3 to 5 years if gasket flattens |
| Double Hung | Sweep/pile strip or V seal on sides and meeting rail | 1/16″ to 1/4″ | Medium durability, check twice a year and replace worn sections |
| Sliding (horizontal) | V seal or sweep/pile along top, bottom, and side channels | 1/16″ to 1/4″ | Medium durability, dirt and debris can compress pile over time |
| Aluminum Sliding Glass Door | Mylar fin strip in side channel | 1/8″ to 1/4″ | High durability, rigid fin resists wear from frequent opening |
| Fixed Pane (non opening) | None needed, use caulk between frame and siding instead | Varies | Caulk lasts 5 to 10 years if applied correctly |
Using Spray Foam and Backer Rod to Seal Larger Window Gaps
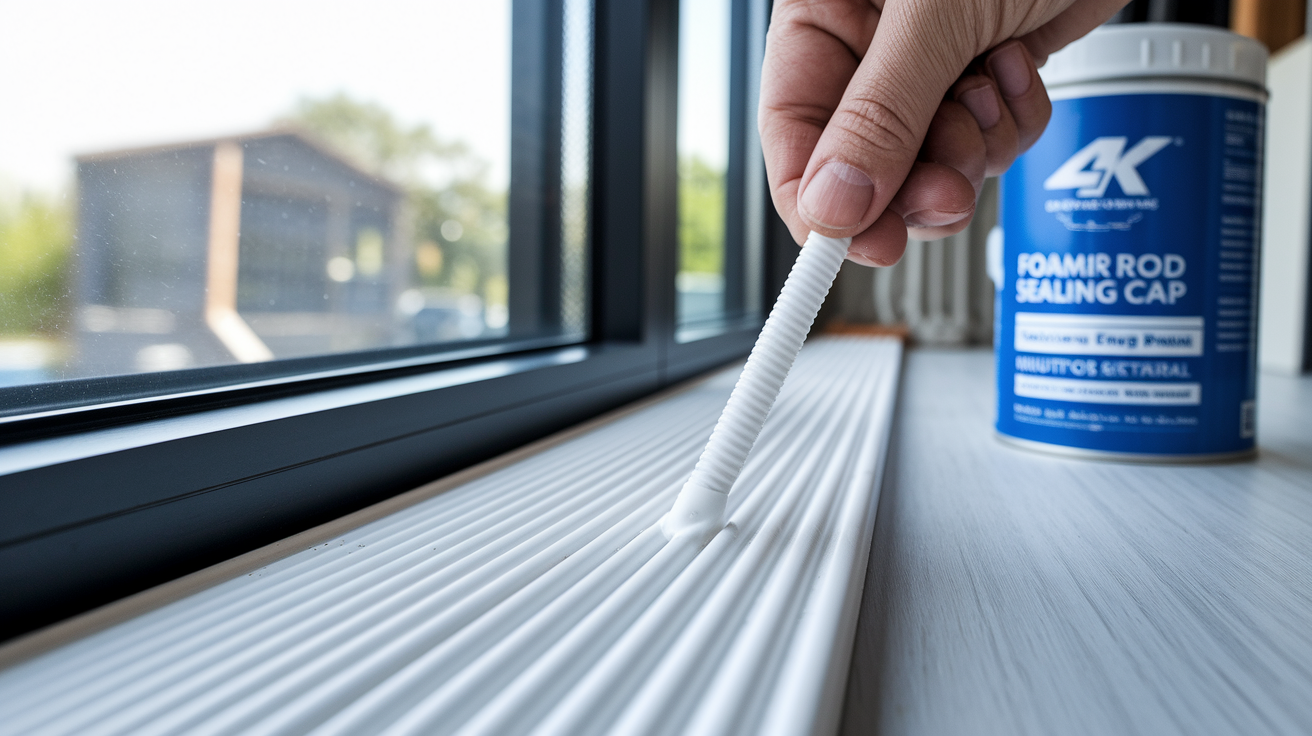
When the gap between your window frame and the rough opening in the wall is wider than a quarter inch, regular caulk won’t cut it. It’ll just sink into the void and leave you with an air path underneath. That’s where foam backer rod and low expansion spray foam come in. Backer rod is a soft, round foam rope that you press into the gap by hand until it fills the space to just below the surface. Then you run a bead of caulk over the top to seal it smooth. This two step approach gives you a solid fill without wasting half a tube of caulk trying to bridge a deep crack.
For cavities or voids too irregular for backer rod (like around a rough window opening where the framing is uneven), use low expansion spray foam. The “low expansion” part is critical. High expansion foam (the kind sold for big insulation jobs) can push with enough force to warp your window frame or crack the surrounding drywall, and once it’s cured you can’t undo it. Low expansion foam grows just enough to fill the space without pressure. Shake the can for about 30 seconds, insert the plastic straw into the gap, and squeeze the trigger in short bursts, moving along the void. The foam will expand slightly over the next hour. Let it cure fully (usually 2 to 4 hours depending on temperature) then trim off any excess that bulges out past the frame with a utility knife. You can caulk or paint over the trimmed foam if needed.
Never use spray foam in spots where the window needs to move, around weep holes, or anywhere water needs to drain. Foam blocks drainage and can trap moisture inside the wall, which leads to wood rot and mold over time. Stick to structural voids and gaps where nothing moves and no water should flow.
Safe spray foam application steps:
- Confirm the gap size. Measure the width. If it’s wider than 1/4 inch and too irregular for backer rod, spray foam is the right choice.
- Shake the can for 30 seconds. This mixes the chemicals inside so the foam expands evenly.
- Insert the straw into the gap. Aim for the back of the void, not the front edge, so the foam fills from deep to shallow.
- Apply in short bursts. Squeeze the trigger for 1 to 2 seconds, move a few inches, squeeze again. Don’t overfill or it will push out too far.
- Let it cure fully. Wait 2 to 4 hours (check the can label) before you touch it. The foam will feel firm and dry when it’s ready to trim.
Temporary and Seasonal Window Draft Solutions

Not every draft fix has to be permanent, and some of the fastest, cheapest solutions are designed to come off when the weather warms up. Temporary fixes work great for renters, for windows you plan to replace next year, or for rooms you only use in winter. They won’t look as polished as weatherstripping and caulk, but they stop cold air fast and cost almost nothing.
The most popular temporary fix is plastic window insulation film. You buy a kit with double sided tape and a large plastic sheet, apply the tape around the inside edge of the window frame, press the plastic onto the tape, and then shrink it tight with a hairdryer on medium heat. The plastic creates an insulating air gap between the cold glass and your room, and when winter ends you just peel off the tape and throw the film away. Rope caulk (also called mortite) is another removable option. It’s a sticky putty that you press into gaps by hand, and you can pull it out in the spring without leaving residue. Draft snakes (long fabric tubes filled with sand or poly fill) sit on the windowsill or at the base of the door to block air that sneaks under the sash. Thermal curtains or insulated cellular shades add another layer of defense by trapping air between the fabric and the glass.
Quick temporary draft blockers:
Plastic window insulation film kit (shrink tight with hairdryer). Rope caulk (removable putty for small gaps and sash edges). Draft snakes or draft stoppers (fabric tubes for sills and door bottoms). Thermal curtains or blackout drapes (hang close to the window). Heavy blankets or quilts pinned over the window frame (low cost emergency fix). Temporary adhesive weatherstripping (peel and stick foam you can remove in spring).
The downside of temporary fixes is they don’t address the root cause. Your window still leaks, you just covered it up for a few months. They also tend to look utilitarian, not finished. But if you’re in a rental, on a tight budget, or waiting for a contractor to replace the windows next summer, temporary solutions let you stay comfortable and keep your heating bill down without committing to permanent changes.
Where Not to Apply Caulk When Sealing Windows

Sealing every crack sounds logical, but some gaps are there on purpose, and caulking them will cause water damage, trapped moisture, and expensive repairs. The biggest mistake DIYers make is sealing weep holes. Those small slots or openings at the bottom of the exterior window frame. Weep holes let water drain out of the frame cavity when rain gets past the glass or condensation forms inside the sill. If you caulk them shut, water has nowhere to go, so it soaks into the wood framing, rots the sill, and eventually leaks into your wall. Leave weep holes open and clear of debris.
The drip ledge (also called a drip cap) is the small overhang or metal flashing above the top of the window on the exterior. Its job is to shed water away from the frame. Caulking along the top edge of the drip ledge traps water against the wall instead of letting it run off. The same rule applies to decorative exterior trim around windows. If there’s a gap between the trim and the siding, it’s usually there to let moisture escape from behind the trim. Sealing it can trap water inside the wall cavity.
Never caulk the moving parts of the window. The sash edges on a double hung window, the hinge side of a casement, or the sliding track on a horizontal slider. Caulking these spots glues the window shut or makes it bind when you try to open it. Use weatherstripping on moving parts, not caulk.
Four places you must never caulk:
Weep holes. Small drainage slots at the bottom of the exterior window frame. Caulking them traps water and causes wood rot.
Drip ledge or drip cap. The top edge overhang that sheds rain away from the window. Sealing it forces water against the wall.
Decorative exterior trim gaps. Intentional gaps that let trapped moisture escape from behind the trim boards.
Moving window parts. Sash edges, hinge sides, sliding tracks, or casement latches. Caulk will glue them shut or create binding.
Energy Savings, Heat Loss Prevention, and Cost Benefits

Leaky windows account for up to 30 percent of your home’s heating and cooling energy loss. That’s a big chunk of your utility bill disappearing through cracks you can see and feel. Every time your furnace or air conditioner runs, some of that treated air is slipping outside while cold or hot outdoor air is pushing in to replace it. Your HVAC system has to work longer and harder to keep the temperature stable, which means higher energy bills every month and more wear on your equipment. Sealing windows is one of the fastest, lowest cost ways to cut that waste and see savings start to show up within the first heating or cooling season.
The cost to seal a window yourself runs somewhere between five and twenty dollars per window, depending on how much weatherstripping and caulk you need. Compare that to a few hundred dollars per window for professional sealing or a few thousand per window for full replacement, and the DIY route pays for itself in a season or two just from the energy savings. Beyond the monthly bill, sealing windows also stops moisture from sneaking into your walls, which prevents mold, mildew, and wood rot. Problems that cost hundreds or thousands to repair if you catch them late.
Four benefits of sealing window air leaks:
Lower heating and cooling bills. Less conditioned air escapes, so your HVAC runs less often and uses less energy.
More consistent indoor temperature. Fewer drafts mean rooms stay comfortable without hot or cold spots near windows.
Reduced moisture intrusion. Sealed gaps keep rain and humid air out of wall cavities, preventing mold and rot.
Longer HVAC equipment life. Your furnace and air conditioner don’t have to cycle as often, which reduces wear and delays expensive replacements.
When to Call a Professional for Window Sealing or Replacement

Most window air leaks are DIY friendly, but some situations need a pro with the right tools, experience, and warranty backing. If you’ve sealed every visible gap with caulk and weatherstripping and you still feel a strong draft, the problem might be hidden. Inside the wall cavity, behind the interior trim, or in the rough opening where the window was installed. Pros have thermal cameras and blower door testing equipment that can pinpoint leaks you can’t see or reach without tearing into the wall.
Structural damage is the clearest sign you need professional help. If the window frame is cracked, the wood sill is soft or rotting, or you see water stains on the drywall around the window, the leak has been there long enough to cause serious harm. At that point, sealing the surface won’t fix the underlying rot or mold. You need the damaged wood replaced and the window reinstalled correctly with proper flashing and a moisture barrier. Large gaps between the window and the wall framing (bigger than about half an inch) often mean the window was installed poorly or has shifted over time, and a pro can shim, re square, and seal it so it actually sits square in the opening.
Failed seals on double pane windows show up as persistent fog or condensation trapped between the two layers of glass. You can’t fix that from the outside. The sealed unit itself has failed, and the only real solution is replacing the glass or the entire window. Some manufacturers cover seal failure under warranty, so check your paperwork before paying out of pocket.
Five signs it’s time to call a professional:
Drafts persist after you’ve sealed all visible gaps. Hidden leaks inside the wall or rough opening need diagnostic tools and access behind the trim.
Visible wood rot, soft spots, or water stains around the window frame. Structural damage requires wood replacement and proper flashing, not just caulk.
Gaps wider than 1/2 inch between window frame and wall. The window may have shifted or been installed incorrectly and needs shimming and reinstallation.
Fog or condensation trapped between double pane glass. The sealed unit has failed and typically requires glass or full window replacement.
Cracked or broken window frames, especially on older wood or aluminum units. Damaged frames can’t hold a proper seal and may need replacement to stop leaks permanently.
Final Words
Get ready to act: find drafts with a candle or by feeling for cold spots, then gather caulk, weatherstripping, backer rod, and low-expansion foam. Seal small gaps first, use backer rod for wide voids, and match weatherstripping to the window type.
Don’t block weep holes or seal moving parts. If drafts persist or frames are rotten, call a pro. Learning how to seal air leaks around windows cuts energy loss and makes your place more comfortable—quick wins you’ll notice right away.
FAQ
Q: How to seal air gaps around windows?
A: Sealing air gaps around windows involves locating leaks, using caulk for small cracks, weatherstripping sash gaps, and filling larger voids with backer rod plus low-expansion spray foam, then smoothing and curing.
Q: What can I use to seal an air leak?
A: To seal an air leak you can use silicone or acrylic caulk for tight joints, self-adhesive weatherstripping for moving sashes, low-expansion spray foam and backer rod for wide gaps, or rope caulk temporarily.
Q: Is it better to spray foam or caulk around windows?
A: Choosing spray foam or caulk around windows depends on gap size: use caulk for joints and gaps up to about 1/4 inch; use low-expansion spray foam with backer rod for larger cavities, avoid high-expansion foam.
Q: What is the best way to seal drafty windows?
A: The best way to seal drafty windows is to inspect for leaks with a candle or wet hand, repair cracked caulk, install appropriate weatherstripping on sashes, and fill bigger gaps with backer rod and low-expansion foam.