

Letting cold air sneak in through your windows is basically throwing money out the window every night.
You can stop it with simple, low-cost fixes that take minutes or a weekend.
This guide shows how to find drafts the easy way, then seal them fast using shrink film, foam and rubber weatherstrips, caulk for stationary gaps, and sash or glazing repairs for older windows.
Whether you’re renting or fixing a drafty old house, you’ll have step-by-step options to keep heat in and bills down.
Immediate Draft-Proofing Methods to Seal Window Gaps Fast

Before you fix a draft, you need to find it. The candle test is dead simple. Light a stick candle and move it slowly along window edges, frames, and meeting rails. Watch the flame. If it flickers, bends, or pulls toward the window, you’ve got incoming air. You can also use the back of your hand on a cold, windy day. Move it around the entire window perimeter, sash, and sill. You’ll feel the temperature change where air sneaks through.
Once you know where the leak is, quick seal solutions let you shut it down in minutes. For tiny gaps along frames, rope caulk works perfectly. Just press it into cracks with your finger and smooth it flat. Painter’s tape can cover micro gaps in an emergency, though it’s best used overnight or for a few days, not all winter. Foam strips made for windows snap onto meeting rails where the top and bottom sash come together. Thermal curtains won’t seal the gap, but closing them at night keeps warm air from escaping through cold glass. Reusable silicone seals press into frame corners and stay flexible through temperature swings.
Temporary fixes are ideal if you’re renting, if the cold snap is short, or if you need time to budget for permanent upgrades. Most can be removed in spring without damaging paint or wood. Shrink film kits are seasonal solutions that block drafts completely but prevent you from opening the window while the film is up. The tape included with these kits is designed to pull off clean, with no sticky residue left behind.
Here are six simple quick fixes you can do right now:
- Apply temporary shrink film using the included double sided tape, then shrink it tight with a hair dryer on the highest setting.
- Use painter’s tape to block micro gaps in emergencies when you need an instant fix.
- Add rope caulk to small cracks along the frame or where trim meets the wall.
- Install temporary foam strips on the sash meeting rails where the two halves of the window close together.
- Close thermal curtains at night to hold heat near the room and reduce loss through the glass.
- Press reusable silicone seals into frame corners or along the sides where gaps appear.
Draft-Proofing Windows with Reliable Weatherstripping Materials

Weatherstripping is the go to solution for sealing gaps around windows that open and close. Foam tape is the most affordable and easiest to install. Just peel and stick. But it wears out faster, especially on windows you use a lot. Foam works best on windows you rarely open, like upper story units or basement casements. Rubber, vinyl, and silicone strips are more durable and handle repeated compression better. They’re the right choice for frequently used windows like those in the kitchen or living room. All of these materials come in different widths and thicknesses, and the packaging will list the size range so you can match the strip to your gap.
Choosing the right thickness is just as important as picking the right material. The weatherstrip needs to be thick enough to fill the gap and create pressure when the window closes. But not so thick that the window won’t latch or lock. Hold the window sash in the closed position and look at the gap between the sash and the frame. Measure it if you can, or use your finger to estimate how much room you have. If the strip is too thin, it won’t seal. Too thick and you’ll force the window and warp the frame over time.
Foam weatherstripping usually lasts one to two seasons before it starts to flatten, crack, or peel away. Rubber and vinyl last three to five years, depending on exposure to sun and movement. Silicone strips are the most durable and can hold up for five years or more, even on south facing windows that get a lot of UV. Plan to inspect your weatherstripping every fall and replace any sections that look compressed, torn, or loose.
Installing Weatherstripping Step-by-Step
Installing weatherstripping is one of the easiest window upgrades you can do. Clean the surface where the strip will go. Use rubbing alcohol or a damp cloth to remove dust, old adhesive, and grime, then let it dry completely. Measure the length you need by holding the strip along the edge of the frame or sash, and cut it to size with scissors or a utility knife. Peel off the adhesive backing a few inches at a time so the strip doesn’t stick to itself or collect dust. Press the strip firmly into place, working from one end to the other, and make sure it sits flat without gaps or wrinkles. Close the window gently to test the seal. You should feel resistance, and the window should still latch without forcing it.
Here’s the full sequence in five stages:
- Clean the window frame and sash with rubbing alcohol or a damp cloth, then dry completely.
- Measure the length of each side where weatherstripping is needed.
- Cut the weatherstripping to the correct size using scissors or a sharp utility knife.
- Peel the adhesive backing off slowly, a few inches at a time, to keep it clean.
- Press the strip firmly along the frame, then close the window to check fit and compression.
Using Caulk and Sealants to Close Persistent Window Frame Gaps
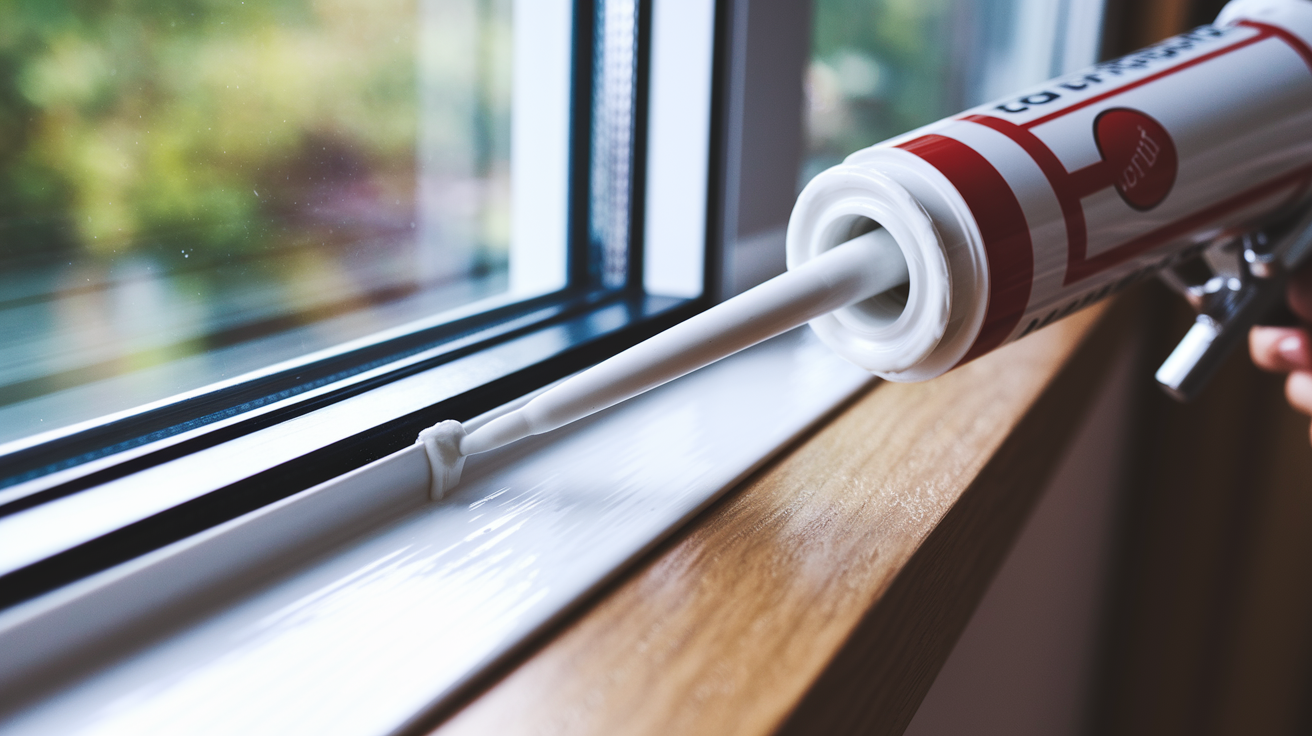
Caulk is for sealing stationary gaps. Places where the window frame meets the wall, trim joins the sill, or small cracks run along the exterior casing. Weatherstripping handles the parts that move, like sashes and hinges. If you see a gap that doesn’t open and close, caulk is the right fix. Silicone caulk is flexible, waterproof, and lasts longest outdoors or in damp areas like bathrooms. Acrylic latex caulk is easier to clean up, paintable, and works well indoors or in low moisture spots. For exterior window frames, use silicone or a hybrid silicone acrylic labeled for outdoor use. It flexes with temperature changes and won’t crack when the frame expands in summer or contracts in winter.
Caulk degrades over time, especially on the exterior. UV exposure, rain, and freeze thaw cycles break it down. If you see cracked, missing, or peeling caulk around your windows, it’s time to refresh it. Old caulk won’t seal properly even if it looks mostly intact. Air and moisture can sneak through tiny cracks you can’t see. Scrape out the old material completely before applying a new bead. Leaving old caulk in place creates a weak bond and traps moisture between layers.
Here’s the full caulking process in five steps:
- Remove all old caulk with a putty knife or caulk removal tool, scraping down to bare wood or material.
- Clean the gap with a damp cloth to remove dust, debris, and loose paint.
- Dry the surface completely. Wet surfaces prevent caulk from sticking.
- Apply a smooth, continuous bead of caulk along the gap, moving the gun steadily without stopping.
- Allow the caulk to cure fully according to package directions before exposing it to moisture or temperature extremes.
Window Insulation Film and Other Seasonal Insulating Options

Window insulation kits use clear shrink film and double sided tape to create an airtight barrier over the entire window opening. The film traps a layer of still air between itself and the glass, which cuts heat loss and stops cold drafts from radiating into the room. Kits like the M-D Polar Block Clear Window Indoor Insulation Kit come with everything you need. Shrink film cut to common window sizes and rolls of double sided tape engineered to stick to trim and peel off clean in spring. Once the film is up, you can’t open that window until you remove it, so these kits work best on windows you don’t use during cold months.
Thermal curtains add another layer of insulation by blocking heat from escaping through the glass at night. They work best when kept closed from dusk until morning, but they also block natural light and reduce passive solar warming during the day. If your main goal is stopping drafts, film is more effective. If you want to reduce overall heat loss and don’t mind the darkness, thermal curtains help. You can use both together for maximum effect.
Applying Shrink-Film Insulation
Clean the window frame, glass, and trim thoroughly before you start. Dust and grease prevent the tape from sticking. Apply the double sided tape around the entire perimeter of the window trim, pressing it firmly so it bonds. Unroll the film and press it onto the tape, working around all four sides and leaving some slack in the middle. The film will look loose and wrinkled at this point. Set your hair dryer to its highest heat setting and hold it a few inches from the film, moving slowly across the surface. The heat shrinks the film tight, pulling out wrinkles and creating a smooth, clear barrier that looks almost invisible.
Common mistakes that weaken the seal:
- Starting with dirty frames or trim, which prevents tape from bonding and causes the film to pull loose.
- Applying tape loosely or skipping corners, creating gaps where air leaks through.
- Overheating the film by holding the dryer too close or too long, which can melt holes or cause it to pull away from the tape.
- Sealing over wet or damp surfaces, which prevents adhesion and traps moisture under the film.
Draft-Proofing Older, Sash, Wooden, and Sliding Windows
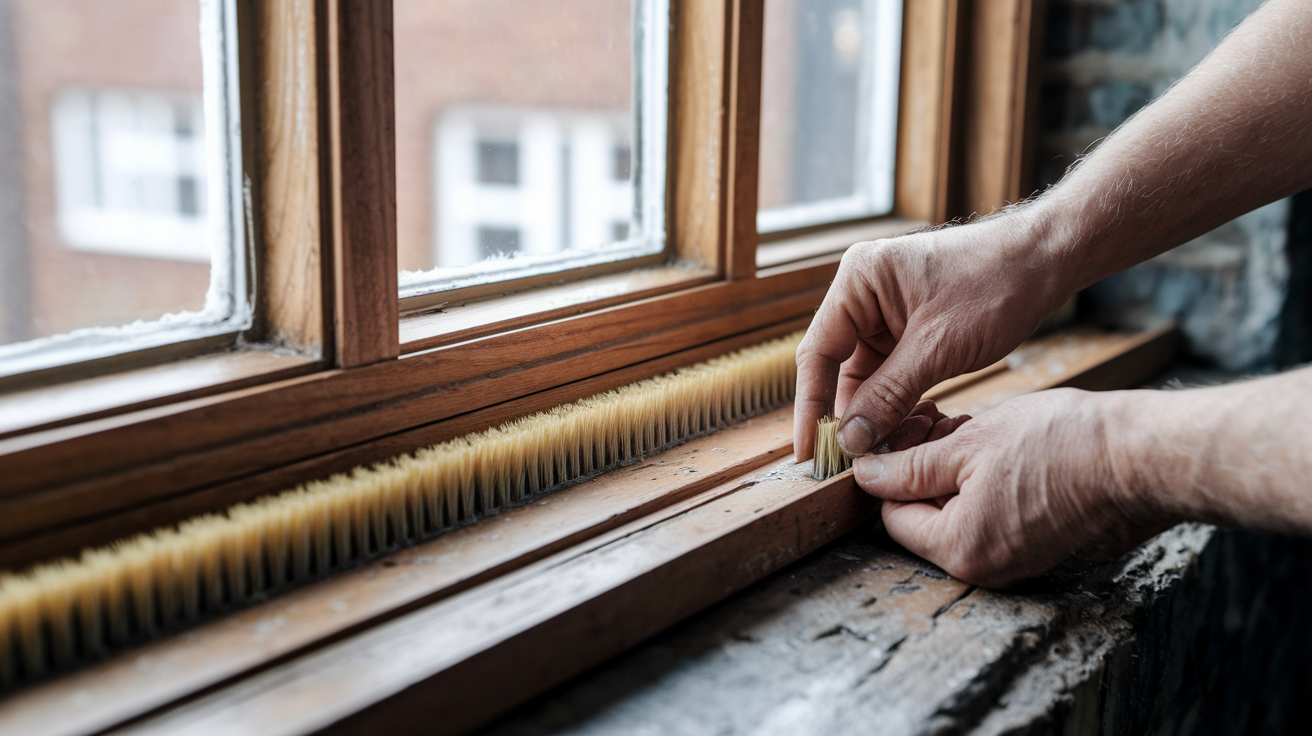
Older wooden windows often leak air around the sash boxes, along glazing putty that’s cracked or missing, and where the top and bottom sash meet in the middle. Sash windows move up and down in channels, and those channels wear over time, creating gaps that let cold air pour in. Use the candle test to pinpoint where air is entering. Move the flame along the sides of both sashes, across the meeting rail, and around the glazing where glass meets wood. If the putty is brittle or falling out, you’ll need to scrape it clean and reapply fresh glazing compound to seal the glass back into the frame.
Brush pile seals work well on sash windows because they compress when the window closes but don’t add so much bulk that the sash binds in the channel. Silicone or vinyl V-strip weatherstripping also works for the sides of the sash where it slides against the frame. Foam strips are fine for sash windows you never open, but they flatten quickly if you raise and lower the window often. For the meeting rail where the two sashes come together, use a thin foam or rubber strip that compresses tightly without blocking the lock.
Sliding windows leak where the moving panel overlaps the fixed panel and along the bottom track. The track often collects dirt and debris that prevents the panel from seating fully, so vacuum it out and wipe it clean before adding weatherstripping. Use adhesive backed foam or brush seal along the sides of the sliding panel, and add a compression bulb seal or silicone strip to the top edge where the panel meets the frame.
| Window Type | Most Effective Seal Method |
|---|---|
| Double-hung sash windows | Brush pile seals on channels; V-strip on meeting rail |
| Wooden casement windows | Foam or rubber gasket around hinged edge; silicone on latch side |
| Horizontal sliding windows | Brush seal on panel sides; compression bulb on top edge |
| Fixed or rarely opened units | Foam tape or rope caulk; caulk stationary frame gaps |
Tools, Materials, and Cost Estimates for Window Draft-Proofing

You won’t need power tools or specialized equipment to draft proof your windows. Most jobs require only a few household items. Rubbing alcohol or all purpose cleaner, a lint free cloth, scissors or a utility knife, a tape measure, and a hair dryer if you’re installing shrink film. For caulking, add a caulk gun and a putty knife or scraper to remove old material. If you’re sealing more than a few windows, a small step stool and a headlamp make the job easier and safer. Skill level is beginner friendly. If you can measure, cut, and press things into place, you can seal a window.
Most homeowners can seal a standard double hung window in about 15 to 20 minutes once they’ve done one or two. Caulking takes a bit longer because you need to scrape, clean, and wait for the bead to dry. For a typical house with ten to twelve windows, expect to spend a full Saturday if you’re doing weatherstripping and film together. If you’re only adding foam tape or rope caulk to the worst leakers, you can finish in an afternoon.
Here’s a sample materials list for sealing multiple windows:
- Foam weatherstripping tape (one or two rolls, depending on window count and size)
- Rubber or vinyl weatherstripping for high use windows
- One or two tubes of exterior silicone caulk
- Rope caulk for emergency gaps and quick fixes
- Window insulation film kit for each window you want to cover
- Rubbing alcohol or window cleaner for surface prep
- Scissors or utility knife for cutting materials to length
- Hair dryer for shrinking window film tight
Long-Term Maintenance and Seasonal Window Draft Prevention

Weatherstripping doesn’t last forever. Foam strips compress and lose their spring after one or two winters, especially if the window gets opened and closed regularly. Rubber and vinyl hold up longer, but they can dry out, crack, or peel away after a few years of sun exposure and temperature swings. Silicone strips are the most durable, but even they degrade eventually. Every fall, walk through your house and press on the weatherstripping around each window. If it feels hard, brittle, or doesn’t bounce back when you push it, replace it before the cold hits.
Exterior caulk needs refreshing too. Check the caulk lines around your window frames every spring and fall. Look for cracks, gaps, or sections that have pulled away from the wood or siding. Even small separations let air and water through. Scrape out any failing caulk and reapply a fresh bead. If you sealed your windows with shrink film, plan to remove it in late spring once heating season ends. The film is designed as a seasonal fix, and leaving it up year round traps heat in summer and blocks ventilation.
Seasonal maintenance checklist:
- Replace weatherstripping that feels hard, cracked, or compressed and no longer springs back.
- Refresh exterior caulk around frames and trim where you see gaps or separation.
- Remove shrink film insulation in spring to restore window function and ventilation.
- Repeat the candle test each fall to confirm seal integrity and find new leaks before winter starts.
One thing to watch after draft proofing is condensation. If you seal your windows very tightly and don’t add ventilation elsewhere, moisture from cooking, showers, and breathing can collect on cold glass. A little condensation is normal on very cold mornings, but if water runs down the glass or pools on the sill, crack a window occasionally or run a bathroom exhaust fan to move humid air out of the house.
Final Words
Start by testing for drafts with a lit candle or your hand, then seal the worst gaps first so warm air stays in. Quick fixes like shrink film, foam strips, rope caulk, and reusable silicone seals can work tonight.
For a longer fix, pick the right weatherstripping or silicone caulk and follow the step-by-step install and maintenance tips. Gather scissors, cleaner, and a hair dryer. Most windows take an hour or less.
Follow these steps and you’ll know exactly how to draft proof windows for winter and beyond. You can do this.
FAQ
Q: How to seal your drafty windows for less than $50?
A: Sealing drafty windows for under $50 uses inexpensive fixes like shrink-film kits, foam weatherstripping, rope caulk, and draft snakes; clean frames first and allow an afternoon per window.
Q: What is the best way to seal drafty windows? What can I put on windows to keep draft out? What is the cheapest way to seal windows for winter?
A: The best and cheapest ways to seal drafty windows are weatherstripping for moving parts, caulk for fixed gaps, and shrink-film or foam tape as budget seasonal options that block most drafts.