

Think you have to rip up your carpet to stop that annoying squeak?
You don’t.
Most squeaks are just the subfloor rubbing or lifting off a joist.
With breakaway screws you can drive through carpet, pull the subfloor tight, and snap the screw head off so nothing pokes up.
Quick, cheap, and often done in 30 to 90 minutes.
This post walks you step-by-step through the fast fix, the tools to buy in one trip, common mistakes to avoid, and simple checks so you know the repair worked.
How to Fix a Squeaky Floor Under Carpet (Fast Method)
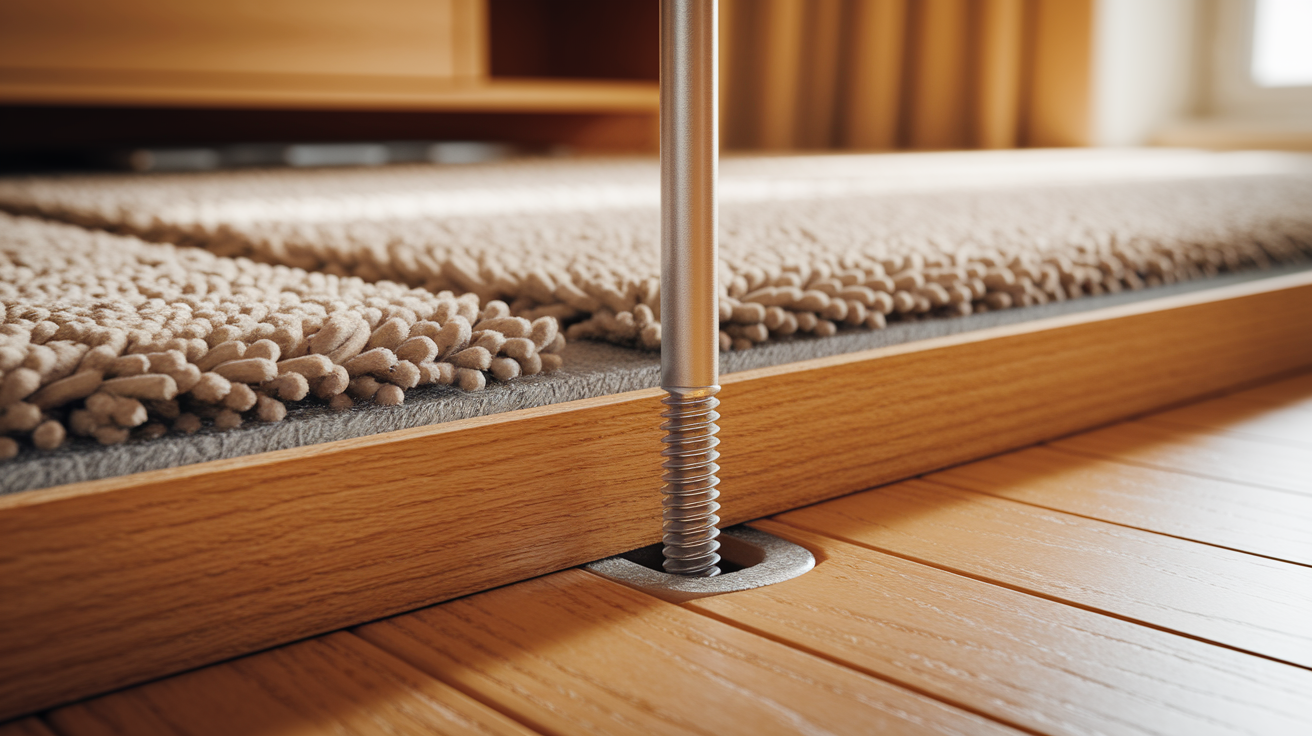
Squeaky floors happen when the subfloor separates from the joists underneath. Wood surfaces rub and flex with every step. But you can fix most squeaks without tearing out your carpet. Breakaway screws (sometimes called scored or snap off screws) let you drive through the carpet, pad, and subfloor straight into the joist, then break the screw head off just below the carpet surface so nothing pokes up. This pulls the subfloor tight against the joist and stops the movement causing the squeak.
This works best when the squeak is localized, like one corner or a hallway section. The subfloor needs to be solid, and you’ve got to locate joists from above. Most single room repairs take 30 to 90 minutes once you’ve marked your spots.
-
Walk the area and mark each squeak. Step slowly and shift your weight until you hear the loudest noise. Put a piece of tape or a coin on each spot.
-
Locate the joist under the squeak. Use a stud finder rated for floors, or probe gently with a thin wire through the carpet backing until you feel solid wood. Joists typically run 16 inches apart.
-
Mark the joist line. Once you find one edge of the joist, probe 1 to 2 inches left and right to confirm the center. Mark the joist run with tape so you stay on target.
-
Set your driver bit depth stop. Measure the combined thickness of your carpet, pad, and subfloor. Usually 1 to 1.5 inches total. Add the joist penetration depth, about 1.5 inches. Set your depth stop or mark your bit so the screw will drive 2.5 to 3 inches total.
-
Drive the first breakaway screw through the carpet. Hold the carpet down with your free hand or knee. Drive the screw straight down at the marked joist location until the screw head sits just below the carpet surface. You’ll feel slight resistance when the head reaches the backing.
-
Use the alignment tool to snap off the screw head. Slide the tool over the protruding screw shaft and rock it side to side or twist gently. The screw will break cleanly at the scored line, leaving the threaded portion buried and the carpet smooth.
-
Drive additional screws every 6 to 8 inches along the joist if needed. One screw often stops a small squeak. Larger problem zones may need three to six screws spaced along the loose section.
-
Walk the area again to confirm the squeak is gone. If you still hear noise, check whether the squeak is between joists or if a second joist run needs fastening.
This delivers quiet floors in minutes when the subfloor is in good shape and the problem is simple movement. If squeaks return after a few weeks, the issue may be deeper. Humidity swings, damaged joists, or subfloor gaps that need shimming or glue.
How to Pinpoint the Exact Squeak Location

Before you drive a single screw, spend five minutes isolating the exact spot. Squeaks sound loud, but they often radiate along joist lines or between carpet seams. Makes the source hard to pin down. Walk slowly across the noisy section and shift your weight from heel to toe on each step. When you hit the worst noise, stop and rock back and forth in place. The squeak will be loudest within a 6 to 12 inch zone. Mark that spot with painter’s tape or a small object.
If you have a helper, ask them to stand outside the room or crouch near the floor and listen while you walk. They’ll hear exactly when and where the floor moves.
Sound travels along the length of a joist, so a squeak near the wall may actually start 2 feet away where the subfloor pulls up. Once you’ve marked the noisiest point, check 1 to 2 feet in each direction along the suspected joist line. Press down firmly with both hands. If the floor flexes or creaks under pressure, that’s your repair zone.
Finding joists under carpet takes a bit of detective work, but it’s faster than guessing. Use a stud finder designed for floors. Some models detect joists through carpet and pad. Tap the floor with your knuckles and listen for a solid thud instead of a hollow sound. Solid means joist. Probe gently along the baseboard where carpet edges meet the wall. Joists often run perpendicular to the longest wall. Check for small nail dimples or seams in the carpet that hint at subfloor sheet edges, which typically land on joist centers.
Tools and Materials Needed for Carpet-Through Squeak Repair
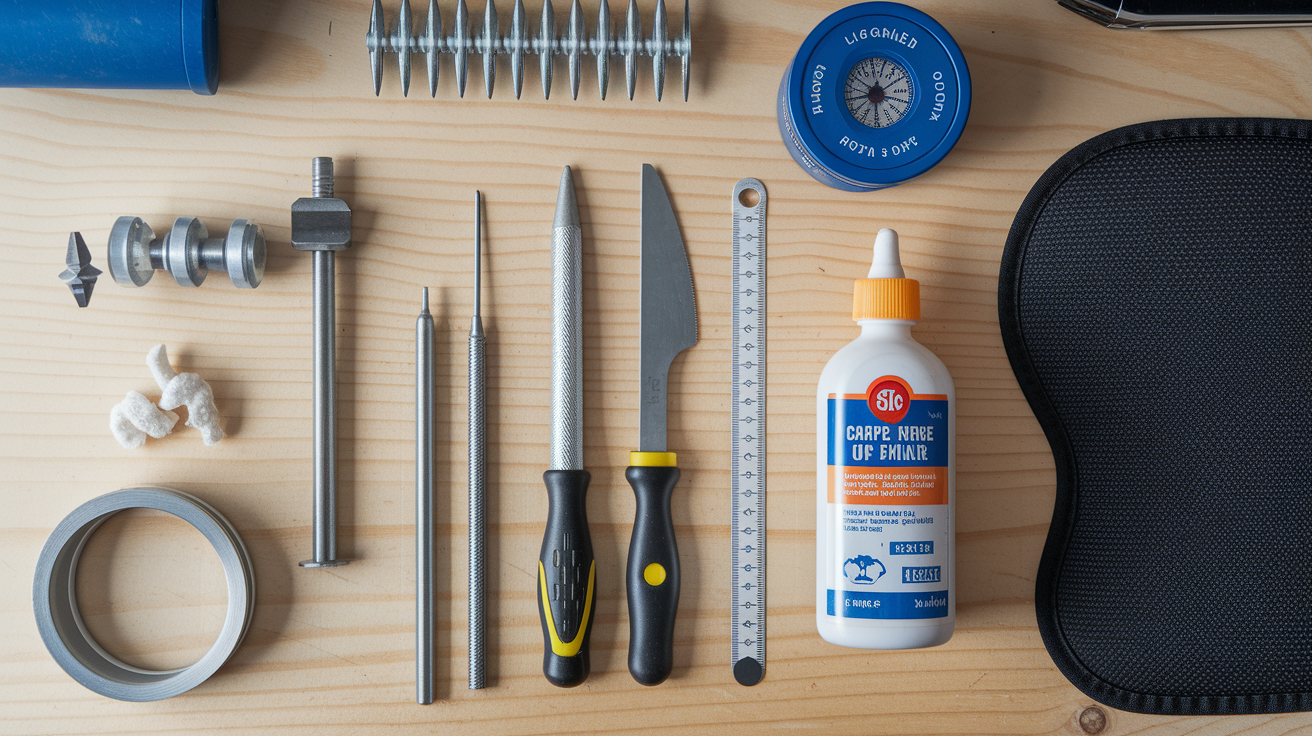
Gather everything before you start so you’re not hunting for tools mid repair. Most items are inexpensive and reusable for future projects.
Required:
Breakaway screws, 3 inches long. Buy a kit of 20 to 50 screws for around $15 to $25. You’ll use 2 to 10 screws per typical squeak zone.
Power drill or impact driver. Corded or battery. 12V is plenty.
Driver bit with depth stop or adjustable collar. Prevents overdriving. Sold separately for $8 to $15 or included in repair kits.
Alignment tool or screw snap fixture. Slides over the screw shaft to break the head off cleanly. Usually $10 to $20.
Stud finder or thin probe wire. Electronic finders cost $15 to $40. A coat hanger works if you’re patient.
Tape measure and marker. For measuring joist spacing and marking repair lines.
Optional but helpful: Knee pads ($10 to $20), vacuum or broom (clean carpet fibers before and after), flashlight if the room is dim.
Alternative Methods When the Fast Method Doesn’t Work

Sometimes breakaway screws quiet most of the floor, but one stubborn section keeps squeaking. That usually means the gap between the subfloor and joist is too wide for a screw alone to pull tight, or the subfloor has cupped and won’t lay flat. In those cases, you need to fill the void or add support.
If you have access to the underside of the floor (basement or crawlspace), shims are the simplest fix. Cut thin wooden shims to fit the gap and tap them gently between the joist and subfloor until snug. Don’t force them or you’ll lift the floor and create a hump. Once the shim is seated, drive a short screw up through the shim into the subfloor to lock it in place.
When you can’t get underneath, construction adhesive applied from above can work if you’re willing to lift a small section of carpet. Peel back the carpet edge along the wall (details in the next section), squeeze a bead of subfloor adhesive into the gap along the joist, then press the subfloor down and weigh it overnight with heavy books or weights. This method is permanent and works for narrow gaps, but it won’t help if the joist itself is warped or sagging.
Here’s when to choose each alternative. Use shims from below when you have crawlspace access, the gap is visible, and you want a quick non adhesive fix that won’t risk carpet damage. Use construction adhesive when the gap is thin (under 1/4 inch), you’re lifting carpet anyway, and you want a permanent bond without extra hardware. Add blocking or sister a joist from below when the joist is cracked, twisted, or sagging and screws or shims won’t hold. This is a bigger repair that may need a pro if the structural issue is widespread.
When and How to Lift Only the Carpet Edge

You don’t need to remove the whole carpet to fix most squeaks, but sometimes you need to see the subfloor seam or apply glue directly. Lifting just the edge along one wall gives you enough access without disturbing tack strips in the middle of the room.
Start in a corner. Use a flat pry bar or a wide screwdriver wrapped in a rag to gently lift the carpet edge off the tack strip. Tack strips have angled pins that grip the carpet backing, so pull straight up and slightly away from the wall. Work slowly for 2 to 3 feet until the carpet releases. Once the edge is free, fold it back carefully without creasing or tearing the backing.
If you need more reach, you can lift an additional foot or two, but don’t go past the first seam or you risk losing your reference for re-stretching. Leave the carpet pad in place unless it’s torn or you need to inspect the subfloor for damage. Make your repairs (screws, glue, or shims), then reposition the carpet. Stretch it gently by hand toward the wall and press the backing onto the tack strip pins, starting at the corner and working along the edge. You should hear small clicks as the pins catch.
For a proper restretched finish on larger areas, use a knee kicker. Rental cost around $15 per day. Place the kicker head a few inches from the wall, brace the padded end against your knee, and give it a firm bump to push the carpet tight before hooking it back onto the strips. Check that the carpet lies flat with no ripples before you replace furniture.
Repair Costs, Time Estimates, and Difficulty Level

Fixing squeaky floors under carpet is one of the easier DIY repairs, and the cost stays low if you already own a drill. A basic breakaway screw kit with alignment tool runs $20 to $35 and handles multiple rooms. If you need to buy a stud finder and knee pads, expect to spend another $25 to $50. Total DIY outlay for a first time repair is usually $50 to $75, and the materials will cover future squeaks too.
Professional services charge by the room or by the hour. A simple one room fix typically costs $150 to $300, depending on your region and the number of problem spots. Larger jobs or repairs that require subfloor replacement or joist work can run $400 to $1,000 or more.
Time depends on how many squeaks you’re chasing. Locating and repairing a single squeak takes 15 to 30 minutes once you’ve gathered tools. A moderate living room with four or five squeak zones usually takes 1 to 2 hours. If you’re lifting carpet edges or shimming from below, add another 30 to 60 minutes. Difficulty is low for straightforward through carpet repairs. If you can use a drill and follow a joist line, you can do this. Moderate difficulty applies when you need to lift carpet, work in a crawlspace, or coordinate repairs from above and below.
| Repair Type | Approx Cost | Time Required |
|---|---|---|
| DIY breakaway screws (single squeak) | $20–$35 (kit) | 15–30 minutes |
| DIY full room (multiple squeaks) | $50–$75 (tools + materials) | 1–2 hours |
| Professional repair (per room) | $150–$300 | 1–2 hours (service call) |
When to Call a Professional

If you’ve driven screws, added shims, and even lifted carpet to apply adhesive, but the squeaks come back within a few weeks, the problem is bigger than surface movement. Persistent squeaking across multiple rooms or whole sections of the house usually points to subfloor damage, undersized or failing joists, or chronic moisture issues that are warping the wood.
Floors that feel spongy, sag noticeably underfoot, or show gaps between the baseboard and the floor need a structural inspection. A pro can assess whether joists need sistering (reinforcing with additional lumber), whether the subfloor has rotted and requires replacement, or whether foundation settling is pulling the framing out of level.
You should also call a professional if you see water stains on the subfloor when you lift the carpet edge, smell mold or mildew, or notice the carpet staying damp after spills. Moisture related squeaks won’t stop until the source is fixed, and hidden mold can become a health issue. Finally, if you’re not comfortable working in a crawlspace, don’t have the tools for safe access below the floor, or if the repair involves cutting into the subfloor or moving plumbing or wiring, a licensed contractor is the safer choice.
Squeak repairs are inexpensive DIY wins when the structure is sound. But when the structure isn’t sound, trying to DIY it can cost more in the long run.
Final Words
Start by locating the joist, mark the spot, and drive carpet‑through breakaway screws to pull the subfloor tight. The guide gives the quick 6–8 step fix, plus how to pinpoint squeaks, the tools you need, and when screws do the job.
If screws won’t quiet the floor, the post covers shims, glue, or lifting just the carpet edge, along with cost and time estimates and clear pro-level red flags.
Follow the plan and you’ll know how to fix squeaky floors under carpet, save cash, and get quiet floors fast. You’ve got this.
FAQ
Q: How to fix squeaky floors without removing carpet and how do you permanently fix squeaky floors?
A: Fixing squeaky floors without removing carpet and permanently fixing them uses carpet-through screws to pull the subfloor tight to joists. Locate joists, mark the spot, and drive breakaway screws. Severe gaps need shims, glue, or subfloor replacement.
Q: Is there anything you can put down on your hardwood floor so it stops creaking like a rug or yoga mat?
A: Putting down a rug or yoga mat can reduce sound by damping surface vibration, but it won’t stop creaks caused by loose subfloor or joists. Those need fastening or repair.
Q: When should I be worried about squeaky floors?
A: You should be worried about squeaky floors when squeaks multiply, spread, follow moisture, show sagging, or you hear grinding. These signs can mean structural damage or rot and need a pro inspection.